Page is loading ...

14+
FOR AGES 14 AND UP
ITEM NO. 33743

INTRODUCTION
SAFETY & PRECAUTIONS
Thank you for purchasing this amazing World Tech Toys product. This drone is suitable for indoor
and outdoor flight. Please carefully read the entire manual before operating this quadcopter and
keep it for reference in the future.
1. Important Instructions
This product is not a toy but a precision piece of equipment with integrated technologies
of mechanics, electronic, air dynamics and radio frequencies. In order to avoid accidents,
the operator must read these instructions carefully. Use safety precautions when operating,
if operated incorrectly, serious physical injury and/or property loss may occur.
This product is suitable for operators with previous hobby flying experience, age 14 and up.
Only fly in a safe environment that is legal for remote control flying.
We do not take any responsibility for the operation and control of this device
and related safety responsibilities.
(1)
(2)
(3)
(4)
2. Safety Instructions
Operate far away from obstacles and crowds.
This quadcopter has uncertain flying speed and conditions which present potential danger.
Fly away from people and animals, high buildings, high voltage wiring, etc. Avoid bad weather
conditions, wind, rain, thunder, and other conditions to ensure a safe and fun flying environment.
Avoid high temperatures.
This quadcopter is made of metal, carbon fiber, plastic, electronic components and
other materials. Keep away from any heat source and avoid using in high temperatures
such as hot sunny days to avoid transformation and broken parts resulting from the heat.
(1)
(2)
3. Flight Environment
The inside of this quadcopter is integrated with precision electric and mechanical parts,
avoid water and wet environments. Water can enter the aircraft and result in part breakdown
and accidents may occur.
(1)
(2)
(3)
(4)
(5)
3. Attention Before Flying
It is recommended that the flying area is at least an area of 25ft x 25ft x 15ft.
Be sure that the transmitter and quadcopter batteries are fully charged.
Be sure that the throttle is at its lowest position to avoid premature flight.
Before playing turn on the quadcopter first, then turn on the transmitter. Incorrect
operation may result in failure and the possible influencing of other devices in area.
Ensure that all plugs and wires are secure and in place, rocking during flight
may loosen over time.

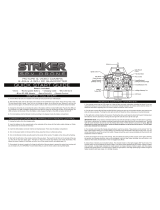
GENERAL DRONE PARTS
TRANSMITTER SPECIFICATIONS
*Speed Control Modes:
• Easy: 1 Beep. Low Speed (30%)
• Pro: 2 Beeps. High Speed (60%)
• 3D: 3 Beeps. Max Speed (100%)
Protective Frames
Propeller Blades (Rear)
Propeller Blades (Front)
Propeller Blades (Front)
Lower Body
Upper Body
Landing Skids
Camera
Battery
Battery Cover
Adjustable
Mounting Bracket
Removable
Phone Cradle
Speed Control*
Easy Mode
Power Switch
Forward/Backward
[Left/Right Sideways Flight]
Ascend/Descend
[Left/Right Turning]
Left/Right
Turning Trim
Power Indicator
Left/Right Sideways Trim
LCD Screen
Forward/Backward Trim
Flip Stunt Mode
Pull up on phone cradle top
and gently release to secure
phone before flight.
Take extra care with transmitter
when phone is secured as
loosening may occur over time.
Not responsible for damages or
drops that may occur.

Battery Cover
4 AA Batteries
(Not included.)
First remove the screw on the
battery cover and remove the
battery cover itself. Then
install 4 AA batteries. Make
sure they are installed with the
correct polarity. Replace the
battery cover and screw in
place.
CAUTION:
1. Make sure the polarity of the
batteries are correctly installed.
2. Do not mix old and new
batteries.
3. Do not mix different types
of batteries.
INSTALLING TRANSMITTER BATTERY
INSTALLING DRONE BATTERY
Battery Type Battery Specification Usage Duration Charge Time
BATTERY PACK SPECIFICATIONS
CAUTION WHILE CHARGING:
Do not charge with batteries still installed. Do not charge battery unsupervised. Do not immediately charge after
use. Do not overcharge battery. Ideal charge time is 90-100 minutes. Overcharging can cause a catastrophic
failure. Always charge on dry and ventilated areas away from any heat source or flammable materials. Always
use the original USB charging cable provided. Promptly change and replace old or defective batteries.
Li-Po Battery 3.7V 500mAh Flight Duration 5.5 - 6.5 minutes Charging Time 90 -100 minutes
CHARGING DRONE BATTERY
Switch off the power and slide
open the battery cover.
1
Pull out the battery cable from the
drone’s power port and remove the
battery before charging..
2
Plug charging cable into a powered USB
port. Connect battery cable to USB
charger cable. Charge for approximately
90 minutes.
3
Push the left throttle joystick all the
way forward and then pull it all the
way back. A clear (Beep) will indicate
that your drone is now ready to fly!
With the power switched to OFF,
slide open the battery cover and
insert battery into the battery bay.
Close battery cover and switch the
drone power to ON.

1. Search your phones application store for “STRIKER FPV” and download the free app. This application allows you to
see a live feed of your drones camera and take photos/videos that can be kept in the app or saved to your phone.
2. Turn on the drone, go into the Wi-Fi settings of your phone and select the network “StrikerFPV-XXXXXX” (X’s are the
unique ID of your drone) to establish a connection. This must be done every time the drone is first turned on.
3. Open the STRIKER FPV app and select “PLAY” to go to live feed screen shown above. Start flying and use touch
controls to take photos or start and stop recording. Select playback to view/delete photos and videos in app. Copies
are automatically saved to your phones media viewer. Additional info available in Help section on app.
A memory card alert may appear when starting app, please disregard as all media is saved to your device.
SYNCING AND LCD INTERFACE PROCEDURE
LIVE FEED CAMERA OPERATION
INSTALLING LANDING SKIDS AND PROTECTION FRAME
Signal Icon
Speed Display
Left/Right Turn
Trimming Display
Battery Level
Forward/Backward
Trim Display
Left/Right
Sideways
Trim Display
After installing the batteries, turn the transmitter
switch to “ON.” The power indicator light flashes
and the signal icon “ ” appears in the top left of
the LCD screen, when there is no signal. After the
transmitter successfully pairs with the drone, the
transmitter will beep twice and the signal icon
changes to “ ”. Push the Ascend/Descend
control to the top, then pull the control back to the
bottom. The transmitter will beep once. The power
indicator will light. The transmitter has successfully
paired with the quadcopter and control information
appears on the LED screen.
LANDING SKIDS: Install the landing skids to
the bottom of the drone by screwing them in.
PROTECTION FRAME: Lock down and screw
in the blade protection frame.
STRIKER FPV
Take
Photo
Photo/Video
Playback
Back
Toggle Controls
(Not used with model)
Record
Video
Live Feed
App Available on Apple &
Android Devices

FLYING THE DRONE
BASIC FLYING CONTROLS
Before flying the quadcopter for the first time please
read the instructions carefully and make sure you
fully understand how to control your drone.
Left Spin
Right Spin
Left Spin/Right Spin
Move Right/Move Left
Move Right
Move Left
Throttle
Move Forward/Backward

ADJUSTING THE TRIM
When drone moves with no directional transmitter input, adjust the trim controls until hovering is stable.
If the drone is spinning to the left,
push the RIGHT TRIM button until the
drone stops spinning.
If the drone is spinning to the right, push the
LEFT TRIM button until the drone stops
spinning.
If the drone is moving forward, push the
BACKWARD TRIM button until the drone
stops moving forward.
If the drone is moving backward, push the
FORWARD TRIM button until the drone
stops moving backward.
If the drone is moving left, push the
MOVE RIGHT TRIM button until the drone
stops moving left.
If the drone is moving right, push the
MOVE LEFT TRIM button until the drone
stops moving right.
Left Trim Right Trim
Forward Trim
Backward Trim
Move
Right Trim
Move Right
Move Left
Move
Left Trim
SPECIAL ACTIONS
FLIP STUNT MODE
Have the quadcopter hover at least 10 feet off the ground. Press the
Flip Stunt Button and push the right joystick in the direction you want
the drone to perform a single flip.
LAUNCH TOSS
You can launch your drone simply by tossing it in the air and
pushing the throttle joystick straight up. The new 6-Axis Gyroscope
technology allows the drone to automatically stabilize and level
itself out and hover smoothly while airborne.
Forward
Backward
EASY MODE
Simplifies drone flight use by limiting command directions based on
your direction. Use Easy Mode when you are having difficulty telling
which direction the drone is pointing because of distance. Press the
Easy Mode button once to activate it. Press again to deactivate it.

AUTOMATIC SHUTDOWN OVERRIDE FUNCTIONS
TROUBLESHOOTING
PROBLEM CAUSE SOLUTION
Quadcopter is unresponsive. The
Transmitter light keeps flashing.
Quadcopter is unresponsive.
Transmitter light is ON.
Quadcopter is unresponsive.
Quadcopter’s rotors spins
but doesn’t take off.
Quadcopter is shaking when flying.
Quadcopter still moves forward
after adjusting the trim.
Quadcopter moves while hovering
without transmitter input.
Trim needs to be adjusted.
Adjust the trim.
Gyroscope midpoint is off.
Turn off both transmitter and quadcopter.
Go through power on process and make
sure you place the quadcopter on a flat
surface before taking off.
Transmitter batteries are
installed incorrectly.
Transmitter and or quadcopter
is not powered ON.
Turn both transmitter and quadcopter ON.
Transmitter batteries are drained.
Quadcopter’s battery pack
is drained.
Rotor blades are damaged.
Replace the damaged rotor blades.
Rotor blades are damaged.
Replace the damaged rotor blades.
Quadcopter is not on a
flat surface.
Place the quadcopter on a flat surface
before attempting to take off.
Charge the quadcopter’s battery pack.
Quadcopter’s battery pack is drained.
Charge the quadcopter’s battery pack.
Install fresh batteries to the transmitter.
Install the batteries with the
correct polarity.
Transmitter is not syncing with
quadcopter.
Repeat the power up process.
Website: www.worldtechtoys.com
Email: [email protected]
Phone: (877) 498-8697
Monday - Friday / 9:00AM - 5:00PM / Pacific Time
WWW.WORLDTECHTOYS.COM
MADE IN CHINA
SPECIFICATIONS,
COLORS AND CONTENT
MAY VARY FROM ILLUSTRATIONS
POST FLIGHT
After you are done flying the Drone make sure the battery pack on the quadcopter is disconnected and
the transmitter power is turned off. If you are not going to use the quadcopter for a long period of time,
please remove the AA batteries to prevent the batteries from draining or leaking.
For safety precautions, the drone will automatically shut down when the following situations occur:
1. When the drone’s battery is running low.
2. When one or more of the drone’s propellers gets into a collision impact or any form of entanglement.
/


