Page is loading ...

TBS5301 Capture Card User Guide
TBS5301 USB2.0 HDMI HD Video capture card with HDMI 1.4 port, completely support full HD
Video and Audio capture and playback. Compact in size and equipped with a USB 2.0 port, the
device is a practical and easy-to-use USB 2.0 capture solution. It provides HDMI input of highest
quality, d meets the HDMI 1.4 standard, satisfies the 1080 50/60p resolutions and H.264
hardware compression, you can easily capture and encode signals from different kinds of device
without limitation. With the LAN port, TBS5301 allows you to stream the signals out directly
without PC, that makes it a device portable and easy to use with or without PC.
Windows platform:
1. Driver install:
1> Connect this capture card to your computer or laptop by USB cable, and power adapter. USB
should be connected to port 2.0, and power adapter is DC 12V, 2A.
2> When device is connected, your computer will detect a new device under:
Computer--Properties--Device Manager.
Check device ID to make sure your capture card is correctly installed:

3>Download driver from our official website and install driver:
Driver link:
Click this executable file “TBS_5301_setup” to start driver installation, wait for a few seconds
until it reminds you install finish:

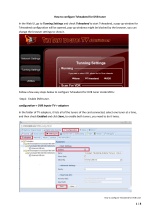
4>Go to “Device Manager”, check whether driver is ready or not. If you can see as below,
A device “TBS5301 USB HDMI Capture” appears under “Sound, video and game controllers”, that
means driver has been installed successfully, you can use it now:
2.The Usage
This device has USB and Ethernet interface, Media will be transferred by USB port or Ethernet
port, and the USB port is always the preferred.
If you choose Ethernet, please remove USB cable and restart device again (power off/on).
In this case, the way to get IP is DHCP.
Transfer media by USB:
1>This capture card is compatible with those DVB software, like DVBdream, DVBviewer, progDVB,
and etc. in Windows system.
2>Encoding setting:
The capture card encoding type is hardware compression, that means it will not cost you any CPU
resource. Please set a proper encoding parameter first. We have 3 modes for you: Auto, Manual,
Advanced.
Auto mode: The output resolution, code rate and frame rate will be identical to the input.
Manual mode: Super, Ultral, Excellent, Good, Fair, Poor, Mobile. A level is corresponding to a
resolution and a code rate.
Advanced mode: You can define the encoding parameter yourself.
3>Here’s the setting tool:

Select a format, click “Apply” to effect your setting.
For the audio input, you can choose HDMI in or Line in. When selected to HDMI, both video and
audio will be transferred by HDMI. If selected to Line in, video is transferred by HDMI, and audio
comes from “AL” and “AR” port.
4>Install software. Now, we’ll take DVBdream as an example to explain you how it works.
4.1>Download DVBdream and install:
https://www.tbsiptv.com/download/common/dvbdream_oem_version_setup_v2934.zip
4.2>Scan:
Connect your media source to this capture card by a HDMI cable. The source can be a set box, a
DVD player, or a Cameral, and ect.
DVBdream version 2.9.3.4. supports auto scan, so just operate “Channels--Manual scan", it will
go to scan automatically.

Now, you can enjoy your channel.
5>Streaming.
If you want to record the media to your local, just go to setting tool “Recording” option:
Set a path for file storage; select a limit option, and click “Start” last, It will start to record.
Limit option, we have “no limit”, “file size limit” and “time limit”.

6>Streaming.
Our setting tool also support streaming in windows. If you want to do a streaming, just go to
setting tool “Streaming” option:
Network Protocol: UDP or RTP
Unicast/Multicast: where you want to stream to.
Port: streaming port
Start/Stop: start or stop “streaming”.
Transfer by Enthernet:
In this case, just need to connect a LAN to this capture card. Please do not connect USB cable, if
USB have already connected, please remove it and restart your capture card (power off/on).
Setting tool is another one named TBSNetConfigurationTool.
1>“HDMI” option is for output setting,3 modes “Auto”, “Manual” and “Advanced”:

2>“Network” option is for setting capture card IP and some streaming settings.
Suboption “streaming” for setting udp/rtp protocol, unicast/multicast, ts port.
“Open ts”----Apply to start your streaming;“Close ts”----Apply to stop your streaming.

Suboption “IP setting” for capture card IP setting:
192.168.8.60 is device IP;
8888 is Server port. This port is for communicating purpose, it’s different from ts port.
Linux platform:
This capture card also supports Linux platform, Linux driver is ready. Linux OS, we recommend
you these command system like Ubuntu or centos, or Debain.
And for software, it’s compatible with those DVB streaming software. For example, DVBlast,
Tvheadend, Astra cesbo, mumudvb, and ect.
Just take it as a DVBS/S2 tuner card, and also all of your configuration must follow DVBS/S2
standard, parameters include “Frequency”, “Polarization”, “Symbol rate”, “Modulation”, not one
less.
Now, we’ll explain you how it works in a Linux platform.
1.Install your capture card to your Linux server.
2.Run this command to check whether device is detected by your Serevr or not:
$ lsusb or $ lsusb | grep 5301

3.Install Linux driver. The driver has been uploaded to our official open source driver website:
https://github.com/tbsdtv/Linux_media/wiki
Install steps:
Downloading source and building:
git clone https://github.com/tbsdtv/media_build.git
git clone --depth=1 https://github.com/tbsdtv/Linux_media.git -b latest ./media
cd media_build
make dir DIR=../media
make allyesconfig
make -j4
sudo make install
sudo reboot
Firmware install:
$ wget http://www.tbsdtv.com/download/document/Linux/tbs-tuner-firmwares_v1.0.tar.bz2
# sudo tar jxvf tbs-tuner-firmwares_v1.0.tar.bz2 -C /lib/firmware/
If any error happens during your compiling, please check and fix the error first, then go to
execute “make install”.
We have listed some common errors, please check the part FAQ to get the solution from the
website “https://github.com/tbsdtv/Linux_media/wiki”.
After the driver is successfully installed, please reboot your Server to load new driver, and then
check adapter is loaded or not.
If you can find adapter under directory “/dev/dvb”, that means driver is ready, you can use now.
Or check frontend status. Like this:
4. Streaming.
4.1>Before you doing a steaming, you need to configure encoding parameter first. We have GUI
tool and command line for you.
Download them from our website and then give the executable file a permission first . Like this:

The GUI tool: “TBSLocalConfigurationTool” also supports recording, streaming, the configuration
is same as the windows, please refer to windows user guide.
Command line:
In some case, your Linux system runs a Server version, can not use GUI tool. We also have tool
“command line” for you to configure capture card.
The command line package you can download from our official website. Unpack the zip package
and go to the new directory. The executable file is needed to be give a permission first.
Tool TBSLocalConfigurationTool(Transfer by USB port):
# chmod +x TBSLocalConfigurationTool
Now you can run this command to get more information how to use “TBSLocalConfigurationTool
“. Like this:
$ TBSLocalConfigurationTool
Here’s more detailed explanation and example of usage:
1> Auto mode: -A (the same with input format)
2> Manual:-M (1--7,1:super 1920*1080,2:ultra 1440*1080,3:excellent 1280*720,4:good
1120*640,5:fair 960*540,6:poor 800*480,7:mobile 480*272)
3> Advance: -p:profile (0:high,1:Main);
-l : level (30/31/32/40/41/42) -H(size)
-V: (size) (1920*1080--480*272)
-B: bitRate (350--18000K)
-F : frameRate : (24--60)
Examples:
# ./TBSLocalConfigurationTool -i -N // check input video format and mac address
#./TBSLocalConfigurationTool -c //check the latest configuration of the output format
#./TBSLocalConfigurationTool -r // the device of mcu reset
#./TBSLocalConfigurationTool -x 1 //set output mute when audio and video are out of sync, it can

be set with auto,manual and advanced mode
#./TBSLocalConfigurationTool -K myhdmiTV // set the device of video output program
name
#./TBSLocalConfigurationTool -A // set the device of video output format auto mode, it means
the same to the input format
#./TBSLocalConfigurationTool -M 3 // set the device of video output format manual mode,
you can set from 1 to 7 match 1920*1080 to 480*272
#./TBSLocalConfigurationTool -p 1 -l 32 -H 1920 -V 1080 -B 5000 -F 30 // set the device of
video output format Advanced mode: main profile, level is 3.2, H is 1920, V is 1080, bitrate is 5M
and frameRate is 30 frames.
#./TBSLocalConfigurationTool -j 1 -r // set the device of program number 1
#./TBSLocalConfigurationTool -s 300,301,302,303 -r // set the device of pid pmt,prc,vpid,apid)
#./TBSLocalConfigurationTool -n 0 -o // check the device of pid (pmt,prc,vpid,apid)
#./TBSLocalConfigurationTool -n 0 -b 0 -r //set audio output select, 1: from audio codec
#./TBSLocalConfigurationTool -f 0 -r// set audio frequency select, 0: 48k
#./TBSLocalConfigurationTool -w //putout the information of audio
#./TBSLocalConfigurationTool -m 0 -t 192.168.8.100:8888 -E //Streaming to192.168.8.100:8888
by UDP;
#./TBSLocalConfigurationTool -Q tbs.ts -X //Record TS (no limit),TS file name is tbs.ts;
#./TBSLocalConfigurationTool -Q tbs.ts -G 10 //Record TS file's size is 10MB,TS file name is tbs.ts;
#./TBSLocalConfigurationTool -Q tbs.ts -Y 10 //Record TS file's time is 10 S,TS file name is tbs.t
#./TBSLocalConfigurationTool -d // get the tool version
Notice:
For “command line” configure, once the configuration is done, please run this command to effect
your setting:
# ./TBSLocalConfigurationTool -r
For example, you want a
“Super” format, set it like this:
# ./TBSLocalConfigurationTool -M 1
# ./TBSLocalConfigurationTool -r
Or run:
# ./TBSLocalConfigurationTool -M 1 -r

Tool TBSNetConfigurationTool (Transfer by Ethernet port):
Download from our website and extract the zip file, give a permission to the executable file
“TBSNetConfigurationTool”.
Here’s more details about how to use this tool:
Example:
#./TBSNetConfigurationTool -i -N // check input video format and mac address
#./TBSNetConfigurationTool -c //check the latest configuration of the output format
#./TBSNetConfigurationTool -r // the device of mcu reset
#./TBSNetConfigurationTool -x 1 //set output mute when audio and video are out of sync, it can
be set with auto,manual and advanced mode
#./TBSNetConfigurationTool -K myhdmiTV // set the device of video output program name
#./TBSNetConfigurationTool -A // set the device of video output format auto mode, it means
the same to the input format
#./TBSNetConfigurationTool -n 0 -M 3 // set the device of adapter0's video output format
manual mode, you can set from 1 to 7 match 1920*1080 to 480*272
#./TBSNetConfigurationTool -p 1 -l 32 -H 1920 -V 1080 -B 5000 -F 30 //set the device of
adapter0's video output format Advanced mode: main profile, level is 3.2, H is 1920, V is 1080,
bitrate is 5M and frameRate is 30 frames.
#./TBSNetConfigurationTool -j 1 -r // set the device of program number 1
#./TBSNetConfigurationTool -s 300,301,302,303 -r // set the device of pid(pmt,prc,vpid,apid)
#./TBSNetConfigurationTool -o // check the device of pid(pmt,prc,vpid,apid)
#./TBSNetConfigurationTool -b 0 -r //set audio input select, 1: audio line(L/R)
#./TBSNetConfigurationTool -f 0 -r// set audio frequency select, 0: 48k
#./TBSNetConfigurationTool -w //putout the information of audio
#./TBSNetConfigurationTool -e 00:22:ab:00:00:00 -r // set Net Mac 00:22:ab:00:00:00
#./TBSNetConfigurationTool -g 192.168.1.188 -r // set ip address 192.168.1.188
#./TBSNetConfigurationTool -v 5442 -r //set prot number 5442
#./TBSNetConfigurationTool -m 0 -r // set udp/rtp select, 0: udp
#./TBSNetConfigurationTool -k 0 -r // set open/close Ts, 0: close Ts
#./TBSNetConfigurationTool -t 192.168.1.40 -r // set target ip 192.168.1.40
#./TBSNetConfigurationTool -u 5522 -r // set target port, number 5522

#./TBSNetConfigurationTool -y // get the information of network
The following is some examples of the common DVB streaming software usage:
Transfer by USB:
4.2>Now, we’ll take some common streaming software like DVBlast, Tvheadend as an example to
explain you how this capture card work.
DVBlast:
a.DVBlast install: please refer to the following website to install DVBlast:
https://github.com/gfto/dvblast/blob/master/INSTALL
b.DVBlast command:
Dvblast only supports command line, here’s an example:
$ dvblast –f 12538000 –s 41250000 –v 13 –a 0
-f: Frequnecy.
-s: Symbol rate.
-v: Voltage (Voltage to apply to the LNB, the value is 13 or 18).
-a: DVB adapter. “–a 0” means adapter 0
You can get more parameters about DVBlast by running command “$ dvblast -help”.
Lock status 1, and also display some program information, then that’s means it’s locked now:
For this capture card, it’s not a real DVBS/S2 tuner card, so these necessary parameters
Frequency, Symbol rate, Voltage you can type in any value. But it must follow DVBS/S2 standard,
can’t be DVBT/T2, DVBC or other standard.
c.Streaming. DVBlast supports UDP and RTP protocol, you must create a configuration to specify
which channel, IP, port out. Here an example:
Create a configuration name “dvb.conf” by tool vim.
dvb.conf content:
239.255.0.1:1234 1 1
239.255.0.1 multicast address;
1234 is port;
1 is flag;
1 is channel program number.

Last run this command to start streaming:
$ dvblast –f 12538000 –s 41250000 –v 13 –a 0 -c dvb.conf
More example about the configuration, please refer to this website, it has detailed description
https://github.com/gfto/dvblast
Tvheadend:
1>Tvheadend install:
https://www.tvheadend.org/projects/tvheadend/wiki/Building
2>Start Tvheadend:
# tvheadend -C
3>Login. Tvheadend control is webUI. Login “localIP:9981”.
So please check computer IP, open a browser like Google Chrome or Firefox access to webUI.
4>Configure:
4.1> Create a DVBS network:
Network name: test_only
Network discovery: Disable


4.2>Enable adapter and add the network “test” which you create to it:
4.3>Create a Muxes:

Configure parameters:
Scan result:

Map channel out:
Number for channel:
For Tvheadend, it has 2 kinds of URL:
1st: http:localIP:9981/playlist
2nd: http:localIP:9981/stream/channelnumber/1
The first URL, it’s a playlist type.
And the second, one URL is for one channel, but channel must be given a number first.
Transfer by Ethernet:
IF you want t to control your capture and transfer stream by Ethernet, please remove USB cable
and then power device off/on. Because USB always the preference.
More details about the configuration, please refer to the windows explanation.
Any question, please write to us:
support@tbsdtv.com
/