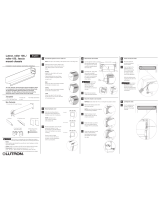
Savant SHA-B2MINBK-00 Reference guide
- Category
- Flat panel wall mounts
- Type
- Reference guide
This manual is also suitable for

SHA-B2xx Quick Reference Guide | 009-1899-02 45 Perseverance Way, Hyannis, MA 02601
200512 | © 2020 Savant Systems, LLC 1 of 1 Savant.com | 508.683.2500
Box Contents
(1) Shade Mount - Inside/Jamb Mount -Drive Side (SHA-B2xx)
(1) Installation Template
(2) #8 Flat Head Mounting Screws
(1) Quick Reference Guide (009-1899-xx this document)
Specifications
Shipping Dimensions and Weights
Height 3 in (7.62 cm)
Width 4 in (10.16 cm)
Length 6 in (15.24 cm)
Weight Shipping: 0.3 lbs (0.14 kg)
Circular Inside Jamb Mount : Motorized Drive Side [SHA-B2x-xx] Quick Reference Guide
Front Panel
A
Face View
B
Jamb View
Mounting Instructions
1. Place the shade mount onto the wall approximately where it will be
mounted. The shade mount should be placed so it covers the hole
drilled in the corresponding wall for the power wire installation.
2. This mount may be positioned in many dierent ways on the wall.
The mount can spin 360° and any of the four quadrants may be
used for wire installation. However, there are only two holes in the
mount for the Mounting Screws.
3. Once a general location is found, ensure the center point of the
mount is 1 ¾ inches from any obstructions and mark the two drill
spots for the (2) #8 Flat Head Mounting Screws.
4. Drill two pilot holes for the mounting screws at the locations
marked in step 3 above.
5. Position shade mount so that pilot holes are visible through the
mounting screw ports on the mount.
6. Install mounting screws through holes on shade mount and into the
pilot holes created in step 4 above.
Additional Information
– Savant Product Deployment Guides are available via the Savant
Customer Community.
– For further product information, visit http://dealers.savantav.com/
portal/redirector.php?id=1172 or scan the QR code below:
A
B
Installation Instructions
1. Proper shade fit is essential for reliable functionality. Shades
must not be too tight, and require at least ⅓ of an inch
tolerance. This can be measured using the provided installation
template cards.
2. If an installation card is unavailable, a credit card should fit
between the bracket and tube idler or male/female coupler, far
enough to reach the retractable pin. If the credit card does not
fit, there is too much pressure on the tube end caps, which may
cause the shade to fail.
Idler face
Bracket Face
Credit Card or Installation template
⅓ inch gap
A
A B
C
D
B
C
D
-
 1
1
Savant SHA-B2MINBK-00 Reference guide
- Category
- Flat panel wall mounts
- Type
- Reference guide
- This manual is also suitable for
Ask a question and I''ll find the answer in the document
Finding information in a document is now easier with AI
Related papers
-
Savant SHA-MGEIGCTRL-00 Reference guide
-
Savant SHA-B1SA-00 Reference guide
-
Savant SHA-B2WH-00 Reference guide
-
Savant SHA-B2MANUALWH-00 Reference guide
-
Savant SHA-B6BA-00 Reference guide
-
Savant SHA-B4MANUALSA-00 Reference guide
-
Savant SHA-B4SA-00 Reference guide
-
Savant SHA-CB34-10 Reference guide
-
Savant SHA-B8CRSA-00 Reference guide
-
Savant SHA-B5WSA-00 Reference guide
Other documents
-
Crestron CSA-DECOR5 Installation guide
-
Legrand Qlink Brackets Installation guide
-
 Lutron Electronics Sivoia QS roller 100 Installation guide
-
Crestron CSA-ARCH5 Installation guide
-
Crestron CSA-ARCH5-BRKT-DUAL Installation guide
-
 Lutron Electronics Sivoia QS roller 100 Installation Instructions Manual
-
Crestron CSA-DECOR3 Installation guide
-
Crestron CS-SHADE-ROLLER-HSHEER Installation guide
-
 Lutron Electronics Sivoia QED Installation Instructions Manual
-
 Lutron Electronics Sivoia QS Installation Instructions Manual


