Page is loading ...

SERIES 600 POS KEYBOARD
PROGRAMMING & USER’S GUIDE

Series 600 POS Keyboard ii
TABLE OF CONTENTS
SCOPE ............................................................................................................1
SPECIAL NOTE..............................................................................................1
PRODUCT INFORMATION...........................................................................3
MODEL DESCRIPTION .................................................................................................3
FEATURES.......................................................................................................................3
SPECIFICATIONS...........................................................................................................5
SERVICE AND WARRANTY..........................................................................5
INSTALLATION..............................................................................................6
UNPACKING AND INSPECTION.................................................................................6
EXTERNAL CONNECTIONS........................................................................................7
DRAWER JUMPER CONNECTIONS (PRINTER FIRED).......................................7
OPERATION.................................................................................................11
CONTROLS AND INDICATORS................................................................................11
PROGRAMMING ..........................................................................................13
PROGRAMMING KEYBOARD OPERATING PARAMETERS..............................13
LOCAL MODE PROGRAMMING - FUNCTION CODES AND SETTINGS.........13
LOCAL MODE PROGRAMMING INSTRUCTIONS................................................11
LOCAL MODE PROGRAMMING................................................................................30
KEY MAKE/BREAK CODES AND EXTENDED FUNCTIONS.............................30
PROGRAMMING IN REMOTE MODE.......................................................................39
REMOTE MODE PROGRAMMING MACROS AND COMMAND SUMMARY....39
101/102-KEY KEYBOARD - KEY CODE IDENTIFICATION .................................53
PROGRAMMING KEY MAKE/BREAK CODES.......................................................50
EXAMPLES OF REMOTE PROGRAMMING FOR KEY MAKE/BREAK CODE55
COPYING KEYBOARD SETUP DATA (CLONING)................................................61
OPERATOR'S AND PROGRAMMER'S MAGNETIC CARDS..............................62
SYSTEM LOG.................................................................................................................62

Series 600 POS Keyboard iii
MAINTENANCE............................................................................................63
PRECAUTIONS.............................................................................................................63
CLEANING......................................................................................................................63
KEY LEGEND CHANGE..............................................................................................64
3/4 AND 5/8-INCH FULL TRAVEL KEYBOARDS..................................................64
BATTERY REPLACEMENT........................................................................................60

Series 600 POS Keyboard iv
APPENDIX
APPENDIX A
SERIES 600 POS STANDARD KEYBOARD LAYOUTS A1
APPENDIX B
KEYBOARD CABLE/CONNECTOR DATA B1
APPENDIX C
ASC11 CHARACTER SET C1
APPENDIX D
101/102-KEY KEYBOARD KEY NUMBER TO SCAN CODE CROSS
REFERENCE D1
LIST OF TABLES
TABLE 1. SERIES 600 POS KEYBOARD - TYPICAL CONTROLS AND
INDICATORS 8
TABLE 2. LOCAL MODE PROGRAMMING INSTRUCTIONS 10
TABLE 3. LOCAL MODE PROGRAMMING FUNCTION CODES AND
DEFAULT SETTINGS 25
TABLE 4. LOCAL PROGRAMMING COMMANDS FOR KEY MAKE/BREAK
AND EXTENDED FUNCTIONS 31
TABLE 5. REMOTE PROGRAMMING MODE COMMANDS 36
TABLE 6. REMOTE PROGRAMMING COMMANDS FOR KEY
MAKE/BREAK CODE 49
TABLE 7. OPOS KEY DEFINITIONS 53
TABLE 8. MSR PROGRAMMING FOR UTC OPOS DRIVERS 54
LIST OF FIGURES
1. TYPICAL POS STATION WITH STANDARD S600 KEYBOARD v
2. TYPICAL KEYBOARD EXTERNAL CONNECTIONS 5
3. KEYBOARD EXTERNAL CONNECTORS – REAR VIEW 6
4. S600 POS KEYBOARD – TYPICAL CONTROLS & INDICATORS 7
5. KEYBOARD DOWNLOADING CONNECTION DIAGRAM 56

Series 600 POS Keyboard v
FEDERAL COMMUNICATIONS COMMISSION
RADIO FREQUENCY INTERFERENCE
STATEMENT
• Reorient the radio or television receiving antenna
• Relocate the keyboard with respect to the receiver
• Move the keyboard away from the receiver
If necessary the user should consult the dealer or an experienced radio/television
technician for additional suggestions. The user may find the following booklet
prepared by the Federal Communications Commission helpful: "How to Identify and
Resolve Radio/TV Interference Problems". This booklet is available from the U.S.
Government Printing Office Washington, DC 20402. Order stock number 004-000-
00345-4.
NOTICE
This equipment complies with the limits for a Class A computing
device in accordance with the specifications in Part 15 of FCC rules
which are designed to minimize radio frequency interference in the
installation; however, there is no guarantee that radio or television
interference will not occur in any particular installation. If this
equipment does cause interference to radio or television reception,
which can be determined by turning the equipment off and on while
the radio or television is on, the user is encouraged to try to correct
the interference by one or more of the following measures:

Series 600 POS Keyboard 1
SCOPE
This user's guide provides the information and procedures needed to install,
operate and program your Series 600 POS Keyboard. Differences in models and
optional features are described in this manual, where applicable. It is suggested
that the entire manual be read before attempting installation or programming. If
assistance is needed that is beyond the coverage provided in this guide, please
contact Customer Service:
Ultimate Technology Corporation
100 Rawson Road
Victor New York, 14564
Phone: (800) 349-0546
Fax: (585) 924-1434
SPECIAL NOTE
When this publication was written, every effort was made to ensure that information in this
document was complete, accurate, and up to date. Ultimate Technology Corporation assumes no
responsibility for errors beyond its control. Ultimate Technology Corporation also cannot
guarantee that changes in software and equipment made by other manufacturers, and referenced
in this guide, do not effect the applicability of the information in this manual. If assistance is
needed, please contact Customer Service at the address or phone number given above.
WARNING: TO PREVENT FIRE OR SHOCK HAZARD, DO NOT EXPOSE THE KEYBOARD
TO RAIN OR MOISTURE.
Contents of this publication may be changed without notice and shall not be regarded as a warranty.
CAUTION
RISK OF ELECTRIC SHOCK
DO NOT OPEN
TO REDUCE THE RISK OF ELECTRIC SHOCK,
DO NOT OPEN KEYBOARD ENCLOSURE WHEN
KEYBOARD IS CONNECTED TO SYSTEM.
REFER SERVICING TO QUALIFIED SERVICE
PERSONNEL.

Series 600 POS Keyboard 2
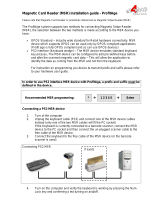
Figure 1. Typical Point-of-Sale Station with Standard QWERTY Series 600 keyboard

Series 600 POS Keyboard 3
PRODUCT INFORMATION
MODEL DESCRIPTION
Series 600 POS Keyboards are point-of-sale (POS) keyboards designed for use with a PC or
ASCII terminal or network computer. These keyboards provide total flexibility in keyboard layout
as well as extensive programming capability. The Series 600 Keyboard contains two bi-
directional serial ports, two status cash drawer ports, main and auxiliary keyboard ports, and a
detachable MSR (optional). The Series 600 is a fully compatible OPOS keyboard with OPOS
device drivers available. The Series 600 POS Keyboard provides both the hardware and
firmware interfaces necessary to fully integrate a modular “open system” POS workstation when
attached to a PC, terminal, or network computer, and connected with a printer, cash drawer and
display of the users choice.
FEATURES
CHOICE OF SERIES 600 KEYBOARD TYPES
• Full travel, standard ¾” key QWERTY layout – 110
keys
• Full travel, standard ¾” key matrix – up to 144
keys
All key locations are available
permanently printed or re-legendable. Full travel
keycaps have removable plastic covers for re-
legending.
Standard keyboard configurations
including QWERTY and typical POS layouts are
available. Custom configurations of any number of
keys are also available.
FULLY USER PROGRAMMABLE
• Local (PC Keyboard)
• Remote (from Host)
• OPOS compatible
• Download (Cloning)
All keys can be reprogrammed to output
any code. Single wide and double wide keys can
be placed anywhere on the keyboard. “Dummys”
or Spacers are available for unused key locations.
Custom bezel configurations are available.
OPTIONAL MAGNETIC STRIPE READER
• Detachable
• 2 track, 3 format
• Programmable for prefix, suffix, separators and
audible annunciation
• OPOS driver available
• Magnetic stripe card controlled security
• Keyswitch optional
TWO CASH DRAWER PORTS
• Status monitoring
Automatic (Unsolicited)
Polling (Solicited)
• Optional cash drawer firing
AUX PC KEYBOARD PORT
• For data entry when full alphanumeric capability is
needed
• For programming key codes (local method)
• For keyboard port compatible peripherals (bi-
directional)
TWO RS232 PORTS
• Serial peripherals
• Main communications port when used as a
terminal
• Hardware and software handshaking
• Selectable baud rates (300 bps - 57.6 Kbps)
• OPOS scanner driver available
32K NVRAM BUILT-IN
• 2048 16 character memory locations
• Control totals
• Other purposes
THREE LED INDICATORS
• User programmable
• PC Controlled (SECURE, NUM lock and CAPS
lock)

Series 600 POS Keyboard 4
BUILT-IN ANNUNCIATOR
• Programmable
• Selectable tone and duration
BUILT-IN DIAGNOSTICS
• Self test

Series 600 POS Keyboard 5
SPECIFICATIONS
DIMENSIONS (d x w x h)
• Series 600 only – 7.85” x 14.7” x 2.97”
• Series 600 w/MSR – 7.85” x 16.2” x 2.97”
WEIGHT
• Series 600 w/MSR - 3.95 pounds
ELECTRICAL
• 135 - 185mA at 5VDC (supplied from host)
• 3-volt lithium battery (battery backup for memory
data retention when host source voltage removed)
ENVIRONMENT
• Storage temperature: -40° to 60°C
• Operating temperature: 0° to 50°C
APPROVALS
• FCC Class A
• UL recognized
• UL recognized (Canada)
SERVICE AND WARRANTY
Series 600 POS Keyboards come with a one-year parts and labor warranty. Assistance and
customer service is always available from Ultimate Technology Corporation's Customer Service
department. If the dealer or your service provider cannot answer your question or provide
satisfactory service, please call our sales and technical support department. When calling for
assistance or service information, please have available the model number, part number and
serial number of the keyboard. This information is found on a decal located on the bottom of the
keyboard.
If the keyboard needs to be returned to a repair facility, please use the original packing material
and shipping carton. It is recommended that one set of packing material be retained for this
purpose.
The address and telephone numbers to be used for assistance, service, and warranty information
is:
Ultimate Technology Corporation
100 Rawson Road
Victor, New York 14564
Phone: (800) 349-0546
Fax: (585) 924-1434

Series 600 POS Keyboard 6
INSTALLATION
UNPACKING AND INSPECTION
1. Examine the exterior of the shipping carton for signs of abuse or damage that may have
occurred during transport. Report all evidence of damage or abuse to shipper and dealer.
2. Open top of shipping carton and carefully remove the keyboard and accessories.
3. Remove shipping retainers and protective covers from the keyboard and accessories.
• Series 600 Keyboard
• Cables as per order requirements
• Series 600 POS Keyboard programming & User’s Guide
• Included with Magnetic Swipe Reader (MSR), (optional)
• Secure Magnetic Card
• Program Magnetic Card
NOTE
Retain a set of shipping retainers, protective covers, and the
shipping carton. Use these items whenever keyboard is to be
shipped.

Series 600 POS Keyboard 7
EXTERNAL CONNECTIONS
As required by the hardware configuration, connect the keyboard to its host computer and other
peripheral devices as shown in Figures 2 and 3. Note that the specific use for each connector on
the keyboard is marked adjacent to each connector. Depending on the make and model of the
user's equipment, the following cables and/or adapters may need to be supplied by the user to
complete the installation:
Standard 6-foot cable, 6-Pin Modular to 6-Pin Modular - UTC Part No. CAB20137 or equivalent
Keyboard adapter 2-Inch, 5 Pin DIN Male to 6-Pin Mini DIN Female - UTC Part No.900-0839 or equivalent
Keyboard adapter 12-Inch, 5 Pin DIN Female to 6 Pin Mini Din Male - UTC Part No. 901-5009A or equivalent
CASH DRAWER JUMPER CONNECTIONS (PRINTER FIRED)
As shown in Figure 3, the Series 600 Keyboard has two status cash drawer ports. Each port is
selectable by use of the jumper connector located next to the MAIN keyboard connector. This
jumper connector is used to make the keyboard compatible with the different printer and cash
drawer connections required by various manufacturers. NOTE: JUMPERS COME
UNINSTALLED. FALURE TO PROPERLY SET JUMPER COULD DAMAGE KEYBOARD.
Jumper pin set A and B is used with cash drawer 1: pin set C and D is used with cash drawer 2.
Installing the jumper on the B (drawer 1) and D (drawer 2) side of the connector causes the status
signal from the cash drawer to be applied on pin 2 of the related cash drawer port. Installing the
jumper on the A (drawer 1) and C (drawer 2) side of the connector causes the status signal from
the cash drawer to be applied on pin 6 of the related cash drawer port which allows pin 2 to be
used to open the drawer. Shown below are the pin connections for the cash drawer ports for each
position of jumper. Identified by an "X" are the jumper setting used with typical Epson and Ithaca
Peripheral devices.
PRINTER 1, 2 PINOUTS
DRIVER 1, 2
DRAWER 1, 2
JUMPER ON A OR C SIDE
DRAWER 1, 2
JUMPER ON B OR D SIDE
1 - SOLENOID GND 1 - SOLENOID GND 1 - SOLENOID GND
2 - SOLENOID GND/STATUS + 2 - SOLENOID GND 2 - STATUS +
3 - STATUS GND 3 - STATUS GND 3 - STATUS GND
4 - SOLENOID + 4 - SOLENOID + 4 - SOLENOID +
5 - SOLENOID GND 5 - SOLENOID GND 5 - SOLENOID GND
6 - NO CONNECTION 6 - STATUS + 6 - STATUS +
EPSON/AHIOHM X
ITHACA SERIES 50,60 X
ITHACA SERIES 80, 80, 150 X

Series 600 POS Keyboard 8
Main RS232
Port
Aux RS232
Port
Cash Drawer 1
(Driver)
Port In
Cash Drawer 1
(Driver)
Port Out
Cash Drawer 2
(Driver)
Port In
Cash Drawer 2
(Driver)
Port Out
Drawer Type
Jumpers
Main KB Port
Aux KB Port
Bar Code Scanner
or
Check Reader
Receipt Printer
Cash Drawer
Port 1 & 2
Cash Drawer 1
Cash Drawer 2
PC or Terminal
PS2 Type KB
CAB20133 or CAB20137 or CAB20134
Adapter (optional)

Series 600 POS Keyboard 9
Figure 2. Typical Keyboard External Connections

Series 600 POS Keyboard 10
ITEM DESCRIPTION
Auxiliary Keyboard To attach auxiliary keyboard
Main Keyboard Connection to PC or Terminal
Jumpers Set jumpers to match printer
Drawer 2 Status from drawer 2
Driver 2 Signal to open drawer 2
Drawer 1 Status from drawer 1
Driver 1 Signal to open drawer 1
Auxiliary RS232 Serial accessory ports for scanner,
MICR, etc. or used as main
communication port
Main RS232 Serial accessory ports for scanner,
MICR, etc.
Figure 3. Keyboard External Connectors – Rear View

Series 600 POS Keyboard 11
OPERATION
CONTROLS AND INDICATORS
Operating controls and indicators on the Series 600 Standard QWERTY Keyboard are shown in
Figure 4 and described in Table 1. Because most Series 600 POS Keyboards are customized to
match the user's needs, keyboard layouts and the function of the keys may vary from Figure 4.
Although the location of keys may differ among types of keyboards, the function of the controls and
indicators described in Table 1 pertain to all keyboard types. The operator should become
familiar with the controls, indicators and other operating features of the keyboard. For typical
keyboard layouts of other Series 600 POS Keyboards, refer to Appendix A.
ITEM DESCRIPTION
1 LED Indicator
2 LED Indicator
3 LED Indicator
5 Magnetic Swipe Reader
6 Enter Key
7 Numeric Keypad
8 Optional Key Lock
9 Pen Holder

Series 600 POS Keyboard 12
Figure 4. Series 600 POS keyboard - Typical Controls and Indicators
Table 1. Series 600 POS Keyboard - Typical Controls and Indicators
Index
No.
Name Function
1 through 3 Light Emitting
Diode (LED)
Indicators
LED (1) SECURE - When on, indicates keyboard is secured(locked);
when off, indicates keyboard is unlocked.
LED (2) When on, indicates keyboard is in CAP LOCK mode.
LED (3) When on, indicates keyboard is in NUM LOCK mode.
When in local programming mode - the status (on or off) of LEDs
varies depending on status of programming. Refer to programming
instructions contained in this guide.
4 Sound Port Beeper annunciator port.
5 Magnetic Stripe
Reader
Magnetic card reader used to read standard format customer credit
and bank cards for normal business transactions when the card is
passed (swiped) through reader.
Used to read Secure Card to secure or unlock use of keyboard when
the card is swiped through reader. LED (1) is on when keyboard is
secured and off when unlocked.
Used to read Program Card to enable keyboard programming in local
mode when the card is swiped through reader.
6 ENTER Key When pressed during local programming mode, initiates various
program actions. Refer to programming instructions contained in this
guide.
When pressed during normal business operation, enters numeric
keyboard and other keyed data as defined by the user.
7 Numeric Keypad Numeric keypad that may be used during normal business
operations to enter numeric values or can be customized to represent
user defined items.
Used during local programming mode to enter programming
commands. Refer to programming instructions contained in this
guide.
8 Keyswitch
(Optional)
All three positions can be programmed for Macros. Refer to
programming instructions contained in this guide.
9 Pen/Pencil Holder Storage location used to hold user's pens or pencils.
All Other User Defined Keys User defined keys programmed by user/developer.

Series 600 POS Keyboard 13
PROGRAMMING
PROGRAMMING KEYBOARD OPERATING PARAMETERS
The operating parameters of the keyboard can be configured (programmed) remotely from the
host computer or locally at the keyboard. Keyboard programming in the remote mode sets the
keyboard parameters as commanded by the host computer input applied at the main
communications port. Selection of the local programming mode enables keyboard parameter
setup locally at the keyboard. Note: All keyboards come from the factory programmed with
a default set of parameters.
LOCAL MODE PROGRAMMING INSTRUCTIONS
To program the Series 600 Keyboard in the local mode proceed as follows:
1. Connect main keyboard port to PC or Host, Aux keyboard port to IBM Compatible PC
keyboard.
2. Swipe the PROGRAM CARD supplied with the keyboard in the magnetic stripe reader MSR).
3. All LED indicators turn on and the keyboard annunicator beeps three times.
4. After step 3 is complete, LED indicator (1) will flash continuously to indicate that the keyboard
programming mode is active.
5. For a summary of the parameters that can be programmed in the local mode, refer to Table 3.
6. Follow the instructions given in Table 2 for the applicable Function Code(s) to program the
keyboard for the desired parameter(s). Note that sequence of instructions provided in Table 2
is in Function Code numerical order.
7. When programming is complete, exit the local programming mode by typing 99 on the Series
600 Keyboard numeric keypad or by swiping the Program Card. This returns the keyboard to
normal operation.
NOTE
Some programming options may not be
activated until the keyboard is re-
powered.
Serial port communication selections --
Function Codes 20-24; 30-34; 91.

Series 600 POS Keyboard 14
Table 2. Local Mode Programming Instructions
* = Default Settings
Function Code(s)
Operation Normal Indication Remarks
00
01
Program Primary
Key Functions (00)
and Secondary Key
Functions (01)
NOTE
The keys can be programmed to have primary and secondary levels of function. The
primary function is activated when only the designated key is pressed. When
programming the secondary operation keys, do not press the Sec Op Key. The secondary
operation access key (Sec Op Key) provides access to the secondary level of each key as
programmed in the Series 600 Keyboard, used only in operation of the keyboard.
1. Swipe Program Card. While in programming mode, at the Series 600 Keyboard
numeric keypad, enter Function Code 00 for primary key function or 01 for secondary
key function.
LED (2) turns on.
Note: See Example 3, page 33 for Procedure to make <sec op> key.
2. At the Series 600 Keyboard, press the key to be programmed. See Table 4 – Local
Programming Key MAKE/BREAK Codes and Extended Functions for detailed steps.
LED (2) flashes.
3. At the auxiliary keyboard, press the desir
ed key or type the desired key sequence.
Note that the maximum number of key codes is limited to 24 – this is equivalent to
approximately 12 key strokes.
If the Series 600 Keyboard beeps and
LED (2) turns off while entering key
codes at the auxiliary keyboard, you
have exceeded 24 key codes. Repeat
steps 1 through 3
4. At the Series 600 Keyboard, press ENTER.
LED (2) stops flashing.
5. Repeat 2 through 4 for next key to be programmed.
6. Exit programming primary/secondary key functions by pressing 00 on the Series 600
Keyboard numeric keypad.
7. Program the next function code or exit programming mode by entering 99 on Series 600
Keyboard numeric keypad or by swiping the Program Card.

Series 600 POS Keyboard 15
Table 2. Local Mode Programming Instructions
* = Default Settings
Function Code(s)
Operation Normal Indication Remarks
02
Code Primary Key
Functions to
Secondary Key
Positions
1. Swipe Program Card. While in programming mode, at the Series 600 Keyboard
numeric keypad, enter Function Code 02.
LED (2) turns on.
2. At the Series 600 Keyboard, press the designated key to copy its primary function
into the secondary position.
3. Repeat 2 for next key to be programmed.
4. When completed, press ENTER.
LED (2) turns off.
5. Program the next function code or exit programming mode by entering 99 on Series
600 Keyboard numeric keypad or by swiping the Program Card.
Note: A Sec Op Key or Sec Op Lock Key must be programmed in the primary function
mode in order to use secondary function codes.
03
04
Program Primary
OPOS Keys (03)
and Secondary
OPOS Keys (04)
The keys on the Series 600 Keyboard can be programmed to output unique key codes.
These keys are used with the UTC OPOS keyboard driver. These key codes cannot be
reproduced on a standard keyboard.
1. Swipe Program Card. While in programming mode, at the Series 600 Keyboard
numeric keypad, enter Function Code 03 for primary key or 04 for secondary key
function.
LED (2) turns on.
2. At the Series 600 Keyboard, press the key to be programmed.
LED (2) flashes.
3. On the Series 600 keypad, type the number of the desired OPOS key to be used 01-
50 and then hit the keypad ENTER on the Series 600 Keyboard.
If LED (2) stops flashing, repeat
step 2.
4. Repeat 2 and 3 for next key to be programmed.
5. Exit programming primary/secondary OPOS key functions by pressing 99 on the
Series 600 Keyboard numeric pad.
/