Page is loading ...

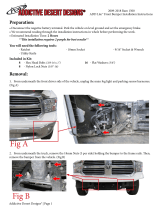
2018-Current Jeep Wrangler/Gladiator Stealth Fighter™
Front Fender Installation Instructions
Addictive Desert Designs® | Page 1
ADDICTIVE DESERT DESIGNSADDICTIVE DESERT DESIGNS®®
®
Preparation:
• Disconnect the negative battery terminal. Park the vehicle on level ground and set the emergency brake.
• We recommend reading through the installation instructions in whole before performing the work.
• When button head bolts are being used, install the supplied washer on the nut side. en, hold the bolt station-
ary and only turn the nut to tighten. Do not turn the bolt to tighten hardware assembly, unless otherwise noted.
• Estimated Installation Time: 2 Hours for OEM Removal/Fender Installation
**This installation requires 2 people for best results**
**Labor Rates are based on a vehicle with no pre-existing damage. Wiring labor is based on a standard wiring procedure
with light switches installed in an easily accessible location. Custom light triggering or switch mounting location will
result in a greater labor charge.**
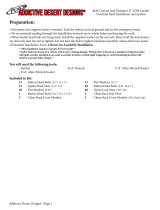
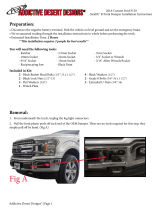
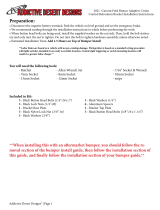
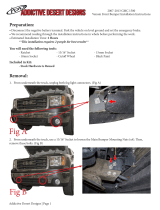
You will need the following tools:
- Ratchet - 9/16" Wrench - 10mm Socket
- 7/16" Socket - 5/32" Allen Wrench/Socket - 3/16" Allen Wrench/Socket
- 1/2" Wrench - Drill - 25/64" Drill Bit
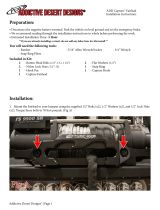
Included in Kit:
16 - Button Head Bolts
(1/4”-20 x 1")
16 - Flat Washers
(1/4”)
16 - Rivet Nuts
(1/4”-20)
2 - Button Head Bolts
(5/16”-18 x 1")
2 - Flat Washers
(5/16”)
2 - Nylon Lock Nuts
(5/16”-18)
1 - Hex Head Bolt
(1/4”-20 x 1 1/4")
2 - Flat Washers
(1/4”)
1 - Hex Nut
(3/8”-16)

2018-Current Jeep Wrangler/Gladiator Stealth Fighter™
Front Fender Installation Instructions
Addictive Desert Designs® | Page 2
ADDICTIVE DESERT DESIGNSADDICTIVE DESERT DESIGNS®®
®
Installation:
1. Using a 10mm Socket, remove the bolt towards the front of the wheel well referenced in (Fig A).
Fig AFig A
2. Using a 10mm Socket, remove the two bolts on top/center portion of the wheel well. (Fig B)
Fig BFig B

2018-Current Jeep Wrangler/Gladiator Stealth Fighter™
Front Fender Installation Instructions
Addictive Desert Designs® | Page 3
ADDICTIVE DESERT DESIGNSADDICTIVE DESERT DESIGNS®®
®
3. Remove the four plastic clips along the top side of the wheel well. (Fig C)
Fig CFig C
4. Remove the 2 plastic clips along the bottom/rear of the wheel well. (Fig D)
Fig DFig D

2018-Current Jeep Wrangler/Gladiator Stealth Fighter™
Front Fender Installation Instructions
Addictive Desert Designs® | Page 4
ADDICTIVE DESERT DESIGNSADDICTIVE DESERT DESIGNS®®
®
5. Release the series of push rivets that hold the inner liner to the fender on the outer edge of the wheel well.
(Fig E)
Fig EFig E
6. Pull the inner fender liner o of the vehicle.
7. Using a 10mm Socket, remove the two bolts in the front section of the wheel well. (Fig F)
Fig FFig F

2018-Current Jeep Wrangler/Gladiator Stealth Fighter™
Front Fender Installation Instructions
Addictive Desert Designs® | Page 5
ADDICTIVE DESERT DESIGNSADDICTIVE DESERT DESIGNS®®
®
8. Release the series of white clips on the inner portion of the wheel well. en, pull the OEM fender o of the
vehicle. (Fig G)
**ere are more white **ere are more white
clips that are not shown clips that are not shown
in this picture**in this picture**
Fig GFig G
9. Install the supplied Rivet Nuts (x7) in the holes that will be used to mount your fender (except the very front
mounting hole, do not do anything with this hole yet). To do this, drill each hole to 25/64". en, use the sup-
plied 1/4"-20 x 1 1/4" Bolt (x1), 1/4" Washers (x2), and 3/8" Nut (x1) to make a rivet nut tool as shown in (Fig H).
Push a rivet nut all the way into each newly drilled hole. While holding onto the 3/8" Nut with a 9/16" Wrench,
fully tighten the 1/4" Bolt (on the rivet nut tool) into the Rivet Nut. Once it is fully tightened, remove the bolt
from the rivet nut and move on to the next. (Fig I)
Drill Hole Assemble Tool Push Rivet
Nut into Hole
Tighten Rivet
Nut as Shown
Fig HFig H

2018-Current Jeep Wrangler/Gladiator Stealth Fighter™
Front Fender Installation Instructions
Addictive Desert Designs® | Page 6
ADDICTIVE DESERT DESIGNSADDICTIVE DESERT DESIGNS®®
®
Fig IFig I
10. Use a cuto wheel or something similar to cut o the tab referenced in (Fig J). Make sure to paint over any
bare metal when you are done cutting. Hold the fender up so you know what areas will be covered. For the best
look, do not grind paint o any areas that will be visible once the fender is installed.
Fig JFig J

2018-Current Jeep Wrangler/Gladiator Stealth Fighter™
Front Fender Installation Instructions
Addictive Desert Designs® | Page 7
ADDICTIVE DESERT DESIGNSADDICTIVE DESERT DESIGNS®®
®
11. THIS STEP IS OPTIONAL. For aesthetics, you can cut the two fender liner brackets o. We le the bottom
hook portion to cradle the wire harness later on in the install. (Fig K)
Fig KFig K
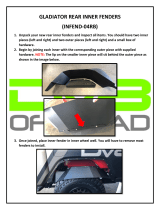
12. Put the fender in place and install all but the very front mounting bolt (7 total). Use one of the supplied
5/16" Bolt/Washer/Nut (x1). en, use a permanent marker or something similar to mark the location of the
front mounting hole on the fender. (Fig L)
Use the 5/16" Bolt Here.
Fig LFig L
Mark the location of the
very front mounting hole

2018-Current Jeep Wrangler/Gladiator Stealth Fighter™
Front Fender Installation Instructions
Addictive Desert Designs® | Page 8
ADDICTIVE DESERT DESIGNSADDICTIVE DESERT DESIGNS®®
®
13. Remove the fender from the Jeep. Drill a hole and install a drill bit in the location that you marked in the
previous step. (Fig M)
Fig MFig M
14. Install the lights onto your new fenders. Use the light manufacturer's supplied hardware. Once the lights are
installed, you will need to trim the end of the bolt that is closest to the body of the Jeep. (Fig N)
Trim the end o this
bolt on both fenders.
Fig NFig N

2018-Current Jeep Wrangler/Gladiator Stealth Fighter™
Front Fender Installation Instructions
Addictive Desert Designs® | Page 9
ADDICTIVE DESERT DESIGNSADDICTIVE DESERT DESIGNS®®
®
15. Install the fender onto the vehicle using the supplied 1/4" Button Head Bolts (x8) and 1/4" Washers (x8).
en use the supplied 5/16" Bolt/Washer/Nut (x1) on the front tab. (Fig O)
Use the 5/16" Bolt Here.
Fig OFig O
16. Plug the light module into the vehicle. en, plug the lights into the light module. Ziptie the wiring up and
out of the way. (Fig P)
Fig PFig P

2018-Current Jeep Wrangler/Gladiator Stealth Fighter™
Front Fender Installation Instructions
Addictive Desert Designs® | Page 10
ADDICTIVE DESERT DESIGNSADDICTIVE DESERT DESIGNS®®
®
For Additional Support or Technical Questions,
Please Call 480-671-0820 or
Email Info@AddictiveDesertDesigns.com
is product is protected by one or more U.S. patents
www.addictivedesertdesigns.com/patents
17. Stand back and enjoy your new ADD Stealth Fighter™ Fenders.
18. Check and re-tighten, if needed, all mounting bolts aer 100 miles and periodically thereaer.
/
