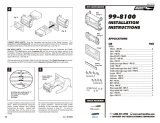
DASH DISASSEMBLY & RADIO REMOVAL INSTRUCTIONS
2018 TOYOTA C-HR
1. Using a soft tool, carefully Unsnap and the dash panel surrounding the factory radio.
Unplug any harnesses from the panel, remove.
2. From the radio support brackets Remove (4) 10mm bolts disconnect any
wire harnesses and antenna lead and remove the radio.
2017-18 TOYOTA COROLLA iM & 2016 SCION iM
1. Using a soft tool, carefully Unsnap and the dash panel surrounding the factory radio,
unhooking the bottom left of the panel from behind the console. Unplug any harnesses
from the panel, remove.
2. From the radio support brackets Remove (4) 10mm bolts disconnect any
wire harnesses and antenna lead and remove the radio.
1
2
Figure A
KIT ASSEMBLY INSTRUCTIONS
SINGLE ISO w/POCKET KIT ASSEMBLY INSTRUCTIONS
1. Attach both Left and Right side ISO brackets to the ISOPOC .
2. Attach ISO brackets and ISOPOC to the rear of the Main Frame Trim, inserting into one
side of the main frame, then snapping into other side.
3. Attach the factory metal mounting brackets to the left and right sides of the aftermarket
radio using the screws removed from the factory radio.
4. Align the Main Frame Trim to the aftermarket radio and attach, If the metal bracket
interferes with the plastic TTR brackets, then remove the factory brackets , and install
over the TTR bracket.
Note: Some TTR bracket locations may share the same mounting locations
as the factory brackets.
Note: Factory bracket alignment nubs can be removed if you are needing to move
radio backwards because of a large nose radio, you also will need to drill additional
holes in the factory brackets.
Bracket Alignment
For CH-R applications
please locate mounting
Screws to the front of the
bracket slots(towards the
front of the radio), pushing
mainframe backwards.
For iM applications please
locate mounting Screws
to the rear of the bracket
slots(towards the rear of
the radio), pushing
mainframe forward.
TTR991 TRIM
DOUBLE DIN INSTALLATION INSTRUCTIONS
DOUBLE DIN KIT ASSEMBLY INSTRUCTIONS
1. Attach ISO brackets to the rear of the Main Frame Trim.
2. Attach the factory metal mounting brackets to the left and right sides of the
aftermarket radio using the screws removed from the factory radio.
3. Align the Main Frame Trim to the aftermarket radio and attach, If the metal bracket
interferes with the plastic TTR brackets, then remove the factory brackets,
and install over the TTR bracket.
Note: Some TTR bracket locations may share the same mounting locations as the
factory brackets.
Note: Factory bracket alignment nubs can be removed if you are needing to move
radio backwards because of a large nose radio, you also will need to drill additional
holes in the factory brackets.
Figure B
TTR991 TRIM
Bracket Alignment
For CH-R applications
please locate mounting
Screws to the front of the
bracket slots(towards the
front of the radio), pushing
mainframe backwards.
For iM applications please
locate mounting Screws
to the rear of the bracket
slots(towards the rear of
the radio), pushing
mainframe forward.


