Page is loading ...

Hi!
Let’s get started.
© 2013 by Feed and Go™. Feed and Watch Your Pets from Anywhere.
Patent Pending

TABLE OF CONTENTS
1
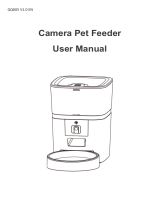
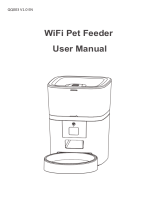
What's in the Box
Get to Know Your Feed and Go
What Do You Need to Setup
Step 1 How to Set Up Your Unit
Quick Setup Using WPS
Wi-Fi Setup via Access Point
Step 2 Final Set up
Unlocking and Locking Your Feed and Go
Recording a Personal Greeting
Using Your Feed and Go
2
3
6
7
8
10
12
12
13
14

WHAT’S IN THE BOX
Feed and Go Unit with Internal Tray
Power Adapter with Cord
BATTERIES. No batteries needed; the Feed and Go unit only works with
the power adapter provided together with the unit.
2

GET TO KNOW YOUR FEED AND GO
A
B
C
Power Jack - The round connector on the left side of the back panel. This powers
your Feed and Go.
Volume Wheel - Located next to the Power Jack, the Volume Wheel allows you
to adjust the volume of your voice recording. Crank it up if your pet is hard of
hearing, or keep it down if your pet is easily spooked.
Ethernet Jack - The rectangular connector on the right side of the back panel. This
is where the "Go" part of the Feed and Go comes in. You can either plug your Feed
and Go directly into your internet router (by plugging an Ethernet cable into this port)
or use Feed and Go's built-in Wi-Fi connection to connect wirelessly.
3
BACK VIEW
E
I
A
B
D
J
K
C

D
E
F
Reset - If one of your settings isn't working for you or your pet (or you just want to try
something new), press a pin into the hole and hold down for 5-8 seconds to clear your
settings and start over. Activating the reset button will clear your feeding schedule,
Wi-Fi connection settings, and your Feed and Go's Date/Time settings, so only press
this button if you mean it.
Feed - Every pet's favorite button! This button (on the left side) will move the feeding
tray, bringing out a new dish for your pet's dining pleasure! Press this button to
manually feed your pet.
WPS – This button connects your Feed and Go device to your wireless router. You'll
need to press the WPS button on your Feed and Go device within 1 minute of pressing
the WPS button on your internet router.
4
F
M
N
R
O
S
G
H
L
P
G
Schedule - This button (the middle button) can be used to manually turn scheduled
feedings on and off.
FRONT VIEW

N
O
P
R
S
Schedule - Blue LED, located inside the Schedule (G) button, indicates a schedule is
loaded onto the device and enabled.
Audio - Blue LED, located inside the Audio (H) button, indicates an audio message is
playing (blinking) or being recorded (on solid).
Speaker - When it's time for your Feed and Go device to feed or call your pet over,
your personalized message will come out of the speaker.
Microphone - When you want to set your personalized message that your pet will
hear every time your device is activated, this is where you speak your message in to.
Your message can be up to 6 seconds long.
Opening buttons – located at the front of the device on the bottom left and right side.
Press them both at the same time to open the feeder when you want to place food into
the tray or when you want to remove the tray to clean it.
5
H
I
J
Audio - This button (on the right side) will play your recorded voice message when
pushed. Don't like your recorded message? Press and hold to record a new one!
Power - Blue LED, next to the power jack, indicates the device is powered.
Network - Blue LED, next to the reset hole. Used for indicating if the device is
connected to a network (on solid), in WPS mode (blinking quickly) or in Access Point
mode (blinking slowly).
K
L
M
Cloud - Blue LED, next to the WPS button, indicates the device is connected to the
Feed and Go cloud service.
Video - Blue LED, on top of the feeder next to the camera lens, indicates video is
active.
Feed – Blue LED, located inside the Feed (F) button. A solid blue light indicates the
motor is active. A blinking light indicates a possible jam. Clear a jam by pressing the
opening buttons (P) and removing the feed tray. Make sure any excess food that's getting
stuck and stopping the motor from turning is removed before returning the tray. Make
sure that when you do put the tray back in, it's in the right place for your pet's next feed.

WHAT DO YOU NEED TO SETUP
Feed and Go Unit
Power Source
Computer / Mobile Device (Phone or Tablet)
A Wireless Internet Router (unless you want to connect via Ethernet cable all the time)
Internet Service
6

STEP 1 HOW TO SET UP YOUR UNIT
INITIAL SETUP
Ensure that there are no cables plugged into your Feed and Go device.1.
Plug the power cord into the Power Jack (A) located at the back of the unit and insert 2.
the power plug into a wall socket. The Network LED (J) and Cloud LED (K) will flash
a few times and then turn off. When the power is connected, you will see the
power LED glowing.
Carefully unpack your Feed and Go device from its packaging.
3. a) If you have Wi-Fi and your Internet router has a WPS function (look for the letters
WPS anywhere on your router) then go ahead to page 8 and follow the instructions
under A. Set up using WPS.
7
BACK VIEW
A
J
K

NOTE: ONLY PLUG IN AN ETHERNET CABLE TO THE FEEDER IF YOU WANT TO
CONNECT WITH THIS OPTION. OTHERWISE, LEAVE THE ETHERNET JACK
UNPLUGGED WHEN USING Wi-Fi.
IF FEED AND GO WILL BE CONNECTED TO YOUR WIRELESS NETWORK, ENSURE
THAT IT IS IN RANGE OF YOUR INTERNET ROUTER AT ALL TIMES.
b) If you have Wi-Fi but your router is not compatible with WPS then follow the Access
Point set up guide on page 10.
If you will be using an Ethernet cable to connect to the Internet, plug one end of the c)
Ethernet cable into Ethernet Jack (C) and the other end into an Ethernet port on your
router. Now go ahead and follow the Final Setup instructions on page 12.
8
A. Quick Setup using WPS:
If you're unfamiliar with the term WPS, don't worry. What you need to know is that if your
Internet router has WPS capability then this is the option you choose. To find out if your
router has WPS capability, look for the letters WPS anywhere on your router. It may be
a WPS logo or just the letters. Over 90% of current routers have WPS capability and if
yours does then this will be really easy.
DID YOU KNOW? WPS stands for Wi-Fi Protected Setup. WPS is a standard
method to allow you to connect electronic devices with your wireless router. So
long as both your router and the device you want to connect to it support WPS
then setting up via this method is simple and very quick.

2. Press and hold the WPS button (E) on your feeder. The Network LED (J) and Cloud
LED (K) will flash quickly and then the Network LED (J) will flash slowly for a few seconds
before it starts flashing quicker.
3. When the Network LED (J) starts flashing quicker then let go of the WPS button.
4. Within 1-2 minutes the Network LED (J) and the Cloud LED (K) will be solid blue.
9
1. Press and hold the WPS button on your internet router for a few seconds. It may start
flashing to let you know it's searching for new devices.
1. Remove the power cable from the back of your feeder for two minutes before reconnecting.
3. Now follow steps 2, 3 and 4 above.
2. Insert a pin into the Reset hole (D) and hold it down for a few seconds until the Feed LED
(M) and the Schedule LED (N) flash quickly. This will reset your feeder to factory settings.
Now the Network LED (J) should be flashing slowly.
5. Your Feed and Go device should now be connected to your wireless internet router.
You can go ahead now to the Final Setup section on page 12.
BACK VIEW
E
J
K
If this method didn't work for you then try the following:
If there is still a problem setting up this way then please go ahead to page 10 and follow the
instructions for Wi-Fi setup via Access Point.

B. Wi-Fi set up via Access Point
This sounds more complicated, but don't worry, it's been tested on Marissa, our CEO,
and she managed to set up this way.
3. The Network LED (J) should be blinking slowly. This indicates you are ready to
set up.
10
BACK VIEW
D
J
K
1. Remove the power cable from the back of your feeder for two minutes before
reconnecting.
2. Insert a pin into the Reset hole (D) and hold it down for a few seconds until the Feed
LED (M) and the Schedule LED (N) (on top of the feeder) flash quickly.

5. Connect to this Wi-Fi point. If you are using Microsoft Windows 7 then a message
may appear prompting you to select the network type. If so, then select ‘Home network’.
6. Now you’re connected to Feed and Go. On your computer/laptop/tablet/smartphone,
open a web browser (IE, Safari, Chrome, Opera, Firefox) and type in: http://192.168.4.1
4. Using your computer/laptop/tablet/smartphone, search in your available Wi-Fi points for
a name called 'Feed and Go (followed by a number)'. The number is the last 3 digits of
your Feed and Go device so for example 'Feed and Go-230'.
11
11. You should now be connected to your usual Wi-Fi network, but if not, simply connect to
your Wi-Fi network as you usually would do. Now go ahead to the Final Setup section
on page 12 to complete the set up.
7. Click on your preferred access point, for example 'Marissa Home'. If for some reason
your usual access point is not available then click the button for ‘Manual Wi-Fi Setup'
on the web page and enter the details of the Wi-Fi access point you wish to use.
10. The device will reboot itself and after 1-2 minutes the Network LED (J) and the
Cloud LED (K) will be solid blue.
DID YOU KNOW? Access Point basically turns your Feed and Go device
into a 'middleman' for you to connect it to your wireless network router.
NOTES: CERTAIN DEVICES MAY AUTOMATICALLY SHOW YOU A LIST OF YOUR
AVAILABLE WI-FI CONNECTIONS AT THIS POINT. IF SO, JUST SELECT YOUR
USUAL WI-FI ACCESS POINT, FOR EXAMPLE 'MARISSA HOME.'
8. You should now see a message asking you to enter your passphrase for your chosen
Wi-Fi network. This is your usual passphrase. Go ahead and enter it and then click ok.
9. You should now see a message saying 'Connection in progress. Your device is now
connecting to (for example) Marissa home. This process will take up to a minute. You
may close this window.' You should close the window by either pressing close or cancel.

STEP 2 FINAL SET UP
UNLOCKING AND LOCKING YOUR FEED AND GO
2. When the feeder powers up, it is initially unlocked.
12
1. If you haven't already, plug the unit into a power outlet near the location where you
wish to feed your pet. And don't worry, as long as the feeder is within your Wi-Fi range,
you will not need to repeat any of the previous steps. If your feeder is connected to your
router via Ethernet cable rather than by Wi-Fi, then it must stay connected at all times.
We've designed Feed and Go so that smart pets can't cunningly press the buttons on top
of the feeder to help themselves to more food, turn their feeding schedule off or even turn off
the feeding message that you've lovingly recorded. We've created an unlock/lock mechanism
to fool even the smartest of pets. Here's how you unlock/lock your Feed and Go device:
3. After the Feed (F), Schedule (G) and Audio (H) buttons have been inactive for 20
seconds, the feeder becomes locked.
While locked, the feeder will ignore all button presses from the 3 top buttons. The 4.
Volume Wheel (B), Reset button (D) and WPS button (E) at the back of the feeder will
still work though so you can set up your feeder.
To unlock the feeder, the Feed (F) and Audio (H) buttons on top of the feeder must be 5.
pressed and held for 2 seconds.
The Blue LED (N) on the Schedule button (G), the middle button on top, will blink 3 6.
times to let you know that it's unlocked. You can then use the buttons for their their
normal functions.
The feeder will automatically re-lock once there has been 20 seconds of non-activity 7.
of the Feed (F), Schedule (G) and Audio (H) buttons.

RECORDING A PERSONAL GREETING
13
Your Feed and Go lets you record a personal greeting that will be played every time your
pet gets fed. The same greeting will be played if you just want to call your pet over without
feeding him.
HOW TO RECORD A PERSONAL GREETING
1. Make sure your Feed and Go device is plugged in.
2. Make sure that your feeder is unlocked by following the instructions on page 12.
3. Press and hold the Audio button (H).
4. Speak clearly into the Microphone (S). Your personal greeting can be up to 6 seconds
in length.
5. Release the Audio button (H) once you are done.
6. You can test your message by pressing the Audio button (H).
7. If you want to change your message at any time then just repeat steps 1-6 above.
Congratulations, you're now ready to use Feed and Go!

USING YOUR FEED AND GO
ACCESSING AND CONTROLLING YOUR FEEDER
Manage your account profile
Set one off or recurring feeding schedules
Call your pet over by playing the feed message but not actually feeding your pet
Watch your pet via the built in Pet Cam (the coolest part!)
View your pet's feeding history
Now you're Feed and Go device should be physically set up and ready for use. You
will need to register your device so that you can create feeding schedules for your pet
online and then control your Feed and Go from your computer, smartphone or mobile
device. To register your device:
1. www.FeedandGo.com Visit and click on the 'Account' link at the top of the website, or
in the drop down if you're using a smartphone.
Select the 'New User' option.2.
You will then need to enter a few pieces of information such as your email address 3.
and the serial number of your feeder (this can be found by lifting up the back flap of
the device). You'll also be able to select a password and set your notification
preferences too.
Once your feeder is registered you will be able to control it from anywhere you and your
feeder have internet access.
1. www.FeedandGo.com Login to your account at from your computer, smartphone or
mobile device.
Once you're logged in, you can:2.
14

NEED MORE HELP?
© 2013 by Feed and Go™. Feed and Watch Your Pets from Anywhere.
Patent Pending
If for some reason you were not able to set up your Feed and Go device then that's going to
be annoying, we are sorry. We have an FAQ's section you can find on www.FeedandGo.com.
If that doesn't help then email us at customer[email protected] and we will get in
touch with you by email or phone to resolve your issue.
/