Page is loading ...

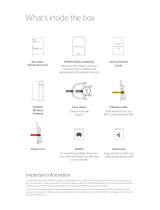
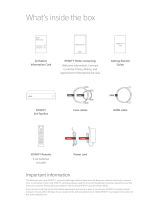
xFi Advanced Gateway
Coax cable Power cord Ethernet cable
To connect via Ethernet
instead of WiFi
Let’s see what’s inside
BL_XB6_GSG_SIK_0419.indd 4 1/15/19 2:12 PM

Activate easier with the app
Take the fast lane
The Xnity xFi app will walk you through activation and be your go-to destination
for managing your home network moving forward. Download for free on the App
Store or Google Play. Can’t get the app right now? Skip down to “Activate using this
guide”.
Activate using this guide
1 Place your Gateway
First, choose a central location near a cable outlet for your Gateway, and take
note of your network name (SSID) and password located on the bottom of your
Gateway.
SSID: 1234 - 5678 - 9123
PW: XXXXXXX
Or
Place your xFi Advanced Gateway at least 3 feet from the ground, avoiding
cramped spaces or anything that may block your WiFi signal.
BL_XB6_GSG_SIK_0419.indd 5 1/15/19 2:12 PM

2 Plug in
Connect your coax cable to your xFi Advanced Gateway. Push the connector on to the
port, then turn to engage the threads, and nally nger tighten the connector.* Then,
connect your coax cable to the cable outlet.Next, connect the power cord to the xFi
Advanced Gateway, then into an electrical outlet without a dimmer or wall switch.
For Xnity Voice customers, connect your telephone to the Tel 1 connection on your
Gateway using a telephone cord (not included).
Coax input
Power input
Ethernet port
Tel 1
Coax Power
Your Gateway may take up to 20 minutes to boot up—don’t unplug it. The LED
light on the top of your Gateway will blink green and yellow. Wait until this light
remains solid white for 60 seconds, then you’re ready to move on.
* Comcast has recently introduced a new coax connector that reduces noise on the network
and improves signal quality.
BL_XB6_GSG_SIK_0419.indd 6 1/15/19 2:12 PM

Need help? We’re here.
Watch videos, search FAQs, and more at: xnity.com/selnstall
We speak your language.
For English and Spanish, give us a call at: 1-800-xnity
For Chinese, Korean, Vietnamese, or Tagalog: 1-855-955-2212
3 Connect
Access the WiFi settings on your personal device. Then, select the Network Name
(SSID) from your Gateway noted in Step 1 and join using the password from Step 1.
If you’re asked to enter a PIN, select “Connect Using a Security Key” and enter the
same password from Step 1.
Connect with Ethernet
If you do not have a WiFi-capable device or if you prefer an Ethernet connection,
plug one end of the provided Ethernet cable into an Ethernet port on your Gateway
and the other end into the port on your computer. If this worked, the LEDs next to
the Ethernet ports on your Gateway will light up.
4 Activate
Once connected, if you’re not automatically directed to a setup screen, open a web
browser and go to xnity.com/activate. Follow the steps to verify your account
and set up your WiFi network. After setup is complete, go to WiFi settings on your
device, wait to see your personalized WiFi name listed and join using your password
(you can skip this step if you connected with Ethernet).
If you’re using a Battery Backup, refer to the steps in that guide once your
Gateway is activated.
Xnity Home Customers
After your Gateway is up and running, conrm that your Xnity Home service
is working by completing a Connectivity Test. Just go to your Xnity Home
Touchscreen and select Settings > Advanced Settings > Connectivity. If the
Broadband Connectivity test fails, please re-boot and run the test again. To re-boot
go to Settings > Advanced Settings > Reboot Touchscreen.
Learn more about optimizing your Internet speed at xnity.com/internetsysreq.
BL_XB6_GSG_SIK_0419.indd 7 1/15/19 2:12 PM

Need help? We’re here.
Watch videos, search FAQs, and more at:
xnity.com/selnstall
To learn more about speed visit:
xnity.com/gigsupport
We speak your language
For English and Spanish, give us a call at: 1-800-xfinity
For Chinese, Korean, Vietnamese, or Tagalog: 1-855-955-2212
© 2019 Comcast. All rights reserved.
XB6 GSG SIK 0419
/


