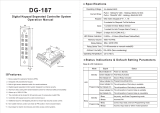
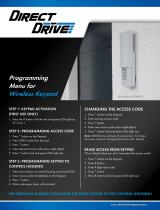
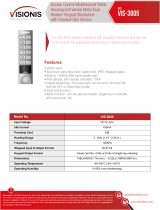
Gianni Industries DG-700 Installation guide

Category
Security access control systems
Type
Installation guide

This manual is also suitable for

Gianni Industries DG-700 is an access control keypad with proximity card reader. It features 2 form C relays, each rated 10A@30VDC, with programmable output time from 1 to 99 seconds or toggle. The keypad can store up to 1,000 user codes and 10 proximity cards for Output #1, and 10 user codes or cards for Output #2. The DG-700 has a built-in tamper contact for added security and can be programmed entirely from the keypad. It is suitable for both surface and flush mounting and has a blue backlit 3x4 keypad for easy nighttime use.

Gianni Industries DG-700 is an access control keypad with proximity card reader. It features 2 form C relays, each rated 10A@30VDC, with programmable output time from 1 to 99 seconds or toggle. The keypad can store up to 1,000 user codes and 10 proximity cards for Output #1, and 10 user codes or cards for Output #2. The DG-700 has a built-in tamper contact for added security and can be programmed entirely from the keypad. It is suitable for both surface and flush mounting and has a blue backlit 3x4 keypad for easy nighttime use.

Access Touch Keypad
Split Series
with Proximity Card Reader
Installation & Programming
Manual
Split controller prevents magnetic interference
Please read the manual carefully before use this unit
with the access control unit to prevent
unauthorized entry into the building
Model
DG-700
DG-760
DG-770TP
EM 125KHz
EM 125KHz
EM 125KHz
Tactile Keys
Tactile Keys
Touch Panel
Keypad
Technology
Mount
Single Gang
Mullion
Single Gang
Poly Nameplate
Poly Nameplate
Red LED
Multi-Colored
3 LEDs
Indicator
Logo/
Trademark
Light
LED
Multi-Colored
LED
Display
Proximity
Proximity
Proximity
DG-350
EM 125KHz
Tactile Keys
Single Gang
Poly Nameplate
Proximity
3 LEDs
Surface/Flush
Surface
Surface
Surface
• Accept power from a 12 or 24 Volt AC/DC supply
• Up to 1,000 user codes (000~999) programmable for output#1 and 10 (00~09) for output#2
• 2 Form C relays, each rated 10A@30VDC
• Each relay has programmable output time from 1~99 seconds or toggle
• Output #2 can be programmed for use with a door bell
• 2 Egress inputs for exiting the premises without keying in the code
• Split controller installation protects the keypad access from magnet tampering
• Tactile key feel and blue backlit 3×4 keypad for easy nighttime use (For DG-700/760)
• All features are programmed entirely from the keypad.
• Non-volatile EEPROM protects codes and instructions in case of power loss
• Tamper contact for added security (N.C. Dry contact, 100mA@12VDC max.)
• High strength design, epoxy potted, fully sealed within a zinc alloy housing
• Built-in RFID proximity reader
Features
Specifications
Current draw
12~24 VAC/VDC
Audible Indicators
Audible Tone
1 Long tone
1 Short tone
3 short tone
Keypad Status
Confirmation
Key press
User code denied
6 short + 1 long tone All user codes deleted
Copyright © All rights reserved. P-MU-DG-7Series Published 2019.06.13
DG-700
12VDC
24VDC
50mA
30mA
103mA
56mA
50mA
30mA
DG-760
12VDC
24VDC
50mA
DG-770TP
12VDC
24VDC 18mA
DG-350
12VDC
24VDC
50mA
Operating Voltage
Relay
Outputs
Egress
Inputs
Operating Temperature
Proximity reader frequency
Proximity reader distance
Total max. current draw
N.O. Ground
N.O. Ground
-4°~122°F (-20°~50°C)
125kHz
1.2” (3cm)
10mA@30VDC, Form C, NO/NC/COM
Model
Voltage Holding Pull in
Keypad
Light On
30mA
27mA
30mA
41mA
26mA
26mA
16mA
95mA
50mA
95mA
50mA
95mA
50mA
39mA
25mA
Dimensions
2 15/16” (76mm)
4 3/4”(120mm)
DG-770TP
DG-760
5 15/16”(151.5mm)
(22.7mm)
7/8”
1
3/4”
(45mm)
2 3/4” (69.5mm)
1/8” (60.3mm)
1/4”
(6mm)
DG-700
2 3/4” (69.5mm)
1/8” (60.3mm)
1/4”
(6mm)
(22.8mm)
7/8”
3 1/16” (78.5mm)
4 13/16”(122.8mm)
Copyright © All rights reserved. P-MU-DG-7Series Published 2019.06.13
LED Indicators
LED
Steady Amber Programming Mode
Keypad Status
Flashing Amber
Waiting to programming entry
Steady Green (Also flashing amber: DG-770TP)
Waiting to program card/code
Steady Red (Also flashing amber: DG-770TP)
Card/Code already present
Steady Green
Relay 1 activated
Steady Red Relay 2 activated
Flashing Amber (6 flashes, for DG-770TP) Reconnect power
2 3/4” (69.5mm)
1/8” (60.3mm)
1/4”
(6mm)
DG-350
2 3/4” (69.5mm)
1/8” (60.3mm)
1/4”
(6mm)
4 3/4”(120mm)
(46.2mm)
1 13/16”
2
15/16”
(74mm)
Extra Power Input
to Emergency Light
(12/24 VAC/DC)
12VDC
(Max Current 100mA )
TAMP (-)
TAMP (+)
Emergency Light
Relay
NC
COM
V+
NO
Model: CPT-710
Sample wiring and applications
Black Wire Cable
Power Supply
Unit
12 VDC
12~24V Black Red Yellow Green
Relay 1
Relay 2
INPUT
AC/DC
To Keypad
To Keypad
Electric Lock 2
Fail-safe Mode
Power Supply Unit
12VDC
Exit Button 2
Electric Lock 1
Fail-secure Mode
Power Supply Unit
12VDC
Exit Button1
REED
Door Closed = N.O.
Door Open = N.C.
Tamp(-)
(Anti-tamper alarm function is
triggered at the same time)
Varistor
Diode
Programming Instructions
1. Codes are programmed to be 4~6 digits in length. All codes must be the same length.
2. Before inputting any of the following, enter Programming Mode by entering the Master Code twice.
The default master code is 1234.
To enter Programming Mode, enter 1 2 3 4 1 2 3 4
3. To exit Programming Model, press the # key.
4. The keypad will exit Programming Mode if no keys are pressed for 30 seconds.
Programming Tips
• Program a new Master Code immediately.
• Take note of the keypad status LED –
Right LED Solid Amber: Programming Mode
Middle LED Solid Green / Right LED Flashing Amber: Awaiting code/card entry
• If you are unsure of which mode the keypad is in, press # until the right LED is off. The keypad is now in
the Standby Mode. Enter the master code twice to return to Programming Mode..
Copyright © All rights reserved. P-MU-DG-7Series Published 2019.06.13
D. Program the Master Card
In addition to a Master Code, a Master Card can also be programmed. Swiping
a Master Card will give direct access to Programming Mode.
1. Enter Programming Mode by entering the Master Code twice. (Default Master Code
is 1234).
2. On the keypad, enter 7 .
3. If the middle LED is solid green and the right LED is flashing amber, a Master card is
already programmed. Clear it by entering . The keypad will beep in
confirmation, the middle LED will start flashing green and the right LED will start
flashing amber.
4. Swipe a proximity card. This card is now the Master Card.
5. Exit Programming Mode by pressing # .
First Time Keypad Use
Take these steps the first time the keypad is programmed.
A. Enter Programming Mode
Enter 1 2 3 4 1 2 3 4 (Default Master Code is 1234)
B. Program Code Length
NOTE: To keep the default 4-digit code length, skip to step C, Program the Master Code.
WARNING: After a new code length is programmed, all user codes will be deleted and the master code will be reset.
1. Enter Programming Mode by entering the Master Code twice. (Default Master Code is 1234).
2. Enter 9 0 4
3. Enter the desire code length. This must be a number from 4~6.
4. Exit Programming Mode by pressing # .
The Master Code will reset depending on the programmed code length. These will be the new Master Codes
after the code length is reset:
Code Length
4 digits
5 digits
6 digits
New Master Code
1234
12345
123456
C. Program the Master Code
1. Enter Programming Mode by entering the Master Code twice. (Default Master Code is 1234).
2. Enter 3
3. Enter the new Master Code twice. The Master Code may not be the same as a user code.
Example: If the desired new Master Code is 4321, enter 4 3 2 1 4 3 2 1
4. Exit Programming Mode by pressing # .
Copyright © All rights reserved. P-MU-DG-7Series Published 2019.06.13
Setting the Output #1 Access Mode
DEFAULT: User card OR user code.
1. Enter Programming Mode by entering the Master Code twice.
2. On the keypad, enter .
3. Enter one of the following:
User card only
Either user card or user code (DEFAULT)
Use card and user code
NOTE: Deleting all users is recommended before changing the access mode to user card
with user code.
4. Exit Programming Mode by pressing .
E.
0
0 0
0 1
0 2
Programming Output #1:
Each Output #1 user can be programmed to have a user card, a user cord, or both user card and code.
NOTE: For all of the following programming functions, the keypad must be in Programming
Mode. To enter Programming Mode, enter the Master Code twice.
A. Program User Cards
1. Enter a user ID number ( to )
2. If the left LED is red, previous user data exists. Clear it by entering . The keypad
will beep in confirmation and the middle LED will turn green.
3. Swipe a new user card.
4. To program the next user, repeat from step 1 in section A, B or C.
5. Exit Programming Mode by pressing .
0
0 0 9 9 9
B. Program User Codes
1. Enter a user ID number ( to )
2. If the left LED is red, previous user data exists. Clear it by entering . The keypad will beep in confirmation
and the middle LED will turn green.
3. Enter a new user code.
4. To program the next user, repeat from step 1 in section A, B or C.
5. Exit Programming Mode by pressing .
0
0 0 9 9 9
C. Program Both User Cards and Codes
1. Enter a user ID number ( to )
2. If the left LED is red, previous user data exists. Clear it by entering . The keypad
will beep in confirmation and the middle LED will turn green.
3. Swipe a new user card.
4. Enter a new user code.
5. To program the next user, repeat from step 1 in section A, B or C.
6. Exit Programming Mode by pressing .
0
0 0 9 9 9
Programming Output #2:
Each Output #2 user may only have a user card or a user code programmed.
NOTE: For all of the following programming functions, the keypad must be in Programming
Mode. To enter Programming Mode, enter the Master Code twice.
A. Programming an Output #2 User Card
1. Enter .
2. Enter a user ID number ( to )
3. If the left LED is red, previous user data exists. Clear it by entering . . The keypad will
beep in confirmation and the middle LED will turn green.
4. Swipe a new user card.
5. To program the next user, repeat from step 2 in section A or B.
6. Return to Programming Mode by pressing .
7. Exit Programming Mode by pressing # again.
B. Programming an Output #2 User Code
1. Enter .
2. Enter a user ID number ( to )
3. If the left LED is red, previous user data exists. Clear it by entering . The keypad will
beep in confirmation and the middle LED will turn green.
4. Enter a new user code.
5. To program the next user, repeat from step 2 in section A or B.
6. Return to Programming Mode by pressing .
7. Exit Programming Mode by pressing # again.
Deleting or changing users and cards:
Deleting or Changing the Master Card
Step 1 Enter:
Step 2 Delete the existing Master Card by entering:
Step 3 Swipe a new Master Card or Exit Programming Mode by entering .
Deleting or Changing an Output #1 User:
Step 1 Enter a user ID number: to
Step 2 Delete existing user by entering:
Step 3 Swipe a new user card or Enter a new user code X or Return to
Programming Mode by entering .
Deleting or Changing an Output #2 User:
Step 1 Enter:
Step 2 Enter a user ID number: to
Step 2 Delete existing user by entering:
Step 3 Swipe a new user card or Enter a new user code or Return to
Programming Mode by entering .
Copyright © All rights reserved. P-MU-DG-7Series Published 2019.06.13
Using the Keypad:
Using a User Card with a User Code
• If Output #1 is programmed to accept a user card with a user code, swipe the user card.
Immediately enter the user code. This may be done in reverse order.
4
0 0 0 9
4
0 0 0 9
7
0 0 0 9 9 9
X X X
4
0 0 0 9
X X X X
Wrong Code Lockout
• If a wrong code is entered or an invalid card is swiped 5 consecutive times, the keypad will
go into lockout for 1 minute. During this time, no codes can be entered and no card can be swiped.
(For DG-350 and DG-770TP, the keypad sounds 3 beeps and red LED flashes 3 times)
• Pushing buttons or swiping cards during lockout will extend the lockout time.
• When the keypad is reset to factory default state, keypad light flashes once for code re-entry.
(For DG-350 and DG-770TP)
Copyright © All rights reserved. P-MU-DG-7Series Published 2019.06.13
Additional Progrmming:
Programming the Output# 1 Timer
DEFAULT: 1 second
Step 1 Enter:
Step 2 For toggle mode, enter or for timed output, enter to
01 to 99 is the number of seconds Output #1 will actovate
Programming the Output# 2 Timer
DEFAULT: 1 second
Step 1 Enter:
Step 2 For toggle mode, enter or for timed output, enter to
01 to 99 is the number of seconds Output #1 will activate
Programming the Output# 2 Function
Output #2 can be activated via * or through user codes. Use the following steps to program
its function.
DEFAULT: User Codes
Step 1 Enter:
Step 2 For user codes, enter or for door bell, enter
When output #2 is programmed for doorbell, press to activate doorbell. Doorbell output
lasts 1 second.
RESETTING THE KEYPAD:
NOTE: Resstting the keypad will cause some or all programmed data to be lost. Do not
perform either of these steps unless it is absolutely necessary.
Deleting All Users: Enter
IMPORTANT: Once key entry is made, all user cards and user codes will be deleted and the
keypad will return to Programming Mode. The Master Code and all other programming
settings will remain the same.
Restore Factory Settings: Enter
IMPORTANT: Once key entry is made, keypad will return to factory default settings. No user
information will be retained and the Master Code will be 1234.
MANUALLY RESETTING THE MASTER CODE:
If the Master Code has been forgotten or does no work, the following steps can be taken to
reset the Master Code:
1. Disconnect power from the keypad.
2. Press the key continuously and connect power again.
3. The keypad will beep to confirm a successful reset.
Note: Manually resetting the Master Code will only reset the Master Code. It will not affect
the Master Card, User Code or any other saved data.
1
0 0
0 1
9 9
5
00
1
0
9
9
2
1
0
2
0
8
8 8
8 9 9
  • Page 1 1
  • Page 2 2
  • Page 3 3
  • Page 4 4
  • Page 5 5
  • Page 6 6
  • Page 7 7
  • Page 8 8

Gianni Industries DG-700 Installation guide

Category
Security access control systems
Type
Installation guide
This manual is also suitable for

Gianni Industries DG-700 is an access control keypad with proximity card reader. It features 2 form C relays, each rated 10A@30VDC, with programmable output time from 1 to 99 seconds or toggle. The keypad can store up to 1,000 user codes and 10 proximity cards for Output #1, and 10 user codes or cards for Output #2. The DG-700 has a built-in tamper contact for added security and can be programmed entirely from the keypad. It is suitable for both surface and flush mounting and has a blue backlit 3x4 keypad for easy nighttime use.

Ask a question and I''ll find the answer in the document

Finding information in a document is now easier with AI