Page is loading ...

H3C S12500 Routing Switch Series
Installation Guide
Hangzhou H3C Technologies Co., Ltd.
http://www.h3c.com
Document version: 6PW112-20110713

Copyright © 2008-2011, Hangzhou H3C Technologies Co., Ltd. and its licensors
All rights reserved
No part of this manual may be reproduced or transmitted in any form or by any means without prior
written consent of Hangzhou H3C Technologies Co., Ltd.
Trademarks
H3C,
, Aolynk, , H
3
Care,
, TOP G, , IRF, NetPilot, Neocean, NeoVTL,
SecPro, SecPoint, SecEngine, SecPath, Comware, Secware, Storware, NQA, VVG, V
2
G, V
n
G, PSPT,
XGbus, N-Bus, TiGem, InnoVision and HUASAN are trademarks of Hangzhou H3C Technologies Co.,
Ltd.
All other trademarks that may be mentioned in this manual are the property of their respective owners
Notice
The information in this document is subject to change without notice. Every effort has been made in the
preparation of this document to ensure accuracy of the contents, but all statements, information, and
recommendations in this document do not constitute the warranty of any kind, express or implied.
Environmental protection
This product has been designed to comply with the environmental protection requirements. The storage,
use, and disposal of this product must meet the applicable national laws and regulations.

Preface
The H3C S12500 Routing Switch Series Installation Guide describes how to install the H3C S12500
switches.
This preface includes:
• Audience
• Conventions
• About the H3C S12500 documentation set
• Obtaining documentation
• Technical support
• Documentation feedback
Audience
This documentation is intended for:
• Network planners
• Field technical support and servicing engineers
• Network administrators working with the S12500 switches
Conventions
This section describes the conventions used in this documentation set.
Command conventions
Convention Description
Boldface Bold text represents commands and keywords that you enter literally as shown.
Italic Italic text represents arguments that you replace with actual values.
[ ] Square brackets enclose syntax choices (keywords or arguments) that are optional.
{ x | y | ... }
Braces enclose a set of required syntax choices separated by vertical bars, from which
you select one.
[ x | y | ... ]
Square brackets enclose a set of optional syntax choices separated by vertical bars, from
which you select one or none.
{ x | y | ... } *
Asterisk marked braces enclose a set of required syntax choices separated by vertical
bars, from which you select at least one.
[ x | y | ... ] *
Asterisk marked square brackets enclose optional syntax choices separated by vertical
bars, from which you select one choice, multiple choices, or none.
&<1-n>
The argument or keyword and argument combination before the ampersand (&) sign can
be entered 1 to n times.
# A line that starts with a pound (#) sign is comments.

GUI conventions
Convention Description
Boldface
Window names, button names, field names, and menu items are in Boldface. For
example, the New User window appears; click OK.
> Multi-level menus are separated by angle brackets. For example, File > Create > Folder.
Symbols
Convention Description
WARNING
An alert that calls attention to important information that if not understood or followed can
result in personal injury.
CAUTION
An alert that calls attention to important information that if not understood or followed can
result in data loss, data corruption, or damage to hardware or software.
IMPORTANT
An alert that calls attention to essential information.
NOTE
An alert that contains additional or supplementary information.
TIP
An alert that provides helpful information.
Network topology icons
Represents a generic network device, such as a router, switch, or firewall.
Represents a routing-capable device, such as a router or Layer 3 switch.
Represents a generic switch, such as a Layer 2 or Layer 3 switch, or a router that supports
Layer 2 forwarding and other Layer 2 features.
Port numbering in examples
The port numbers in this document are for illustration only and might be unavailable on your device.
About the H3C S12500 documentation set
The H3C S12500 documentation set includes:
Category Documents Purposes
Marketing brochures Describe product specifications and benefits.
Technology white papers
Provide an in-depth description of software features
and technologies.
Product description and
specifications
Card datasheets
Describe card specifications, features, and
standards.

Category Documents Purposes
Regulatory compliance
and safety information
Provides regulatory information and the safety
instructions that must be followed during installation.
Installation guide
Provides a complete guide to hardware installation
and hardware specifications.
H3C N68 Cabinet
Installation and Remodel
Introduction
Guides you through installing and remodeling H3C
N68 cabinets.
H3C Pluggable SFP
[SFP+][XFP] Transceiver
Modules Installation
Guide
Guides you through installing SFP/SFP+/XFP
transceiver modules.
Adjustable Slider Rail
Installation Guide
Guides you through installing adjustable slider rails
to a rack.
Hardware specifications
and installation
H3C High-End Network
Products Hot-Swappable
Module Manual
Describes the hot-swappable modules available for
the H3C high-end network products, their external
views, and specifications.
Configuration guides
Describe software features and configuration
procedures.
Command references
Provide a quick reference to all available
commands.
Software configuration
Configuration examples
Describe typical network scenarios and provide
configuration examples and instructions.
System log messages Explains the system log messages.
Trap messages Explains the trap messages.
MIB Companion Describes the MIBs for the software release.
Operations and
maintenance
Release notes
Provide information about the product release,
including the version history, hardware and software
compatibility matrix, version upgrade information,
technical support information, and software
upgrading.
Obtaining documentation
You can access the most up-to-date H3C product documentation on the World Wide Web at
http://www.h3c.com
.
Click the links on the top navigation bar to obtain different categories of product documentation:
[Technical Support & Documents > Tech
nical Documents] – Provides hardware installation, software
upgrading, and software feature configuration and maintenance documentation.
[Products & Solutions]
– Provides information about products and technologies, as well as solutions.
[Technical Support & Documents > Software Download]
– Provides the documentation released with the
software version.

Technical support
customer_service@h3c.com
http://www.h3c.com
Documentation feedback
You can e-mail your comments about product documentation to [email protected].
We appreciate your comments.

i
Contents
Product overview··························································································································································1
About the H3C S12500 Routing Switch Series·············································································································1
Physical architecture ·························································································································································2
Backplane ··········································································································································································7
Fan tray ··············································································································································································7
Power supply system······················································································································································ 11
AC power supply ·················································································································································· 11
DC power supply··················································································································································· 14
Preparing for installation ···········································································································································17
Safety recommendations ··············································································································································· 17
General safety recommendations························································································································ 17
Safety with electricity ············································································································································ 17
ESD prevention ······················································································································································ 18
Safety with switch moving···································································································································· 18
Safety with laser ···················································································································································· 19
Examining the installation site ······································································································································ 19
Weight support requirements······························································································································· 19
Temperature requirements ···································································································································· 19
Humidity requirements ·········································································································································· 20
Cleanness requirements········································································································································ 20
EMI requirements··················································································································································· 21
Grounding requirements······································································································································· 21
Power supply requirements··································································································································· 21
Space requirements··············································································································································· 21
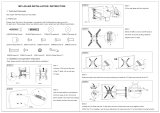
Rack-mounting requirements ········································································································································· 22
Installation tools······························································································································································ 23
Installing the switch····················································································································································25
Installation flow ······························································································································································ 26
Check before installation··············································································································································· 26
Installing the switch in a rack········································································································································ 26
Installation preparation········································································································································· 27
Installing slide rails and cage nuts to the rack ··································································································· 27
Installing the mounting brackets··························································································································· 29
Installing an air deflector (optional) ···················································································································· 30
Installing a chassis air filter (optional)················································································································· 31
Mounting the switch in the rack··························································································································· 33
Verifying the installation ······································································································································· 34
Installing the switch on a workbench··························································································································· 34
Installation preparation········································································································································· 34
Installation procedures·········································································································································· 34
Grounding the switch ···················································································································································· 36
Installing the power system ··········································································································································· 37
Installation preparation········································································································································· 37
Installing a DC power supply······························································································································· 38
Installing an AC power supply····························································································································· 39
Installing a fan tray ························································································································································ 40
Installing a card······························································································································································ 41
Installation preparation········································································································································· 42

ii
Installation procedure············································································································································ 42
Connecting power cords··············································································································································· 43
Prerequisites ··························································································································································· 44
Connecting an AC power cord ··························································································································· 44
Connecting a DC power cord······························································································································ 45
Verifying the installation················································································································································ 47
Connecting the switch to the network·······················································································································49
Logging in to the switch················································································································································· 49
Connecting the console cable······························································································································ 49
Setting up a configuration environment·············································································································· 51
Powering on the switch········································································································································· 54
Verification (recommended) ································································································································· 56
Connecting the switch to the network ·························································································································· 57
Connecting the switch to the network through the AUX port············································································ 57
Connecting the switch to the network through a copper Ethernet port ··························································· 58
Connecting the switch to the network through a fiber Ethernet port································································ 58
Cable routing recommendations ·································································································································· 61
Hardware management·············································································································································63
Displaying the electrical label information of your switch························································································· 63
Displaying the card information of your switch·········································································································· 64
Rebooting your switch ··················································································································································· 66
Managing the power supply system ···························································································································· 67
Displaying the electrical label information of the power monitoring module················································· 67
Enabling power supply management·················································································································· 67
Configuring the number of redundant power supplies······················································································ 68
Manually starting or stopping power supply to a card····················································································· 68
Allocating IDs for AC power supplies················································································································· 69
Displaying the power supply system information of your switch ····································································· 71
Configuring temperature alarm thresholds for a card································································································ 76
Configuring temperature alarm thresholds for a card······················································································· 76
Displaying the temperature information of your switch····················································································· 77
Isolating a card and locating card faults····················································································································· 78
Configuring in-service hardware failure diagnosis and failure protection ······························································ 79
Displaying the operating state of fans························································································································· 81
Displaying the alarming information of a card··········································································································· 82
Displaying transceiver information and alarming information·················································································· 83
Introduction to transceivers··································································································································· 83
Displaying transceiver information······················································································································ 83
Displaying the alarming information or fault detection parameters of a transceiver····································· 85
Troubleshooting··························································································································································88
Configuration terminal problems·································································································································· 88
No terminal display ·············································································································································· 88
Garbled terminal display······································································································································ 88
Power supply system failure·········································································································································· 89
Power monitoring module····································································································································· 89
Power supplies······················································································································································· 89
Fan failure······································································································································································· 91
MPU failure····································································································································································· 91
LPU failure······································································································································································· 92
Switching fabric module failure··························································································································· 92
Interface failure······························································································································································· 93
Technical support ··························································································································································· 94

iii
Replacement procedures ···········································································································································95
Removing, cleaning, and installing the air filters········································································································ 95
Removing, cleaning, and installing the chassis air filters·················································································· 95
Removing, cleaning, and installing a power supply air filter··········································································· 97
Replacing a power supply ············································································································································ 98
Preparing for the replacement ····························································································································· 98
Replacing a power supply···································································································································· 98
Replacing a PEM (applicable to only an AC power supply)············································································ 99
Replacing a card··························································································································································100
Preparing for the replacement ···························································································································100
Replacement procedure······································································································································101
Replacing a fan tray ····················································································································································102
Preparing for the replacement ···························································································································102
Replacement procedure······································································································································103
Replacing a CF card····················································································································································103
Replacing a transceiver module ·································································································································105
Regulatory Compliance and Safety Information··································································································· 107
Regulatory Compliance Information···························································································································107
Regulatory Compliance Standards····················································································································107
European Directives Compliance·······················································································································108
USA Regulatory Compliance ·····························································································································108
Canada Regulatory Compliance ·······················································································································109
Japan Regulatory Compliance···························································································································109
CISPR 22 Compliance ········································································································································109
Safety Information Sicherheits informationen安全信息····························································································109
Overview Überblick 概述 ···································································································································109
Electricity Safety Elektrische Sicherheit 用电安全 ····························································································113
Lithium Battery Lithiumbatterie 锂电池···············································································································115
Fuse Sicherung保险丝·········································································································································116
Laser Laser激光辐射············································································································································116
Appendix A Technical specifications ··················································································································· 117
Environment requirements ···········································································································································117
Power consumption/weight/dimensions···················································································································117
Switches································································································································································117
Cards ····································································································································································118
Fan trays·······························································································································································119
Power components ··············································································································································119
Switch ordering guide ·················································································································································120
Card ordering guide····················································································································································120
MPUs·····································································································································································122
Switching fabric modules ···································································································································122
Ethernet interface card specifications················································································································123
OAA cards···························································································································································123
Power components ordering guide ····························································································································124
Appendix B LEDs···················································································································································· 129
Power system LEDs ·······················································································································································129
Monitoring module LEDs·····································································································································129
Power supply LEDs ··············································································································································129
Fan LEDs········································································································································································130
MPU LEDs······································································································································································131
CF card status LED···············································································································································131
Network management port LEDs ·······················································································································131

iv
Switching fabric module LED ·····························································································································132
LPU status LED ······················································································································································132
Fan status LED ······················································································································································132
Power status LED··················································································································································132
MPU LEDs ·····························································································································································133
Line card LEDs ······························································································································································133
Interface LEDs·······················································································································································133
RUN LED·······························································································································································134
Switching fabric module LEDs·····································································································································134
Appendix C Transceiver modules························································································································· 136
10-GE XFP transceiver modules··································································································································136
10-GE SFP+ transceiver modules ·······························································································································137
10-GE SFP+ cables ······················································································································································137
100/1000 Mbps SFP transceiver modules···············································································································137
Appendix D Lightning protection of the switch···································································································· 139
Installation of lightning arrester for AC power (socket strip with lightning protection) ········································139
Installation of lightning arrester for network port······································································································140
Appendix E Cable management ·························································································································· 142
Correct use of labels····················································································································································142
Cable management requirements ······························································································································142
Appendix F Engineering labels for cables··········································································································· 145
Introduction to labels ···················································································································································145
Material································································································································································145
Type and shape···················································································································································145
Printing labels ······················································································································································147
Writing labels ······················································································································································148
Affixing labels······················································································································································149
Information carried on labels·····························································································································151
Remarks ································································································································································152
Engineering labels for Ethernet cables·······················································································································152
Engineering labels for optical fibers ··························································································································153
Labels for the fiber that connects two devices··································································································153
Labels for the fiber that connects the device and the ODF ·············································································154
Engineering labels for power cables ·························································································································155
Labels for DC power cables·······························································································································156
Labels for AC power cables·······························································································································157
Index ········································································································································································ 159

1
Product overview
This chapter includes these sections:
• About the H3C S12500 Routing Switch Series
• Physical architecture
• Backplane
• Fan tray
• Power supply system
About the H3C S12500 Routing Switch Series
The H3C S12500 Routing Switch Series is a line of 100G new-generation core/data center switching
platforms. You can deploy the series at the core layer and distribution layer of large-scale data centers,
enterprise networks, campus networks, large-sized clusters, and grid computing networks.
The H3C S12500 Routing Switch Series delivers the following benefits:
• Advanced multi-level, multi-plane, non-blocking CLOS switching architecture.
• Ultra-high port density and a variety of interfaces, including 10-GE XFP fiber (optical) ports, 10-GE
SFP+ fiber ports, 100/1000 Mbps SFP fiber ports, and GE RJ-45 copper (electrical) ports.
• Distributed ingress cache technology enables good accommodation of bursts in data center
networks and high-performance computing networks.
• Innovative H3C Intelligent Resilient Framework 2 (IRF2) technology enables multiple connected
S12500 switches to be managed as a single logical switch, increasing network resilience,
availability and performance while also reducing network complexity.
• Independent control engines, detection engines, and maintenance engines offer powerful control
capability and high reliability.
• Support for the open application architecture (OAA) cards that provide value-added services such
as intrusion prevention, firewall, NetStream, load balancing, and application control gateway.
Table 1 S12500 models
Model MPU slots Line card slots Switching fabric module slots
S12508-AC 2 8 9
S12508-DC 2 8 9
S12518-AC 2 18 9
S12518-DC 2 18 9

2
NOTE:
• The “AC” suffix in a chassis model represents AC powered and the “DC” suffix in a chassis model
represents DC powered.
• The line card slots are for both Ethernet interface cards and OAA cards. For card specifications, see
“Appendix A Hardware specifications.”
• Unless otherwise stated, the configuration and installation procedures in this document apply to all
S12500 switches.
Physical architecture
NOTE:
• The DC-powered model and the AC-powered model of a chassis look the same.
• The diagrams in this guide are for illustration only.

3
S12508 chassis views
Figure 1 S12508 front view
(1) Power frame cover (2) Upper cabling rack (3) MPU slots (slots 0 and 1)
(4) Lower cabling rack (5) System air intake vents (6) ESD-preventive wrist strap port
(7) Line card slots (slots 2 to 9)
NOTE:
The power frame cover protects the power supply air filter and the power frame slot. See “Power supply
system.”

4
Figure 2 S12508 rear view
1
2
3
4
5
6
7
8
9
(1) Power entry module (PEM) (2) Upper fan tray
(3) Lower fan tray (4) Ventilation panel
(5) Grounding screw (6) ESD-preventive wrist strap port
(7) Switching fabric module slots (slots 10 to 18) (8) System air exhaust vents
(9) Power air exhaust vents
The S12508 chassis has the following slots and components:
• Two MPU slots and eight line card slots at the front, and nine switching fabric module slots at the
rear.
• One power frame, at the top of the chassis, can accommodate up to six power supplies.
• Two horizontally oriented fan trays at the rear of the chassis. For the ventilation inside the chassis,
see Figure 7.

5
S12518 chassis views
Figure 3 Front view of the S12518
(1) Power frame cover (2) Upper cabling rack (3) MPU slots (slots 0 and 1)
(4) Line card slots (slots 2 to 19) (5) Lower cabling rack (6) System air intake vents
(7) ESD-preventive wrist strap port

6
Figure 4 S12518 rear view
1
2
3
4
5
6
7
8
9
(1) Power entry module (PEM) (2) Upper fan tray
(3) Switching fabric module slots (slots 20 to 28) (4) Lower fan tray
(5) Ventilation panel (6) Grounding screw
(7) ESD-preventive wrist strap port (8) System air exhaust vents
(9) Power air exhaust vents
The S12518 chassis has the following slots and components:

7
• Two MPU slots and 18 line card slots at the front, and nine switching fabric module slots at the rear.
• Two power frames at the top, and each power frame can accommodate up to six power supplies.
• Two horizontally oriented fan trays at the rear. For the ventilation inside the chassis, see Figure 7.
Backplane
The backplane of an S12500 switch is located inside the chassis. It provides high-speed data switching
between switching fabric modules and line cards, and exchanges management and control signals
between MPUs and line cards/switching fabric modules. The backplane provides the following
capabilities:
• Provides communication channels for signal exchange between cards.
• Supports hot-swapping of cards.
• Identifies card type.
• Supplies power to MPUs, line cards, switching fabric modules, fan trays, and power supplies when
connected to the power frame.
• Provides monitoring channels to monitor power supply status.
Fan tray
A fan tray contains fan units. The dimension of each fan unit is 120 × 120 × 38 mm (4.72 × 4.72 ×1.50
in).
Both the S12508 and the S12518 use an upper fan tray at the top and a lower fan tray at the bottom.
Each fan tray comprises 12 fan units and one fan monitoring board.
S12500 fan trays provide the following functions:
• Effective heat dissipation and single-point of failure protection.
• Status monitoring, including fan rotation speed monitoring and fault alarming.
• Fan speed can be controlled by the MPU or automatically adjusted based on temperature. The
S12508 and S12518 have four groups of fans. Speed adjustment is done on a per-group basis to
decrease noise and improve energy efficiency.
• Each fan tray has two LEDs on the front panel to show its operating status.
• Hot swappable. The fans receive DC power from the backplane, and are hot swappable.
CAUTION:
The S12508 and S12518 use different fan trays, and do not support the intermixing of fan trays.
Figure 5 shows the S12508 fan tray. The physical view of the S12518 fan tray is similar.

8
Figure 5 S12508 fan tray
Table 2 Description of fan LEDs
LED Color Status Description
Off
The fan tray has failed.
RUN Green
Flashing
The fan tray is operating normally.
Off
The fan tray is in a normal state.
Flashing
The fan tray is faulty.
ALM Red
On The fan tray is faulty.
Figure 6 and Figure 7 show the ventilation inside the chassis of the S12508 and S12518.

9
Figure 6 Ventilation inside an S12508 chassis
1
1
2
3
3
4
1
(1) System air intake direction (2) System air exhaust direction
(3) Power supply air intake direction (4) Power supply air exhaust direction

10
Figure 7 Ventilation inside an S12518 chassis
1
1
1
3
3
2
4
(1) System air intake direction (2) System air exhaust direction
(3) Power supply air intake direction (4) Power supply air exhaust direction
/