Page is loading ...

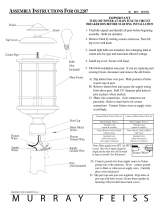
POST MOUNT INSTALLATION INSTRUCTIONS
1) TURN OFF POWER.
IMPORTANT: Before you start, NEVER attempt any work without
shutting off the electricity until the work is done.
a) Go to the main fuse, or circuit breaker, box in your home. Place
the main power switch in the “OFF” position.
b) Unscrew the fuse(s), or switch “OFF” the circuit breaker switch(s),
thatcontrolthepowertothextureorroomthatyouareworkingon.
c) Placethewallswitchinthe“OFF”position.Ifthexturetobe
replaced has a switch or pull chain, place those in the “OFF”
position.
2) Slipxtureoverpostandmarkpositionofmountingholesinpost.
3) Removexturefrompost.
4) Drill 3/16” dia holes in post at positions marked .
5) Ifxtureisprovidedwithgroundwire,connectxturegroundwiretooutlet
boxgroundwirewithwireconnector.(Notprovided).Neverconnect
ground wire to black or white power supply wires.
6) Makewireconnections(connectorsnotprovided).Referencechartbelow
for correct connections and wire accordingly.
7) Slipxtureoverpostandsecureinplaceusingprovidedscrews.Screws
should slip into holes drilled in post.
8) Insert recommended bulb.
9) Lowerglassdownoversocket.Fitbottomofglassinsidecuponxture
base.Carefullyturnglasstosecureglassinplace.(DONOTovertighten.)
10)Setroofdownontopofxture.
11) Threadscrewsdownthroughholesinroofandintoxture.Tighten
screws to secure roof in place.
INSTRUCTIONS D’INSTALLATION AVEC MONTAGE SUR POTEAU
1) COUPER L’ALIMENTATION SECTEUR.
IMPORTANT: TOUJOURScouperl’électricitéavantdecommencerle
travail.
a) Localiser le coffret à fusibles ou le disjoncteur du domicile. Mettre
l’interrupteur principal en position d’Arrêt.
b) Dévisserleoulesfusibles(oumettreledisjoncteursurArrêt)qui
contrôlentl’alimentationversleluminaireoulapiècedanslaquelle
letravailesteffectué.
c) Mettre l’interrupteur mural en position d’Arrêt. Si le luminaire à
remplacer est doté d’un interrupteur ou d’une chaîne connectée à
l‘interrupteur, placer ces éléments en position d’Arrêt.
2) Passerleluminairepardessuslesupportetmarquerunrepèrepourles
trous de montage sur le support.
3) Enleverleluminairedusupport.
4) Percerdestrousde1/8posurchacundesrepèresdusupport.
5) Siluminaireestfourniavecunldemiseàlaterre,leconnecteràlaboîte
desortiedecourantdemiseàlaterreavecunserre-ls(nonfourni).Ne
jamaisconnecterunldemiseàlaterreauxlsd’alimentationnoirou
blanc.
6) Connecterlesls(connecteursnonfournis).Seporterautableau
ci-dessouspourfairelesconnexions.
7) Faireglisserleluminairesurlesupportetxeràl’aidedesvis.Lesvis
doivents’ajustercorrectementdanslestrousdusupport.
8) Installer l’ampoule recommandée.
9) Abaisserleverrepourleplacersurladouille.Placerlapartieinférieure
duverredanslacoupellesurbaseduluminaire.Tournersoigneusement
leverrepourlebloquer.(NEPASserreravecexcès).
10) Placer le toit sur le dessus du luminaire,
11) Visserlesvisàtraverslestrousdansletoitetdanslelumianire.Serrer
lesvispourxerletoitsurlelumianire.
Date Issued: 5/11/12 IS-49478-CB
Connect Black or
Red Supply Wire to:
Connect
White Supply Wire to:
Black White
*Parallel cord (round & smooth) *Parallel cord (square & ridged)
Clear, Brown, Gold or Black
without tracer
Clear, Brown, Gold or Black
with tracer
Insulated wire (other than green)
with copper conductor
Insulated wire (other than green)
with silver conductor
*Note: When parallel wires (SPT I & SPT II)
are used. The neutral wire is square shaped
or ridged and the other wire will be round in
shape or smooth (see illus.)
Neutral Wire
Connecter le fil noir ou
rouge de la boite
Connecter le fil blanc de la boîte
A Noir A Blanc
*Au cordon parallèle (rond et lisse)
*Au cordon parallele (à angles droits el strié)
Au bransparent, doré, marron, ou
noir sans fil distinctif
Au transparent, doré, marron, ou
noir avec un til distinctif
Fil isolé (sauf fil vert) avec
conducteur en cuivre
Fil isolé (sauf fil vert) avec
conducteur en argent
*Remarque: Avec emploi d’un fil paralléle
(SPT I et SPT II). Le fil neutre est á angles
droits ou strié et l’autre fil doit étre rond ou
lisse (Voir le schéma).
Fil Neutre
INSTRUCTIONS
For Assembling and Installing Fixtures in Canada
Pour L’assemblage et L’installation Au Canada
FIXTURE
LUMINAIRE
SCREW
VIS
SCREW
VIS
GLASS
VERRE
ROOF
TOIT
CUP
COUPELLE
SOCKET
DOUILLE

INSTRUCTIONS D’INSTALLATION AVEC MONTAGE SUR PILIER
1) Démonterlacoupelledupoteauduluminaireenenlevantl’écrouetles
rondelles à l’intérieur de la coupelle de montant. (Voir la FIG 1)
2)Enseservantdelasangledemontagedupiliercommegabarit,marquer
la position des trous de montage.
3) Préparer la surface de montage pour le matériel approprié (non fourni) aux
endroitsmarquésaucoursdel’étape2.Fixerlasangledemontagesurà
la surface.
4) Fixerlaplaquedemontagesurlapartieinférieureduluminaireàl’aidede
l’écrou et des rondelles retirés au cours de l’étape 1. (Voir la FIG 2)
5) COUPER L’ALIMENTATION SECTEUR.
IMPORTANT: TOUJOURScouperl’électricitéavantdecommencerle
travail.
a) Localiser le coffret à fusibles ou le disjoncteur du domicile. Mettre
l’interrupteur principal en position d’Arrêt.
b) Dévisserleoulesfusibles(oumettreledisjoncteursurArrêt)qui
contrôlentl’alimentationversleluminaireoulapiècedanslaquelle
letravailesteffectué.
c) Mettre l’interrupteur mural en position d’Arrêt. Si le luminaire à
remplacer est doté d’un interrupteur ou d’une chaîne connectée à
l‘interrupteur, placer ces éléments en position d’Arrêt.
6) Connecterleldemiseàlaterreduluminaireauldemiseàlaterrede
lasourceaveclecapuchondeconnexion(nonfourni).Nejamais
connecterleldeterreauxlsd’alimentationblancsounoirs.
7) Connecterlesls(connecteursnonfournis).Sereporterautableau
ci-dessouspourfairelesconnexions.
8) Placerleluminaireverslebassurlasnagledemontage.Enlerlesvis
dans les trous sur le côté du luminaire et dans la sangle de montage.
Serrerlesvispourxerleluminaireenplace.
9) Installer l’ampoule recommandée.
10)Abaisserleverrepourleplacersurladouille.Placerlapartieinférieure
duverredanslacoupellesurbaseduluminaire.Tournersoigneusement
leverrepourlebloquer.(NEPASserreravecexcès).
11) Placer le toit sur le dessus du luminaire,
12)Visserlesvisàtraverslestrousdansletoitetdanslelumianire.Serrer
lesvispourxerletoitsurlelumianire.
13)Lasurfacedemontagedoitêtrepropre,sèche,plateetde0,6cmplus
épaissequelebasduluminairesurtouslescôtés.Toutécartentrela
surfacedemontageetleluminairedépassantde0,5cmdoitêtrerectié
selon les besoins.
14) À l’aide de matériaux d’étanchéité à la silicone, calfeutrer bien autour où le
basduluminaireentreencontactaveclasurfacedemontagepour
empêcher l’eau de passer dans le compartiment du câblage.
Date Issued: 5/11/12
IS-49478-CB
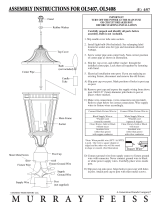
PIER MOUNT INSTALLATION INSTRUCTIONS
1) Disassemblethepostcupfromthexturebyremovinghexnutandwashers
from inside post cup. (See FIG 1)
2) Using pier mount mounting strap as a template mark position of mounting
holes.
3) Preparemountingsurfaceforappropriatehardware(notprovided)at
locations marked in step 2. Attach mounting strap to surface.
4) Attachmountingplatetobottomofxtureusingthehexnutandwashers
from step 1. (See FIG 2)
5) TURN OFF POWER.
IMPORTANT: Before you start, NEVER attempt any work without
shutting off the electricity until the work is done.
a) Go to the main fuse, or circuit breaker, box in your home. Place
the main power switch in the “OFF” position.
b) Unscrew the fuse(s), or switch “OFF” the circuit breaker switch(s),
thatcontrolthepowertothextureorroomthatyouareworkingon.
c) Placethewallswitchinthe“OFF”position.Ifthexturetobe
replaced has a switch or pull chain, place those in the “OFF”
position.
6) Connectxturegroundwiretogroundwirefromsourcewithwireconnector
(notprovided).Neverconnectgroundwiretoblackorwhitepowersupply
wire.
7) Makewireconnections(connectorsnotprovided).Referencechartbelow
for correct connections and wire accordingly.
8) Placexturedownovermountingstrap.Threadscrewsintoholesonside
ofxtureandintomountingstrap.Tightenscrewstosecurextureinplace.
9) Insert recommended bulb.
10)Lowerglassdownoversocket.Fitbottomofglassinsidecuponxture
base.Carefullyturnglasstosecureglassinplace.(DONOTovertighten.)
11) Setroofdownontopofxture.
12)Threadscrewsdownthroughholesinroofandintoxture.Tighten
screws to secure roof in place.
13)Mountingsurfaceshouldbeclean,dry,atand1/4”largerthenthebottom
ofthextureonallsides.Anygapsbetweenthemountingsurfaceandthe
xtureexceeding3/16”shouldbecorrectedasrequired.
14) With silicone caulking compound, caulk completely around where bottom
ofxturemeetsmountingsurfacetopreventwaterfromseepingintowiring
compartment.
Connect Black or
Red Supply Wire to:
Connect
White Supply Wire to:
Black White
*Parallel cord (round & smooth)
*Parallel cord (square & ridged)
Clear, Brown, Gold or Black
without tracer
Clear, Brown, Gold or Black
with tracer
Insulated wire (other than green)
with copper conductor
Insulated wire (other than green)
with silver conductor
*Note: When parallel wires (SPT I & SPT II)
are used. The neutral wire is square shaped
or ridged and the other wire will be round in
shape or smooth (see illus.)
Neutral Wire
SEE OTHER SIDE FOR POST MOUNT INSTALLATION
INSTRUCTIONS
FIG. 1
FIG. 2
POST CUP
COUPELLE DU
POTEAU
HEXNUT
ECROU HEXAGONAL
WASHER
RONDELLE
MOUNTING STRAP
SANGLE DE MONTAGE
MOUNTING PLATE
PLAQUE DE MONTAGE
MOUNTING STRAP
SANGLE DE MONTAGE
MOUNTING PLATE
PLAQUE DE MONTAGE
Connecter le fil noir ou
rouge de la boite
Connecter le fil blanc de la boîte
A Noir A Blanc
*Au cordon parallèle (rond et lisse)
*Au cordon parallele (à angles droits el strié)
Au bransparent, doré, marron, ou
noir sans fil distinctif
Au transparent, doré, marron, ou
noir avec un til distinctif
Fil isolé (sauf fil vert) avec
conducteur en cuivre
Fil isolé (sauf fil vert) avec
conducteur en argent
*Remarque: Avec emploi d’un fil paralléle
(SPT I et SPT II). Le fil neutre est á angles
droits ou strié et l’autre fil doit étre rond ou
lisse (Voir le schéma).
Fil Neutre
FIXTURE
LUMINAIRE
GLASS
VERRE
CUP
COUPELLE
SCREW
VIS
ROOF
TOIT
SOCKET
DOUILLE
/


