Page is loading ...

FP-MK2-2X1
REV00-08302015
1 of 2
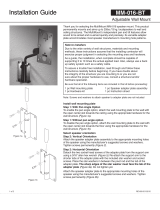
Installation Guide
2X1 Planar Array Kit
Step 1: Remove and discard the screws from the top and bottom of the
speaker that will be used for attaching joiner plate.
Step 2: Install Joiner Plate
Flip the speakers so the bottom is facing up. Position speakers side by
side. Determine the desired splay angle between speakers (Figure 1).
Attach a joiner plate to the bottom side of speakers using the supplied 3/8”
screws and at washers (Figure 2). Do not permanently tighten until all
plates are installed.
Step 3: Slowly ip the speakers so the top is facing up, attach the other
joiner plate to the top with two button head socket screws and at washers
through the joiner plate’s slot and into the inner/top edge rigging holes of
the speaker. Install the two 3/8x2.5” long eyebolts, and at washers on the
designated holes for the selected splay angles. Use the same holes as on
the bottom plate (Figure 2).
The FP-MK2-2X1 planar array kit gives designers, contractors and audio
consultants the ability to join two EAW MK2 Series speakers in a tight
pack or up to 60° splayed congurations. The FP-MK2-2X1 kit allows
the speaker cabinets to be adjusted relative to each other to achieve the
optimum sound directivity. A series of holes with angle indicator marks
are provided to easily adjust the splay angle from tight pack to 60° at an
increment of 2.5° between speakers.
Note to installers
Due to the wide variety of wall structures, materials, mounting and
rigging methods, these instructions assume that the installing contractor
will exercise proper judgment in selecting the mounting, suspension
areas and hardware.
As a guide, the installation, when complete should be capable of
supporting 5 to 10 times the actual applied load. Always use a back up
safety system such as a safety cable.
To assure a trouble free installation, read through and follow these
instructions carefully before beginning. If you have doubts about
the integrity of the structure you are mounting to or you are not
sure about the proper hardware to use, consult a structural and/or
hardware specialist.
Be sure that all of the following items are included in this kit before proceeding:
2 pcs 7-3210 Joiner Plate 2 pcs Eyebolt, 3/8-16x2.5
2 pcs Eyebolt, 3/8-16x1.25 1 pc Hardware kit
1 pc Instruction sheet
Note: Screws and washers to attach speaker to adapter plate are not included
Figure 1
Figure 2

FP-MK2-2X1
ALWAYS INSTALL SAFETY CABLES
WARNING: Mounting and/or suspension loudspeakers requires experienced
professionals. Improperly installed loudspeakers can result in property
damage, personal injury and/or liability to the installing contractor.
Adaptive Technologies Group
1635 E. Burnett Street | Signal Hill, CA 90755 USA
Ph: 562.424.1100 | Fax: 562.424.3520
www.adapttechgroup.com
REV00-08302015
2 of 2
Installation Guide
2X1 Planar Array Kit
Step 4: Install two 3/8x1.25” long eyebolts with at washers to
the lower back rigging points of speakers for pull back attachment
(Figure 2).
Step 5: Use the eyebolts on top of the speakers for primary
suspension points. Use the rear eyebolts for pull back points to
adjust the tilt angle of the cluster. Bridle the two pull back points if
necessary to create a single pull back cable (Figure 3, Figure 4).
Step 6: Tighten all bolts permanently.
Step 7: Check all hardware connections before hoisting cluster.
Figure 3
Figure 4
/