Page is loading ...

INSTALLERS: Please leave this manual with the owner.
Doc. # 400130
®
Indoor Shades
Pocket Single
Installation Instructions
275

2

3
TABLE OF CONTENTS
Parts List � � � � � � � � � � � � � � � � � � � � � � � � � � � � � � � � � � � � � � � � � � � � � � � � � � � � � � � � � � � � � � � � � � � � � � � � � � � � � � � � � � 4
Leveling Shims � � � � � � � � � � � � � � � � � � � � � � � � � � � � � � � � � � � � � � � � � � � � � � � � � � � � � � � � � � � � � � � � � � � � � � � � � � � � �5
275 Pocket Single Shades Installation � � � � � � � � � � � � � � � � � � � � � � � � � � � � � � � � � � � � � � � � � � � � � � � � � � 6 - 8
Side & Sill Channels Installation � � � � � � � � � � � � � � � � � � � � � � � � � � � � � � � � � � � � � � � � � � � � � � � � � � � � � � � � �9 - 13
Pocket Hanger & Flap Closure Installation � � � � � � � � � � � � � � � � � � � � � � � � � � � � � � � � � � � � � � � � � � � � � � � � �14
Wiring - 24v DC - 485 � � � � � � � � � � � � � � � � � � � � � � � � � � � � � � � � � � � � � � � � � � � � � � � � � � � � � � � � � � � � � � � � � 15 - 16
Wiring - 24V DC -Zigbee / RTS and 110v AC - 485 � � � � � � � � � � � � � � � � � � � � � � � � � � � � � � � � � � � � � � � � � �17
Programming - Zigbee � � � � � � � � � � � � � � � � � � � � � � � � � � � � � � � � � � � � � � � � � � � � � � � � � � � � � � � � � � � � � � � � � � � �18
Troubleshooting - Zigbee � � � � � � � � � � � � � � � � � � � � � � � � � � � � � � � � � � � � � � � � � � � � � � � � � � � � � � � � � � � � � � � � � �19
Programming - 485 � � � � � � � � � � � � � � � � � � � � � � � � � � � � � � � � � � � � � � � � � � � � � � � � � � � � � � � � � � � � � � � � � � � � � � 20
Troubleshooting - 485 � � � � � � � � � � � � � � � � � � � � � � � � � � � � � � � � � � � � � � � � � � � � � � � � � � � � � � � � � � � � � � � � � � � � � 21
Programming - RTS � � � � � � � � � � � � � � � � � � � � � � � � � � � � � � � � � � � � � � � � � � � � � � � � � � � � � � � � � � � � � � � � � � � � � � 22
Troubleshooting - RTS � � � � � � � � � � � � � � � � � � � � � � � � � � � � � � � � � � � � � � � � � � � � � � � � � � � � � � � � � � � � � � � � � � � � 23

4
Shades
PARTS LIST - 275 - POCKET - SINGLE - SHADES
Parts list - 275 - Pocket - Single shades
275 Roll
Installation Remotes
(1 per RTS shade)
Please note all the Serial No.s on your
Shade motors. See the last page on these
instructions.
mymy
Motor Side Bracket
Idler Side Bracket
Leveling Shims
(4 per shade)

5
Leveling Shims - used if the window frame is out of level.
Connect to shade brackets before installation
Note: do not use more than 2 leveling shims per bracket.
Leveling Shims
LEVELING SHIMS (OPTIONAL)

6
INSTALLATION - 275 - POCKET - SINGLE - SHADES
Installation - 275 - Pocket - Single shades
1. Install the motor side bracket inside of the pocket with a distance of 0.46 inches from the edge
of the mounting bracket to the back wall.
2. Install the idler side bracket inside of the pocket with a distance of 0.46 inches from the
edge of the mounting bracket to the back wall.

7
3. Use the length of the shade roll to determine the distance between brackets. Once the brackets
are secured, we are ready to install the roll.
Installation - 275 - Pocket - Single shades
INSTALLATION - 275 - POCKET - SINGLE - SHADES
4. To install the roll: First, insert the idler side of the roll in the idler side bracket.
Making a slight pressure to the idler side, push up the motor side of the roll until lined up with
the motor side bracket.

8
5. Repeat the same step 4 for the following remaining shades.
Installation - 275 - Pocket - Single shades
INSTALLATION - 275 - POCKET - SINGLE - SHADES

9
1. Align the right face of the Side Channel with the right face of the right-end bracket. Repeat
process on the left-end bracket.
SIDE CHANNELS INSTALLATION
(Ignore, if you dont have Side Channels)
Side Channels Installation

10
SIDE CHANNELS INSTALLATION
2. Pre-drill holes for screws.
Side Channels Installation

11
3. Install screws in place.
SIDE CHANNELS INSTALLATION
Side Channels Installation

12
4. Install covers for each Side Channel.
SIDE CHANNELS INSTALLATION
Side Channels Installation

13
SIDE CHANNELS INSTALLATION
You are done with installing the shades successfully! We can now move to Wiring and Programing
the Shades.
Side Channels Installation

14
1. Align the bottom of the hanger ush to the ceiling, Then secure withe screws as shown below.
2. Now hang the closure by the lip of the hanger as shown below.
POCKET FLAP AND HANGER INSTALLATION
(Ignore, if you dont have Flap and Hanger)

15
WIRING - 24v DC - 485
Pre-wire Shade
Marking
V+
V-
+
-
G
Marking
V+
V-
+
-
G
Wire Gauge (AWG)
14
16
18
Wire Gauge (AWG)
24 w/o Spike
24 w Spike
Maximum Supported Wire
Length (FT.)
250
150
100
Supported Wire Length (FT.)
150 (275 Shade)
100 (375 Shade)
300 (275 Shade)
150 (375 Shade)
Description
Positive 24VDC
Negative 24VDC
485 Data Positive
485 Data Negative
485 Data Ground
Description
Positive 24VDC
Negative 24VDC
485 Data Positive
485 Data Negative
485 Data Ground
24v DC - Using 5 Conductor Wire
24v DC - Using UTP wire with terminal blocks
Shade
Blue
Blue White
Green
Green White
Brown
Orange
Brown White
Orange White
Wire between Janus terminal block face and the motor only�
Wiring - 24v DC - 485

16
WIRING - 24v DC- 485
TERMINATION FOR 4 - CONDUCTOR CABLE
If the shade will be connected to a Janus, terminate with the following pinout:
Note: Please note, the illustration above, wire between Janus UTP face and the motor only. Do
not use this pinout with Terminal face of Janus. *Only use Spike sense, when
connecting shades.
*Only use Spike sense, when connecting shades
If the pre-wire does not have a third insulated data conductor for the 485 ground, terminate the
wire as shown below. Use the same termination on both ends.
22 AWG Jumper wire
Pre-Wire Shade
Pin 1 Pin 8
RJ45
Wiring - 24v DC - 485
RJ45 Data and Power cable for Janus only
Pin#
1
2
3
4
5
6
7
8
Color
Orange White
Orange
Green White
Blue
Blue White
Green
Brown White
Brown
Function
SDN Data RS485 (+)
SDN Data RS485 (-)
Spike sense*
Power 24v DC (V+)
Power 24v DC (V+)
Spike sense*
SDN RS485 Ground (G)
SDN RS485 Ground (G)
Utilizing RJ-45 TIA-568B termination standard

17Wiring - 24V DC - Zigbee / RTS and 110v AC - 485
WIRING - 24v DC - ZIGBEE / RTS
Pre-wire Shade
Connect data only. DO NOT
connect 110v AC power to
terminal block.
RJ45 DATA CABLE FOR DATA HUB ONLY
WIRING - 110v AC - 485
For guaranteed motor performance the supplied voltage for 24v motors must be 24v DC. See
the table below for maximum wire lengths.
If the motors are powered using a Power Distribution Enclosure connect the motors to the
“+24v DC” and “-24v DC” ports on the terminal blocks. The RS485 ports are unused.
Wire Gauge (AWG)
14
16
18
Maximum Supported Wire Length (FT.)
250
150
100
V+ Positive 24vDC
V- Negative 24vDC Not used
24v DC Zigbee/ RTS

18
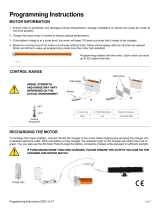
Programming - Zigbee
PROGRAMMING - ZIGBEE
The lower limit of every shade is preprogrammed to 1/2” from the bottom of the window. After
installing each shade, follow these steps to adjust the lower limit:
STEP 2 - Assign shades to groups :
All grouping of devices is completed within the TaHoma application:
1. Open the TaHoma application and navigate to the conguration tab.
2. Press the + symbol in the upper right corner.
3. Choose the Zigbee device type.
4. Select “Add Zigbee Group”.
5. Label the group.
6. Select the devices you would like to be included in this group.
STEP 3 - Pair devices or groups with a remote:
All pairing of devices and groups to remotes is completed within the TaHoma application. In
order to pair more than one shade to a channel, a group must be created rst.
1. Open the TaHoma application and navigate to the conguration tab.
2. Press the chain/link button next to the remote being congured.
3. Select the shade or group to pair from the list and deselect any other devices.
4. Quick press the programming button on the back of the remote and click OK in the application
to conrm.
NOTE: Each Zigbee Situo remote channel will be capable of pairing to a group containing up to 20 motors.
PROGRAMMING STEPS
(TaHoma/LinkPro Z must be plugged in and on the network)
Step 1: Fine tune lower limit.
Step 2: Assign shades to groups and remotes.
Step 3: Pair devices and groups with remotes.
STEP 1 - Fine tuning lower limit :
1. Click on the 3 dots in the lower right hand corner of the TaHoma app.
Note: You may see a pop-up warning window which could damage the shade.
2. In settings click on advanced settings.
3. Select the shade you want to set the limits to.
4. You only want to select and adjust the lower limit.
Note: Do not set upper limit or change rotation.
5. Press the down button in the app to move the shade to the Factory set lower limit.
6. Click Next.
7. Now make up or down adjustments to shade using the Up / Down increments. Each (button
press) adjustment can take a couple seconds, to execute. Once you are satised with the new
lower limit, press save Limit.

19
For Zigbee
Problem Possible Cause Action to Take
TaHoma LED is Red. No internet
connectivity.
Check network connection to the internet, and ensure
the TaHoma is properly connected via ethernet or
Wi.
Shade won’t operate. Motor battery is low/
drained.
Check the battery level of a motor via the TaHoma
application. If the battery level is below 20%, the
charging cord can be plugged in and the shade will
operate while charging.
The remote battery
may be low.
Check that the green LED on the remote ashes when
a button is pressed. If the LED does not ash at all,
the remote may need a new CR2430 battery.
Technical Support: 512.832.6939 screeninnovations.com
Hours of Support: 7:30am - 5pm CST support@screeninnovations.com
Please use this QR Code
to access the updated
installation instructions
TROUBLESHOOTING - ZIGBEE
Troubleshooting - Zigbee

20
PROGRAMMING - 485
485 shades are programmed using the Screen Innovations SIFI via the web interface. This
programming can be done with a Windows or Mac computer either over LAN or wired directly to
SIFI. The following instructions are for a Windows computer, but the steps for programming on
a Mac are very similar. For a complete guide to program SIFI on a Mac, please visit our website.
Before attempting to program any motors with SIFI, verify that the rmware is up to date. To
adjust the lower limit of an 485 shade, follow the steps below.
Connect SIFI as shown below.
1. Launch Windows File Explorer
2. Click on the “Network” tab
3. Double click on the SIFI, the default web browser will launch
4. At the landing page, click the three lines in the top right corner, then click “Settings”
5. Select the “485” tab on the top left
6. Press the spyglass to auto discover motors on the 485 network (may have to press it more
than once)
7. Click on the motor you want to program
8. Name the motor
9. Right click on the down limit count
10. Move the shade up or down using the buttons in the popup window
11. Click set to conrm the limit
12. Operate the shade up and then back down to verify the position of the limit
Programming - 485
Data Pass-
through Input
Power/Data
Output
Bus Power
Supply
Data Hub
Device Device Device Device Device
SDN Wiring Pinout
Utilizing RJ-45 TIA-568B termination standard
Pin#
1
2
3
4
5
6
7
8
Color
Orange White
Orange
Green White
Blue
Blue White
Green
Brown White
Brown
Function
SDN RS485 (+)
SDN RS485 (-)
Reserved
Power 24v DC
Power 24v DC
Reserved
SDN RS485 Ground
SDN RS485 Ground
Pin 1
Pin 8
Stub length must not exceed 200’
SIFI
To IP Network/PC
Standard CAT - 5e
or higher cable
SDN / Power
c
c
c
c
c
/