Page is loading ...

15mm Crashed Starship - Hatch
B15-SF-500
Please read these instructions fully before starting construction.
PVA or equivalent glue will be required to stick sections together.
Sand paper can be used to gently clean any joints.
A sharp modelling knife will be required to remove sections from the sprue. Please use knives with due care and
remember to cut away from yourself at all times.
During the construction of this model, you may find it convenient to use pegs / elastic bands to hold pieces in
place while you allow glue to dry.
Note – We painted the sections of our kit prior to assembly – see below for details.
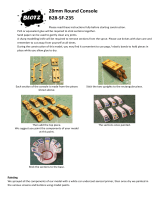
Take the lower hull section and the four gantry
supports.
Attach the gantry supports to the back of the hull
section as shown above.
Note – the two inner supports do not have detailing
on the front leg.
Glue the other hull sections into position.
Slide the front edge of the floor piece into place so
the gantry supports fit into the slots, then lower the
floor into place.
Glue three broken railings to each side of the floor.
The completed model.

Additional debris pieces are provided for you to decorate your model as you see fit.
Painting
Prior to construction we sprayed most of our model with a
white car undercoat aerosol. The support gantry pieces were
sprayed with black car undercoat.
Any areas of bare metal were then painted black (household DIY
emulsion paint) and the detailed areas painted red (household
emulsion).
All the black areas were then dry brushed with silver paint
(household emulsion)
Any mistakes were then tidied up with white paint (model
paint)
After assembly, the visible lugs were tidied up with white and/or red as appropriate so that they blended into the rest of
the model.
Once dry, finishing touches such as rust streaks and corrosion were added (using model paints) to show the ship had
been broken up for some time.
The model was then streaked with a black ink wash, drawing the brush downwards each time, so the streaks run top to
bottom.
/


