Ground
Quick connect
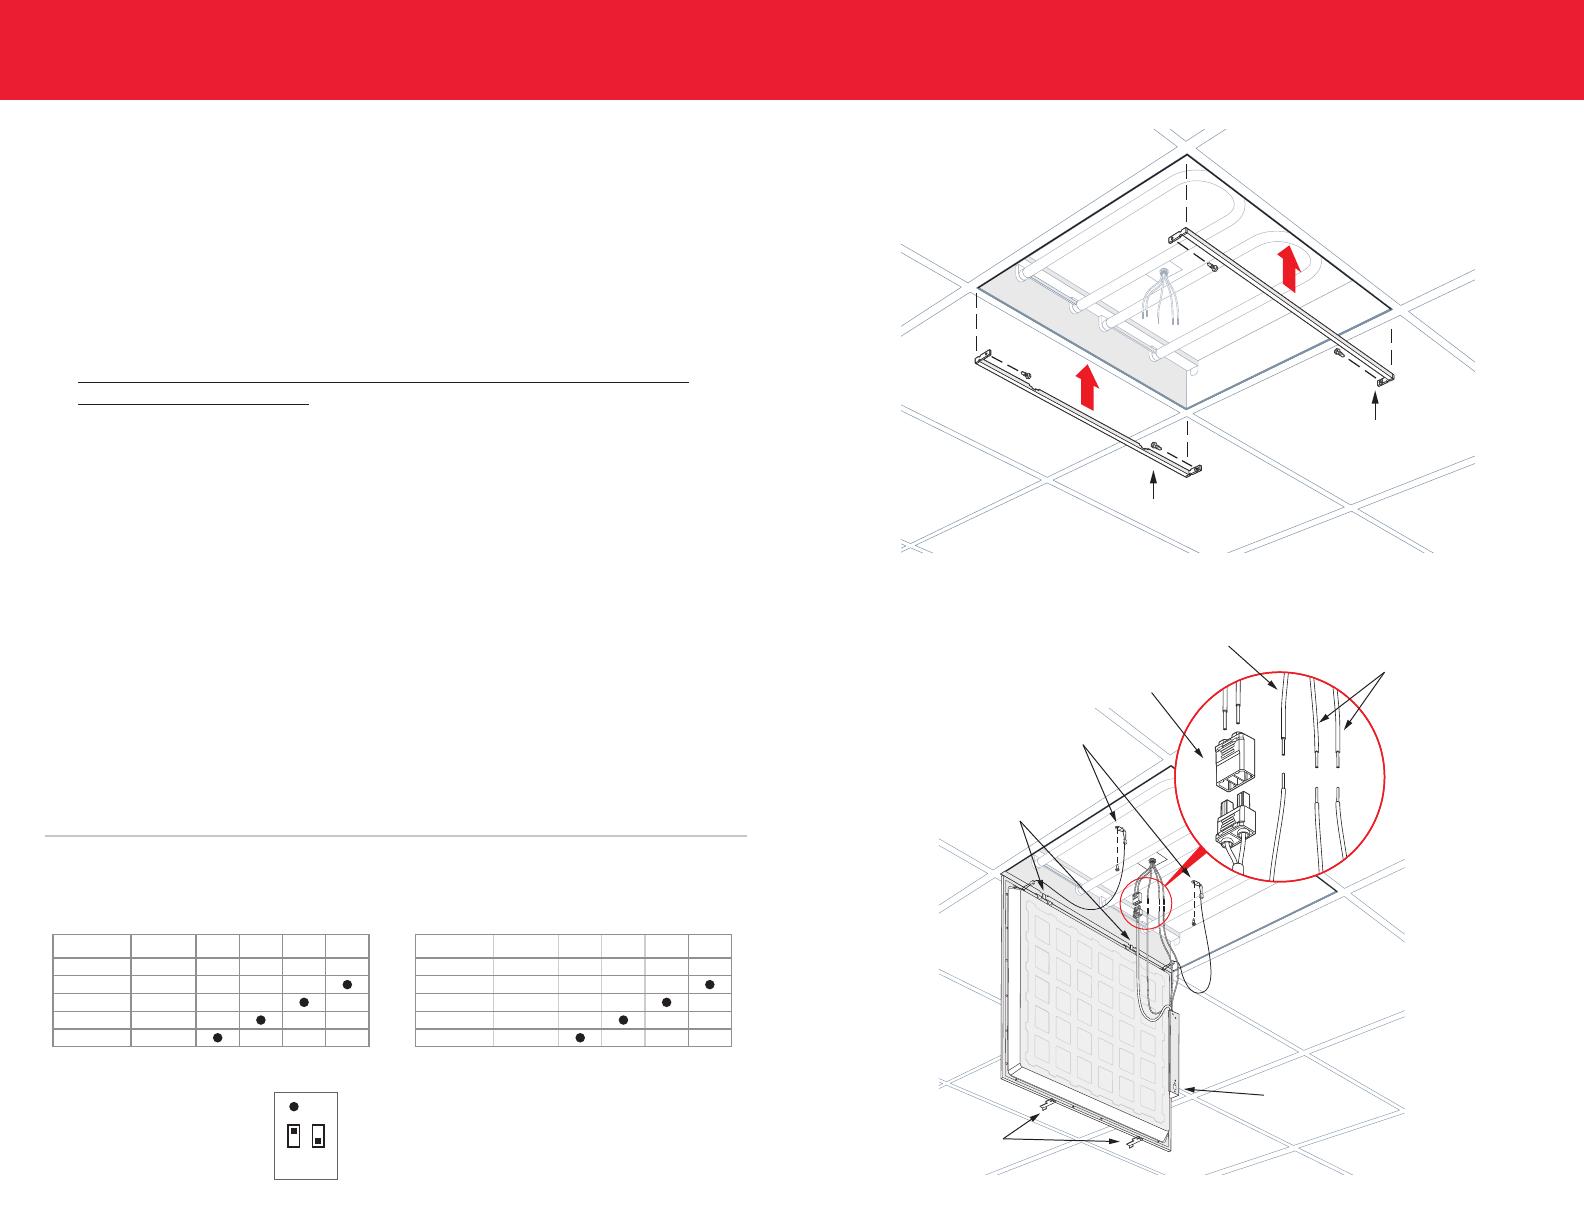
Hangers
Hooks
Dimming
Dip switch
Safety cables
Rail A
Rail B
figure 3
figure 4
INSTALLATION PROCEDURE INSTALLATION PROCEDURE
READ ALL INSTRUCTIONS BEFORE BEGINNING INSTALLATION
DIP SWITCH SETTINGS BY WATTAGE
Each fixture is set to the highest wattage by default. To set your fixture to a lower wattage, adjustments will need to be made prior to installation.
Preparation
1. Turn off power at the electrical panel.
2. Remove the lens/diffuser, tubes and ballast from the existing troffer.
3. Set the desired wattage by adjusting the dip switch (found on the outside of the driver). See figures 1 & 2
below for settings.
Rail installation
4. Insert mounting rails A and B on opposite sides between the troffer and the grid rail with anti-rotational tabs
pointed inward and notches facing up. The troffer will need to be raised slightly to accommodate the rails.
Once inserted, push rail B to the right until it is flush against the t-grid rail. This will ensure the locking hooks
latch on to the rail and secure the fixture. See figure 3 for reference. For 2x2 size, the rails should be installed
on the taperred sides of the troffer.
For added security, the rails can be secured to the t-grid. Once the rails are installed, insert the included
self-tapping screws through the end tabs and drill into the t-grid as shown in figure 3.
Panel installation
5. Locate the two panel hangers on the side edge of the panel. Insert the hangers into the notches on mounting
rail A. This will allow the panel to hang freely. See figure 4 for reference.
6. Attach the two seismic safety cables from the panel to the troffer using self-tapping screws.
7. Connect power wires AC-L (Black) and AC-N (White) into the open side of the quick-connect.
8. Connect the ground wire using the supplied wire nut.
9. Connect Purple (Dim+) and Gray (Dim-) to *0-10V dimmer (if required) with help of wire nuts (not included).
*Follow dimmer control manufacturer instructions
10. Apply the luminaire label to the inside of the troffer.
11. Locate the panel hooks (2) on the panel and rotate them to the open or install position.
12. Swing the panel up so it’s even with the ceiling. Then rotate the hooks (2) so that they engage the rail tabs.
Panel should be flush to ceiling.
13. Your installation is complete. Once all retrofit kits have been installed you can restore power.
WATTAGE LUMENS 1234
18 2250
20 2500
25 3125
30 3750
36 4500
WATTAGE LUMENS 1234
25 3125
30 3750
40 5000
45 5625
50 6250
figure 1
2’ X 2’ & 1’ X 4’ 2’ X 4’
figure 2
Adjust dip switches by moving each
switch to the ON or OFF position
=
=
ON OFF


