TROFFER RETROFIT INSTALLATION
RTLED1X4, 2X2 & 2X4
Thank you for buying RAB lighting xtures. Our goal is to design the best quality products to get the job done right. We’d like to hear your comments.
Call the Marketing Department at 888-RAB-1000 or email: marketing@rablighting.com
SAFETY INSTRUCTIONS
WARNING - Risk of fire or electric shock. Luminaire wiring and electrical parts may be damaged when drilling for
installation of LED retrofit kit. Check for enclosed wiring and components.
WARNING - Risk of fire or electric shock. Install this kit only in luminaires that have the construction features and
dimensions shown in the photographs and/or drawings and where the input rating of the retrofit kit does not exceed the
input rating of the luminaire.
Only those open holes indicated in the drawings may be made or altered as a result of kit installation. Do not leave any
other open holes in an enclosure of wiring or electrical components.
Do not make or alter any open holes in an enclosure of wiring or electrical components during kit installation.
IMPORTANT
READ CAREFULLY BEFORE INSTALLING FIXTURE. RETAIN THESE INSTRUCTIONS FOR FUTURE REFERENCE.
RAB xtures must be wired in accordance with the National Electrical Code and all applicable local codes. Proper grounding
is required for safety. THIS PRODUCT MUST BE INSTALLED IN ACCORDANCE WITH THE APPLICABLE INSTALLATION CODE BY A
PERSON FAMILIAR WITH THE CONSTRUCTION AND OPERATION OF THE PRODUCT AND THE HAZARDS INVOLVED.
Make certain power is OFF before installing or maintaining xture.
WARNING - To prevent wiring damage or abrasion, do
not expose wiring to edges of sheet metal or other
sharp objects to lampholder lead wires by employing
applicable connectors.
RECESSED CEILING MOUNTING
The xture is suitable only for INDOOR RECESSED CEILING
application. To mount in an insulated or non-insulated
ceiling exposed Flat Tee Grid Ceiling follow the steps below.
1. Remove existing lamps, door frame (if applicable),
reector and cover. Depending on clearance space,
ballast may need to be removed.
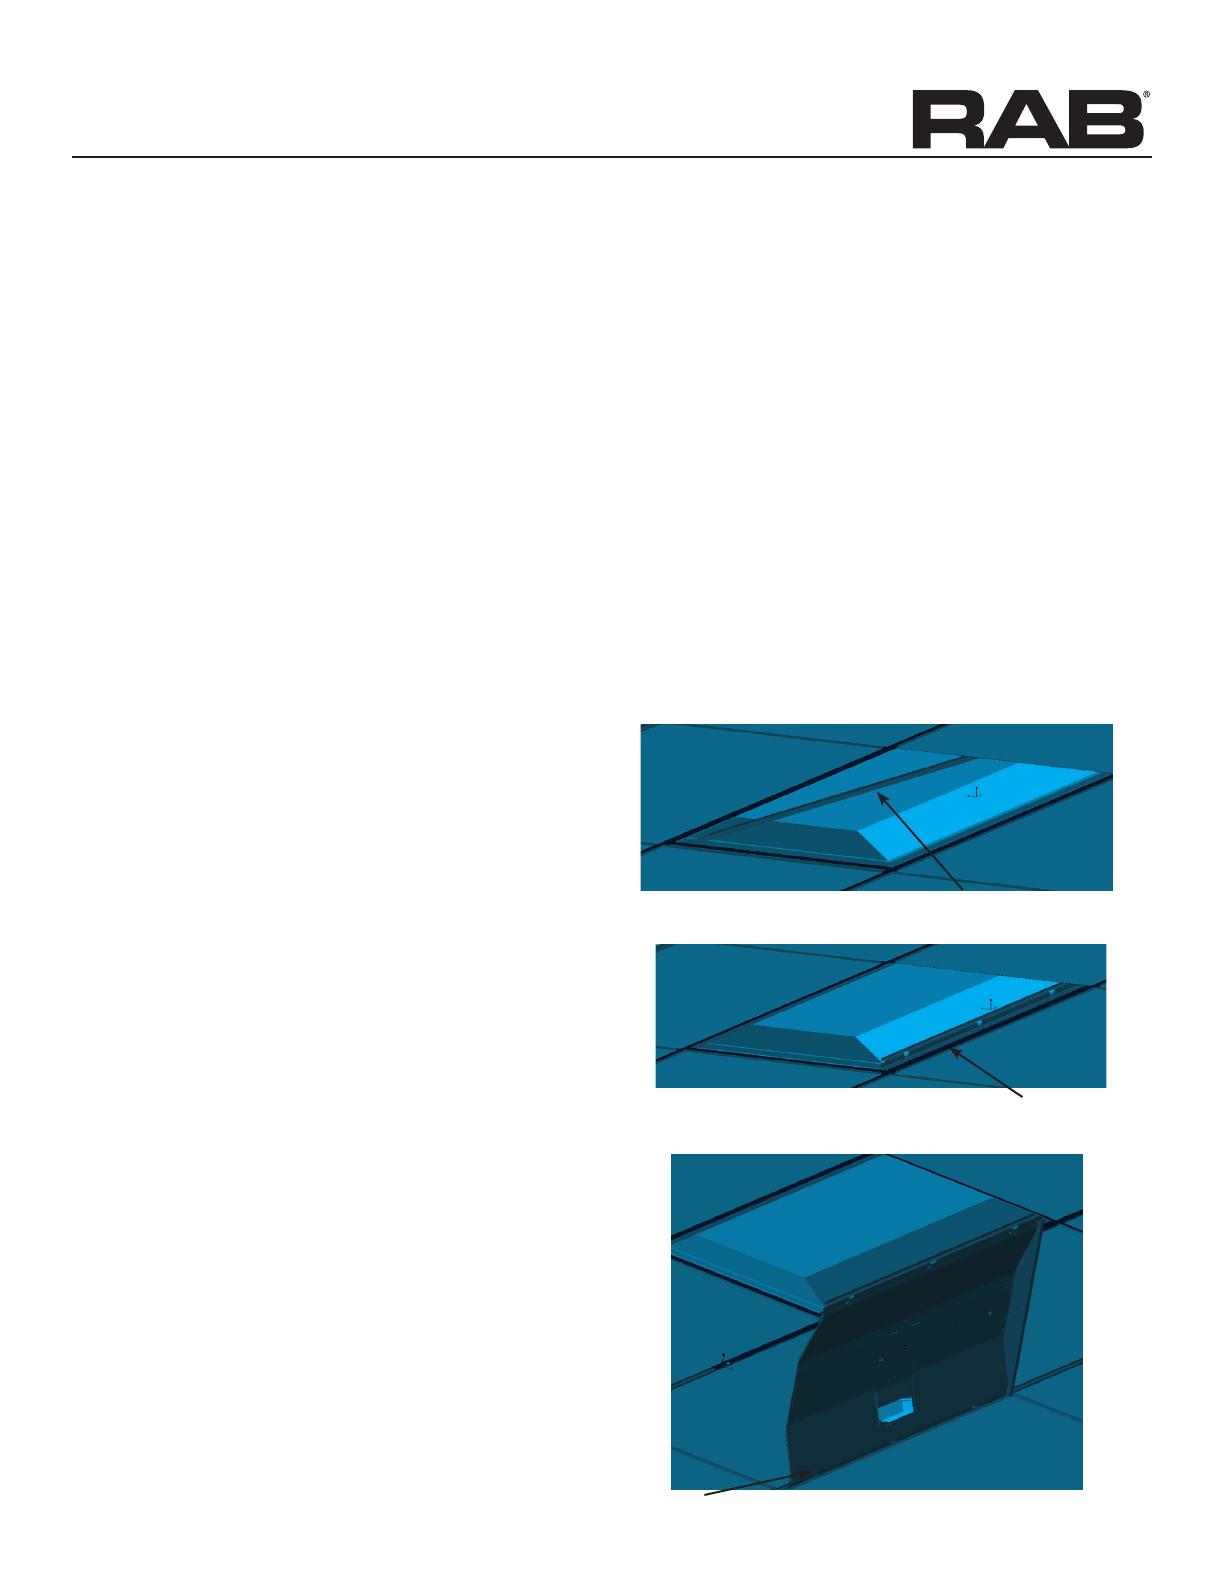
2. Gently lift the original luminaire housing and slide in both
side brackets between the housing and the T-grid. Lower
the housing to rest on the brackets, securing them in
place. (g. 1 & 2)
3. Hang the retrot kit body by hooking the T-hinges into
the respective on one mounting brackets. (g. 3)
4. Attach the safety cables to the original luminaire housing
using the self-tapping hex screws provided.
5. Connect the retrot kit power to the AC power. Insert the
black wire (line) from the power into the provided LED
quick connector marked with a black circle. Insert the
white wire (neutral) into the unmarked port. Connect the
power supply to the retrot kit.
6. Wire the existing xture’s green wire (ground) to the
retrot kit’s green wire. If a ground wire is missing from
the power supply, attach the retrot kit’s ground wire
directly to the luminaire housing.
7. For 4ft long xtures, secure the housing by locking to the
side bracket. Secure the left and center bracket together
and then right side latch. Be sure the side bracket is
pushed close to retrot kit.
T- Hinges
Tee-Grid Bar
Housing
Fig. 1
Fig. 2
Fig. 3


