JLHBM LINEAR HIGH BAY SERIES
1. Turn power off before inspecon, installaon or removal.
2. The installaon should be performed by qualified electricians or lighng technicians.
3. Before conducng any installaon, maintenance, or removal, disable all power to the luminaries and wait unl the fixture cool down.
4. Do not touch the fixture while it is in service.
5. If there is any problem with the fixture, DO turn off power and DO NOT aempt repair unless you are a qualified technician.
6. This product is not available for several special environments, such as places with corrosive gas liquids or high pressure water vapor. WARNING
WWW.JADEMAR.COM
Miami, FL USA - info@jademar.com
T: 305.640.0465 - F: 305.640.0468 Revised 01/2022
Page 1 of 1
INSTALLATION INSTRUCTIONS
LINEAR HIGH BAY
Installation Guide
WARNING
1. Turn power off before inspection, installation or removal.
2. The installation should be performed by qualified electricians or lighting technicians.
3. Before conducting any installation, maintenance, or removal, disable all power to the luminaries and wait until the fixture cool down.
4. Do not touch the fixture while it is in service.
5. If there is any problem with the fixture, DO turn off power and DO NOT attempt repair unless you are a qualified technician or the
customer service member.
6. This product is not available for several special environments, such as places with corrosive gas liquids or high pressure water vapor.
210mm
297mm
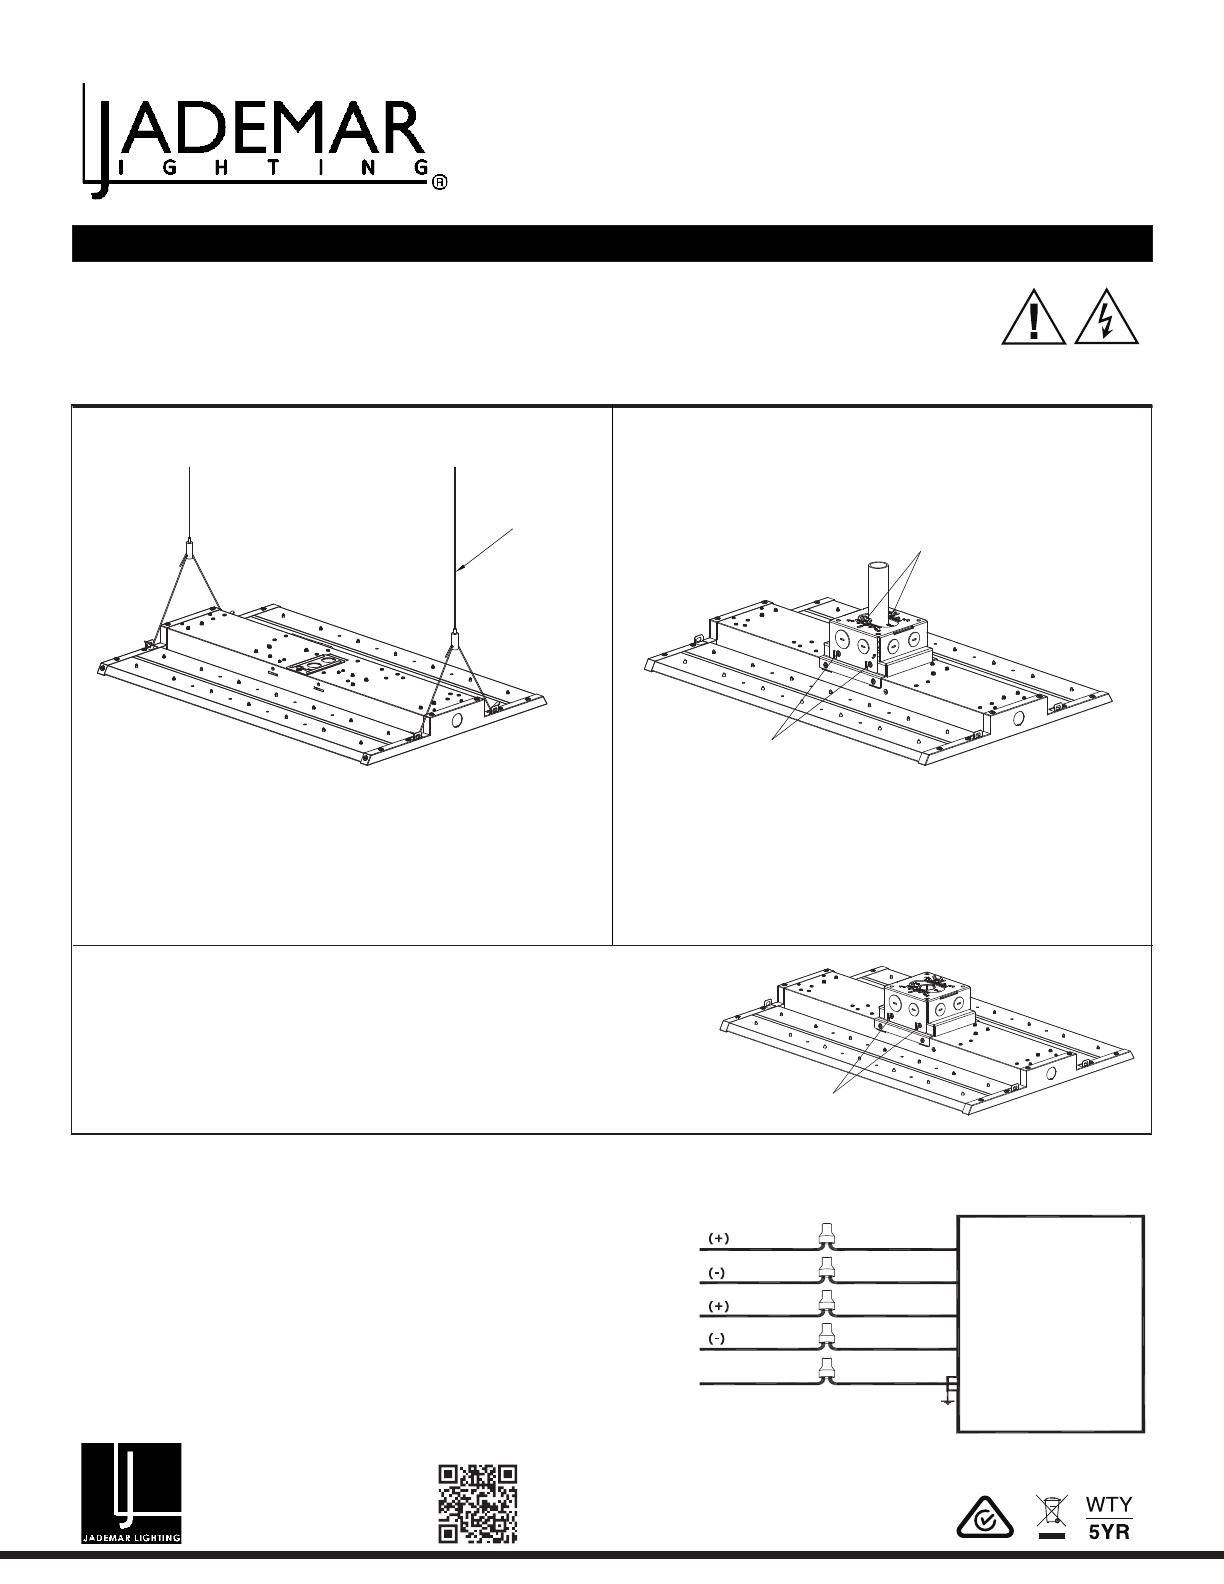
1. MOUNTING WITH STEEL WIRE ROPE 2. CONDUIT PENDANT
steel wire rope
HWM58
fly-headed screw
HWM58
1. Inspect the fixture condion and accessories before installaon.
2. Each of the two steel wire rope hooks on both ends of the mounng holes
on fixture.
3. Remove the access plate, take the wires out of the power driver
compartment and through the hole of access plate, make wiring and re-
install the access plate, then plug the flexible conduit into the hole of the
access plate.
1. Installing the adjustable board in square J-BOX with M4*8 fly-headed flat
boom screw, and pass the 3/4" conduit through adjustable board, then
fix it with J-BOX. (nut is provided by others)
2. Aach fixture to the hanger of square J-BOX, and connecng wires
3. Placing fixture horizontally, and fix it with J-BOX by using M5*8 screws
3. SURFACE MOUNTING
1. Fix the square J-BOX hanger to the ceiling juncon box with screws (the screws are
matched with the juncon box).
2. Hook the fixture of the J-BOX base to the fixed hanger, pull out the wire and complete the
wiring.
3. Place the fixture horizontally and secure it with M5 * 8 screws.
WIRING
Universal voltage driver permits operaon at 120V thru 277V, 60 Hz. For 0-10V Dimming,
follow the wiring direcons as in fig 1.
1. Connect the black fixture lead to the (+) LINE supply lead.
2. Connect the white fixture lead to the (-) COMMON supplylead.
3. Connect the GROUND wire from fixture to supply ground. Do NOT connect the GROUND
of the dimming fixture to the output.
4. Connect the purple fixture lead to the (V+) DIM lead.
5. Connect the gray fixture lead to the (V-) DIM lead.
TROUBLESHOOTING
Check that the line voltage at the fixture is correct. Refer to wiring direcons:
1. Confirm the fixture grounded properly.
2. Be sure the moon sensor, if used, is funconing properly.
LIGHT
FIXTURE
LINE
COMMON
DIM+
DIM-
GROUND
BLACK
WHITE
PURPLE
GRAY
GROUND
CLEANING & MAINTENANCE
CAUTION: Be sure fixture temperature is cool enough to touch.
Do not clean or maintain while fixture is connected to power source.


