General Installation Notes
Any adhesives, sealants, fillers or paint used must be compatible with the material that is being installed (see manufacturer’s recommendations in the
Finishing and Adhesives section below). Always use corrosion-resistant mechanical nails or screws along with manufacturer’s recommended adhesive
product when installing all Fypon products. This combination provides a secure, long-lasting bond. Countersink all fasteners about
1
/
8
" and fill with
product compatible filler. Exterior installations should be finished using a manufacturer’s recommended caulk to prevent water infiltration behind
siding, windows and doors. Some exterior installations, in particular new construction before siding is applied, may require a J-channel and/or
flashing to prevent water infiltration. Installers must determine which installation technique is best for the specific situation.
Finishing and Adhesives
Polyurethane (PUR) – Fypon polyurethane products are factory primed. Depending on product location, always use interior/exterior-grade, PUR
compatible adhesives, sealants, and fillers when installing Fypon products. Consult the manufacturer’s recommendations for your particular
climate and the substrate you are installing to.
Cellular PVC – Depending on product location, always use interior/exterior-grade, PVC compatible adhesives, sealants, and fillers when installing
Fypon products. Consult the manufacturer’s recommendations for your particular climate and the substrate you are installing to. If painting is
desired, a 100% acrylic latex paint with a Light Reflectance Value (LRV) of 55% or higher must be used. Applying paint with an LRV of 54% or
lower will void the warranty.
IMPORTANT:
Please read these installation guidelines thoroughly before beginning installation. Please note that these guidelines are provided only to assist with the installation of Fypon moulding
and millwork products. Modified procedures may be required in order to meet specific situations, unique applications and local building codes. The manufacturer does not, under any
circumstances, warrant the installation of its products. Be sure to wear appropriate protective clothing, gloves and safety glasses when working with any tools. Installer should check
for and relocate all electrical wiring within the proposed installation area, as needed (be sure to disconnect all electric power before working with any electrical wiring and follow all
applicable local electrical codes and safety procedures).
Fypon, Ltd. 1750 Indian Wood Circle Maumee, Ohio 43537 1.800.446.3040 www.fypon.com
Page 2 of 2
12" Balustrade System Continued
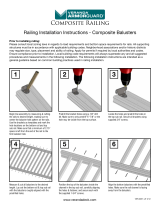
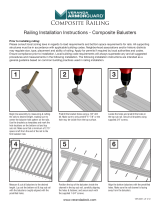
6. Final Assembly
A) Position the newel post bottom section with the floor layout lines marked in Step 1A. Apply a 1/4" bead of adhesive to the channel in
newel post bottom section, and align newel post center section onto newel post bottom section.
B) Working with one rail section at a time, apply a 1/4" bead of adhesive on both ends of each baluster.
C) Position a baluster into each pre-drilled hole in the baluster bottom rail assembly. Align and cap off with pre-drilled top rail assembly.
D) Apply a 1/4" bead of adhesive to baluster top rail ends and to the channel in newel post top section. Align newel post top section onto
newel post center section.
E) Fasten the 5/16" - 18 x 5" hex head cap screws into the bear claw brackets in the top rail and tighten to 75 in./lbs. torque.
F) Install a 3/8" flat washer, a 3/8" lock washer and a 3/8" - 16 hex nut onto the threaded rod assembly. Tighten the entire assembly to
100 in./lbs. torque.
G) Apply caulk to seam in channels of newel post assembly to prevent moisture infiltration.
H) Apply a 1/4" bead of adhesive to newel post top section, and then install newel post top.
I) Mouldings such as MLD601, MLD602, MLD610 and MLD611 may be applied to newel post center section as a decorative treatment.
7. Wall Installation (Optional)
When working with wall installations, fasten the rails to the wall first, then assemble away from wall sections. Note: The fasteners for mounting
bear claw brackets to the wall are not included in the rail installation kit.
A) Determine position of baluster bottom rail and mark layout on wall. Locate position of center of bear claw brackets on wall. Mount bear
claw brackets securely to wall (fasteners for this are not included in hardware pack).
B) Apply a 1/4" bead of adhesive on the end of baluster bottom rail and position over bear claw brackets and flush with the wall. Drill a
7/32" pilot hole from the top of the baluster bottom rail into center of each bear claw bracket. Secure with 1/4" - 20 x 2" flat head self-
tapping screws (provided with baluster rail installation kit).
C) Position and install balusters using the steps described previously in these guidelines. Use above procedures to attach top rail.


