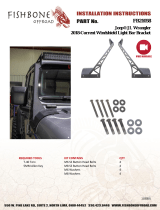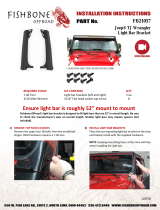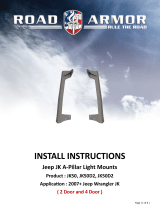
REMOVE STOCK HARDWARE
- Remove the two T40 Torx head lower bolts in the cowl
panel using slow and even pressure to remove the bolts to
avoid damaging the hardware.
- Remove the windshield hinge nut using the T45 Torx bit,
being careful not to chip the paint on the windshield hinge
nut.
- Repeat for both sides.
1.
INSTRUCTIONS FOR INSTALLATION
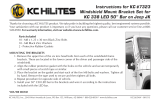
The KC Jeep Wrangler JL / Gladiator JT Overhead Bracket Set (SKU #7327) is made of black, textured
powder coated steel and includes integrated A-Pillar mounts. These are designed to easily mount KC
Gravity ® LED Pro6 and C-Series light bars to factory bolt locations.
JEEP JL/JT OVERHEAD BRACKET (WITH A-PILLAR MOUNTS)
Parts Included:
QTY 2 - Overhead brackets
QTY 2 - Protective gaskets
QTY 4 - M8 lower cowl bolts and washers
QTY 2 - A-Pillar light mounts (optional)
QTY 4 - Short M6 bolts with nuts and
washers (optional)
2018+ JEEP
WRANGLER JL / GLADIATOR JT
Jeep Wrangler JL Rubicon with Overhead Mounts
Copyright 2018 KC HiLiTES, Inc. Rev09182019- KC3264F
WARNING: Please read all instructions before beginning installation. These guidelines are provided in good faith to help prevent
any issues arising from errors during installation. The manufacturer of this product shall not be held responsible for any user
actions taken or not taken during installation. There are many details of the installation that are assumed to be general
mechanical knowledge to experienced installers; which are not detailed in these instructions. These installation guidelines are
intended to serve as professional recommendations and are not a step-by-step, fail-safe installation checklist. Selection of an
experienced installer is the sole responsibility of the project owner.
TOOLS NEEDED FOR INSTALLATION
T40 & T45 TORX BIT 4MM & 5MM HEX KEY

- Place the supplied M6 washer on the M6 screw and align
the two holes on the overhead bracket with the two on the
a-pillar bracket tab.
- Place the M6 screws through the holes and thread on the
nuts by hand.
- Tighten the nuts with a 10mm deep socket and 4mm allen
key.
4.
INSTALL OVERHEAD BRACKET
- Set the bracket in place on the vehicle and hand tighten all
hardware:
- Install the supplied M8 bolts through the washers and bracket
into the factory lower cowl bolt holes.
- Apply blue thread lock on the windshield hinge nut and then
place it through the bracket and install.
- Tighten all bolts.
- Repeat for both sides.
3.
INSTALL A-PILLAR MOUNT (optional)
INSTALL THE SILICONE GASKETS
- Conrm proper orientation of gaskets on the brackets and then
remove a portion of the paper backing on the protective gaskets.
- Stick the exposed portion of the adhesive backing onto the bracket
while lining up the gasket. There should be about a 1/16” gap
between the edge of the bracket and the edge of the gasket.
- Repeat for all 4 gaskets. Apply pressure for complete adhesion.
2.
JEEP WRANGLER JL/JT OVERHEAD LIGHT BAR
2
KC HiLiTES, Inc. | 2843 W. Avenida De Luces Williams, AZ 86046 | support@kchilites.com | (888) 689-5955
PRODUCT REGISTRATION
Thank you for becoming part of the KC HiLiTES family and purchasing one of our premium KC
products! With over 45 years of history in the auxiliary lighting market, you have become a part
of our ever growing family, and we encourage you to register your product online at HTTP://
REGISTER.KCHILITES.COM to ensure you get all the benets of owning a KC HiLiTES product.
/
