Page is loading ...

VDPDMXC145 VELLEMAN 1
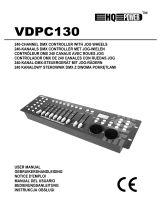
VDPDMXC145 – 192-CHANNEL DMX CONTROLLER
1. Introduction & Features
Thank you for buying the
VDPDMXC145
! Please read the manual carefully before bringing this
device into service.
This is a 192-channel DMX controller, capable of controlling 12 devices with up to 16 channels.
The device features 30 banks of 8 scenes each, 6 chases for scene programming and a 4-digit
LED display.
Check carefully for damage caused by transportation. Consult your dealer and don’t install this
device if it has been damaged in transit.
2. Safety Instructions
• A qualified technician should install and service this device.
• Damage caused by disregarding certain guidelines in this manual is not covered by the
warranty and the dealer will not accept responsibility for the ensuing defects or problems.
• Do not switch the device on immediately if it has been exposed to changes in temperature.
Protect the device against damage by leaving it switched off until it has reached room
temperature.
•
Make sure that the available voltage does not exceed the voltage stated in the specifications
of this manual.
•
Do not crimp the power cord and protect it against damage from sharp edges. Ask an
authorised dealer to replace the cord if necessary.
• Always disconnect the device from the mains when it is not in use or when you wish to clean
it. Only handle the power cord by the plug. Never pull out the plug by tugging the power cord.
• Note that damage caused by user modifications to the device are not covered by the
warranty. Keep the device away from children and unauthorised users.
3. General Guidelines
• This device is a lighting controller for professional use on stage, in discos, theatres, etc. The
VDPDMXC145
should only be used indoors with the included adapter working on an
alternating current of max. 230Vac/50Hz.
Keep this device away from rain and moisture
Unplug the mains lead before opening the housing
Be very careful during the installation : touching live
wires can cause life-threatening electroshocks.

VDPDMXC145 VELLEMAN 2
• Do not shake the device. Avoid brute force when installing or operating the device.
• Select a location where the device will be protected against extreme heat, moisture and dust.
• Do not use or transport the device under temperatures < 5°C or > 35°C.
• Familiarise yourself with the functions of the device before actually using it. Do not permit
operation by unqualified people. Any damage that may occur will probably be due to
unprofessional use of the device.
• Use the original packaging if the device is to be transported.
•
Note that all modifications of the device are forbidden for safety reasons.
• Do not remove the serial number sticker from the device as doing so will void the warranty.
Only use the device for its intended purpose. All other uses may cause short circuits, burns,
electroshocks, lamp explosions, crashes, etc. Using the device in an unauthorised way will
void the warranty.
4. Description
a) Front Panel
1. Scanner Buttons
SCANNERS CHANNEL
1 1-16
2 17-32
3 33-48
4 49-64
5 65-80
6 81-96
7 97-112
8 113-128
9 129-144
10 145-160
11 161-176
12 177-192
Press the button to activate the selected scanner (LED is lit). All appropriate channels are ready
for use and can be adjusted.
Fig. 1

VDPDMXC145 VELLEMAN 3
2. Scene Buttons (1 – 8)
Press a button to run or store a scene. The second digit of the LED display shows
scenes 1-8.
3. Faders (1 – 8)
Use the faders to adjust the output level of a DMX channel from 0 to 255. The value
will appear on the LCD display.
4. Page Select
Press this button to switch between page A (the first 8 channels) and page B (the
next 8 channels) of a device.
5. Speed Slider
Adjust the chase speed with this slider (0.1 sec. – 10 min.)
6. Fade Time Slider
Adjust the fade time with this slider (0 – 30 sec.)
7. LED Display
Displays all necessary information
8. Bank Buttons
Press ▲ or ▼ to select a bank. The third and fourth digit on the LED display make
up the bank number (01 – 30).
9. Chase (1 – 6)
Press a button to run or store a chase. The first digit on the LED display is the
chase number (1 – 6).
10. Program
The device is in MANUAL RUN mode when you turn it on. Hold the PROGRAM
button for 2 seconds. The LED flashes and SCENE and CHASE are ready to be
programmed. Hold PROGRAM for 2 seconds again to activate the BLACKOUT
mode. The PROGRAM LED extinguishes and the BLACKOUT indication is lit. Press
the BLACKOUT button to return to the MANUAL RUN mode. The blackout LED
goes out.
11. MIDI / ADD
MIDI : Hold the MIDI button for two seconds when the device is in RUN mode. The
third and fourth digit of the LED display start to flash. Select a MIDI channel
with ▲ or ▼. Press any button other than ▲ or ▼ to end the MIDI channel
setting.
ADD : Push this button to add lines in a program while the device is in the
programming mode.
12. AUTO / DEL
AUTO : Press this button while the device is in the RUN mode. The AUTO
TRIGGER LED is lit, indicating that the AUTO RUN mode has been
activated. Press the AUTO button again to deactivate the auto run mode.
DEL : Push this button to delete a scene or a chase while in the programming
mode.

VDPDMXC145 VELLEMAN 4
13. MUSIC / BANK COPY
MUSIC : Push this button while in the device is in RUN mode. The MUSIC
mode is now activated and the MUSIC TRIGGER LED is lit. Press
this button again to deactivate the MUSIC mode.
BANK COPY : Press this button to copy a bank when the device is in the
programming mode.
14. TAP SYNC / DISPLAY
TAP SYNC : When the device is in the AUTO RUN mode, the running speed
depends on the duration of the interval between the last two times you
pressed the TAP SYNC/DISPLAY button.
DISPLAY : Press this button to choose between 00-255 or 0%-100% display for
the faders.
15. BLACKOUT
Press this button to set the output of all channels to 0%. This does NOT affect the
other functions of the device. Press this button again to deactivate the blackout
mode.
b) Back Panel
16. MIDI IN
17. DMX POLARITY SELECT
18. DMX OUT (3-pole XLR)
19. DC input (9-12V, 300mA)
c) Connections
The manufacturer is not responsible for damage caused by improper connections.
Connect the supplied adapter with the DC jack and connect the other end with a mains outlet.
The device has a built-in microphone for sound control. Use the MIDI input if you want sound
control by an external source.
5. Operating Instructions
Programming Scenes
Hold the PROGRAM button for 2 seconds to activate the PROGRAM mode. The PROGRAM
LED will flash.
a) Scene Programming
1. Press the desired SCANNER button to select a device
2. It is possible to select several devices and control them simultaneously.
3. Adjust the appropriate faders to the desired output level.
4. Press the MIDI/ADD button
5. Select the desired bank with ▲ or ▼.
6. Press a SCENE button to store this scene in the selected bank.
Fig. 2

VDPDMXC145 VELLEMAN 5
b) Scene Editing
1. Select the desired scene of a bank by pressing the corresponding SCENE button.
2. Adjust the faders
3. Press the MIDI/ADD button
4. Press SCENE again to store the new settings
c) Copying a Scanner
1. Hold the button for the currently selected scanner
2. Press the button for the scanner you want to copy the settings of the first scanner to.
3. Release both buttons.
d) Copying a Scene
1. Press the SCENE button for the scene you wish to copy
2. Press the MIDI/ADD button.
3. Select a bank with ▲ or ▼ and press the button for the scene you want to copy the settings
of the first scene to.
e) Deleting a Scene
1. Select the desired scene by pressing the corresponding scene button.
2. Press the button for the scene to be deleted while holding the AUTO/DEL button.
f) Clearing all scenes
1. Press PROGRAM and ▼ while deactivating the device.
2. Turn the device back on.
g) Copying a Bank
1. Select the desired bank.
2. Press the MIDI/ADD button.
3. Select the bank you wish to copy with ▲ or ▼.
4. Press the MUSIC/BANKCOPY button.
h) Deleting a Bank
1. Select the bank to be deleted.
2. Press AUTO/DEL and MUSIC/BANKCOPY buttons simultaneously.
Programming Chases
Hold the PROGRAM button for 2 seconds to activate the programming mode. The programming
LED will start to flash. One chase can contain up to 240 scenes and the scenes are run in the
programmed order. The first scenes to be run will be the first that were programmed.

VDPDMXC145 VELLEMAN 6
a) Programming a Chase
1. Select a chase containing programmed scenes by pressing the appropriate CHASE button.
2. Select a scene from a bank with ▲ or ▼ and press the corresponding SCENE button.
3. Press the MIDI/ADD button.
b) Copying all Scenes from a Bank to a Chase
1. Select the desired bank with ▲ or ▼.
2. Press the MUSIC/BANKCOPY button.
3. Press the MIDI/ADD button.
c) Adding a Step to a Chase
Example : inserting a scene as step 10 in an existing 15-step chase.
1. Press TAPSYNC/DISPLAY to display the CHASE and its STEP on the LCD.
2. Select STEP 9 with ▲ or ▼.
3. Press MIDI/ADD, making the step turn to 10.
4. Select a scene from the bank with ▲ or ▼ and then press the corresponding SCENE button.
5. Press MIDI/REC to add the new scene to the newly inserted step. The previous step 10
becomes step 11, etc..
d) Deleting a Step from a Chase
Example : deleting step 10.
1. Press TAPSYNC/DISPLAY to display the CHASE and its STEP on the LCD.
2. Select step 10 with ▲ or ▼.
3. Press AUTO/DEL : step 11 becomes step 10, step 12 becomes step 11, etc.
e) Deleting a Chase
1. Select the desired chase with the CHASE button.
2. Press AUTO/DEL while holding that CHASE button.
f) Clearing all Chases
1. Press ▼ and AUTO/DEL simultaneously while deactivating the device.
2. Turn the device back on.
Running Scenes
The device is in RUN mode when it is turned on. Hold the PROGRAM button for 2 seconds to
enter the PROGRAM mode. Subsequently, the device automatically switches to the
BLACKOUT mode. Press the BLACKOUT button to enter the RUN mode. Only those scenes
programmed into a bank can be run.

VDPDMXC145 VELLEMAN 7
a) Manual Run
1. Make sure AUTO TRIGGER and MUSIC TRIGGER are off.
2. Select a bank with ▲ or ▼ or through MIDI signals.
3. Press the desired SCENE button.
b) Auto Run
1. Press AUTO/DEL. The AUTO TRIGGER LED comes on.
2. Press TAPSYNC/DISPLAY. Press it again after an interval of your choice. The interval
between the two presses is the assigned speed of AUTO RUN (max. 10 min.). If you press
more than twice, only the last two presses are taken into account.
3. Select a bank with ▲ or ▼ or through MIDI signals.
4. Press AUTO/DEL again to leave the AUTO RUN mode.
c) Music Run
1. Press MUSIC/BANKCOPY. The MUSIC TRIGGER LED is lit.
2. Select a bank with ▲ or ▼ or through MIDI signals.
3. Press MUSIC/BANKCOPY again to leave the MUSIC RUN mode.
d) Midi Run
The scenes from a bank are selected through the MIDI input whenever the device is in the
MANUAL RUN, AUTO RUN or MUSIC RUN mode.
e) Chase Run
To use a chase run you have to make programmes first. A chase run can be activated via the
MANUAL RUN, AUTO RUN, MUSIC RUN and MIDI RUN modes.
Select the desired chase with the CHASE button. The selected chase is displayed on the LCD.
f) Fade Time Control
Adjust the fade time with the slider.
MIDI Channel Settings
The correct bank is selected by means of the NOTE ON signal coming from the MIDI device
e.g. a keyboard.
BANK NOTE NUMBER FUNCTION
00 Turn on/off SCENE 1
01 Turn on/off SCENE 2
02 Turn on/off SCENE 3
03 Turn on/off SCENE 4
04 Turn on/off SCENE 5
05 Turn on/off SCENE 6
BANK 1
06 Turn on/off SCENE 7

VDPDMXC145 VELLEMAN 8
07 Turn on/off SCENE 8
08 Turn on/off SCENE 1
09 Turn on/off SCENE 2
10 Turn on/off SCENE 3
BANK 2
“ “
112 Turn on/off SCENE 1
113 Turn on/off SCENE 2
114 Turn on/off SCENE 3
115 Turn on/off SCENE 4
116 Turn on/off SCENE 5
117 Turn on/off SCENE 6
118 Turn on/off SCENE 7
BANK 15
119 Turn on/off SCENE 8
120 Turn on/off SCENE 1
121 Turn on/off SCENE 2
122 Turn on/off SCENE 3
123 Turn on/off SCENE 4
124 Turn on/off SCENE 5
CHASE
125 Turn on/off SCENE 6
126 BLACKOUT
6. Cleaning and Maintenance
1. All screws for installing the devices or parts of the device have to be screwed down tight and
must not be corroded.
2. The housing, mounting supports and connections should not be modified or tampered with
e.g. do not drill extra holes in mounting supports, do not change the location of the
connections, etc.
3. The electric power supply cables must be undamaged. Have the device installed by a
qualified technician.
4. Disconnect the device from the mains prior to maintenance activities.
5. Wipe the device regularly with a moist cloth. Do not use alcohol or solvents.
6. Entrust a qualified technician with the maintenance of this device. Contact your dealer for
spare parts if necessary.
7. Technical Specifications
Power Supply AC/DC adapter 9-12Vdc/300mA (supplied)
Number of DMX Channels 192
Max. Cable Length 100m
Music Control via built-in microphone or MIDI interface
Dimensions 482 x 132 x 73mm
Weight 2.5kg
The information in this manual is subject to change without prior notice.
/