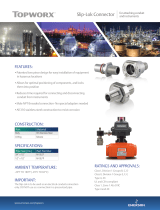
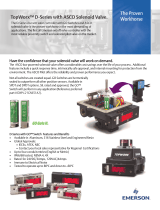
Page is loading ...

Slip-Lok Installation Manual
Global Support Offices
Americas
3300 Fern Valley Road Louisville, Kentucky
40213 USA
+1 502 969 8000
Asia-Pacific
1 Pandan Crescent Singapore 569625
+65 6891 7550
Europe , Middle East, Africa
Horsfield Way
Bredbury Industrial Estate Stock-
port SK6 2SU
United Kingdom
+44 0 161 406 5155
The Emerson logo is a trademark and service mark of Emerson Electric Co. © 2017 Emerson Electric Co. © 2017 TopWorx, All rights reserved. TopWorx™, and GO™ Switch, are all
trademarks of TopWorx, All other marks used in this document are the property of their respecve owners. Informaon contained herein is subject to change without noce.
ES-06185-1 R1
About Emerson-TopWorx
Emerson Process Management, is the global leader in valve control
and position sensing for the process industries. Our solutions enable
management and controlling of operations more intelligently and effi-
ciently under the most demanding and extreme conditions.
TopWorx™ discrete valve controllers enable automated on/off
valves to communicate via FOUNDATION Fieldbus, Profibus, De-
viceNet, AS-Interface, and HART protocols. They attach to all rotary
and linear valves and actuators and carry a variety of glob-al certifica-
tions.
For more information please visit www.topworx.com.
Or contact us at: info.topw[email protected]
Safety Notice
These instructions should be read before proceeding with the installa-
tion, operation and maintenance of the product. Installation, operation or
maintenance work must be performed by personnel with the necessary
training and experience. If you are in doubt about any aspect of such
work contact TopWorx™ before proceeding.
Installation-General Guidance
1. Loosen the set screws on the base of the Slip-Lok assembly and
separate the two halves of the assembly.
2. Thread the Slip-Lok base into the switchbox enclosure and thread
the opposite side of the Slip-Lok assembly into the accessory
3. Route the accessory wires through the Slip-Lok assembly and land
them on the terminal strip inside the switchbox
4. Press the accessory side of the Slip-Lok assembly into the base of
the Slip-Lok assembly and press together, so that the surfaces
mate flush
5. Rotate the accessory as needed to the desired position and lock in
place using the set screw on the collar of the Slip-Lok assembly
The product must be installed in accordance with the requirements of
relevant National and International standards. Thread sealant should be
used to prevent water ingression and a minimum of 5 threads of engage-
ment is required to meet certification requirements.
Certifications
Class I, Division 1 Groups B,C,D
Class II, Division 1 Groups E,F,G
Type 4, 4X, 7, and 9
Temperature Limitations
Ambient Temperature Range: -29°C to 82°C
WARNING: To prevent the possibility of death, personal injury,
or property damage, the two Slip-Lok connectors halves must
be fully seated together and both locking screws tightened to
20 in. lbs. [2,3 Nm]. Ensure that the Slip-Lok connector is se-
cure before placing into service.
360°
3/4” NPT - Part# AV-SLEP 1/2” NPT - Part# AV-SLPP
/


