Page is loading ...

Pegatha Aluminum Baluster
Face Mount
Installaon Instrucons 2015 V1.0
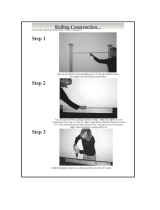
Step #1 – Measure and Cut Railings
Measure the distance between your posts and
note the length.
Use your measurement and mark your top and
bottom rails.
Use a miter saw to cut your rails to the deter-
mined length.
Check all local building codes before you begin!
www.pegatha.net
Step #2 – Determine Baluster Locations
Lay your top and bottom rail next to each other
and mark the center of your rails.
Mark the baluster locations 4 7/8” on center
along both railings. This will allow for 3 3/4” spac-
ing between the balusters.
Apply stain, paint or other finish to the railings
and posts.
Step #3 – Install Railings
Install both the top & bottom rails between your
posts.
Make sure to place a support block under the
bottom rail .
Step #3 – Install Balusters
We recommend making a wood fixture for in-
stalling Pegatha Face Mount balusters that gives
you the correct spacing between them.
Place a support block under the bottom railing if
you have not done so in Step 3.
Find your previously marked lines and use the
provided screws to apply the balusters to the
railings.
/


