Trex WT12088 Installation guide

Type
Installation guide
2017 INSTALLATION GUIDE
TREX
®
DECKING
AND RAILING
ENGLISH
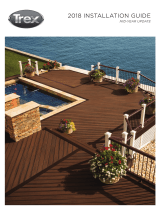
ON THE COVER
decking:
Transcend in Tiki Torch & Lava Rock
railing: Signature in Charcoal Black
with Trex posts in Vintage Lantern
» Page 5 – Removed Trex Hideaway Universal Collated Clip System
» Page 7 – Renamed Reveal Railing Care and Cleaning Guide to Signature Railing Care and Cleaning Guide
» Page 8 Removed Glossary of Terms page
» Page
12 – Added SKU page for Trex Lighting products
» Page
21 – Renamed Trex Reveal Post Cap Light to Signature Post Cap Light
» Page
23 – Renamed Trex Reveal Post Lamp to Trex Wedge Deck Rail Light
» Page
26 – Added SKU page for Decking and Hidden Fasteners
» Page
33 – Updated stair overhang from ½” to ¾
» Page
35 – Added tip about using additional fastening method when using Trex Universal Fasteners in wide
temperature range environments
» Page
40 – Updated Surface Mount Post Instructions to show revised picture of guide block
» Page
44 – Updated Joist Mount Post Instructions to clarify attachment methods and show revised picture
of guide block
» Page
53 – Added SKU for Transcend, Signature (formally Reveal), and Select Railings
» Page
57 – Updated Transcend Railing instructions to show the following:
Remove Colonial Baluster option
Added post choices
Added new footblock instructions
Added new 3-hole bracket instructions
Added additional details to Transcend Stair instructions
» Page
73 – Updated Reveal Railing instructions to show the following:
Renamed to Signature Railing
Added Signature Cocktail design
Added Signature Traditional design
Added Signature Stair Cocktail design
Added Signature Stair Traditional design
» Page
107 – Renamed Reveal Panel to Signature Panel instructions
» Page
114 – Updated Select Railing instructions to show the following:
Remove all square balusters
Added new bracket design
» Page
129 – Updated warranties
This symbol indicates text continues to next page.
Trex provides a variety of valuable resources to answer your questions or concerns. For
additional assistance, check out:
»
Trex.com
Here you will fi nd a wealth of useful information on Trex’s extensive products including:
installation, care and cleaning instructions and videos, technical help, and FAQs. You’ll also
nd inspiring photos of deck projects, steps to help you plan and start your project, and
tips for selecting the right deck builder. At trex.com, you can request information, register
your warranty, and reach out to customer service representatives who can answer even
more questions.
» Call 1-800-BUY-TREX (1-800-289-8739) and speak to a technical support representative
who can answer your questions.
» Email your question or concern to question@trex.com and we’ll get back to you quickly.
Refer to www.trex.com for up-to-date installation and technical documents that may not be
found in this printed guide.
NEED HELP?
CHANGES FOR 2017 INSTALL GUIDE:
NOTE: Construction methods are always improving. Please refer to www.trex.com for the most up-to-date installation requirements.
3
INSTALLATION GUIDE
TREX INSTALLATION GUIDE
CONTENTS
SECTION ONE: General Information
Safety ......................................................................................5
Tools ........................................................................................5
Care and Cleaning ..................................................................6
SECTION TWO: Planning Ahead
Trex Decking ...........................................................................9
Railing (Including ADA Handrail) ..........................................9
Trex Lighting ...........................................................................9
Trex
®
RainEscape
®
Drainage System ...................................9
Installing Hot Tubs, Planters, and Seating ...........................9
Installing Fireplaces and/or Fire Pits ...................................9
Installing a Pergola ...............................................................10
Installing Trex
®
Spiral Stairs™ .............................................10
Installing Trex
®
Outdoor Kitchens™ ...................................10
Special Patterns ...................................................................10
SECTION THREE: Lighting
How to Install Trex
®
DeckLighting
Outdoor Lighting SKUs ......................................................12
Parts List/Tools Needed ................................................... 13
Lighting and Wiring Overview ..........................................13
Helpful Tips ....................................................................... 13
General Information ......................................................... 14
Pla nning ............................................................................. 14
Installing Wiring ................................................................14
Making Connections ........................................................ 14
Timer Operation Instructions .......................................... 15
Installing Post Cap Lights ................................................ 15
Installing Deck Rail Lights ................................................ 15
Installing Riser Lights .......................................................16
Installing Recessed Deck Lights .....................................16
How to Install Trex
®
LandscapeLighting
Parts List/Tools Needed ................................................... 17
Helpful Tips ........................................................................ 17
How to Install Trex Well Light, Path Lights, and
Multifunction Lights ..................................................... 18
How to Install Trex Spotlight ............................................ 19
How to Program Dimmer Remote.................................. 20
How to Install Signature
®
Post Cap Light
Parts List/Tools Needed ................................................... 21
Helpful Tips ........................................................................ 21
Installing Post Cap Lights ................................................ 21
How to Install Trex Wedge Deck Rail Light
Parts List/Tools Needed .................................................. 23
Helpful Tips ....................................................................... 23
Installing Post Lamps ...................................................... 23
SECTION FOUR: Decking
Decking, Porch Flooring & Fascia SKUs ............................ 26
Decking and Fascia Recommended Fasteners .................27
Trex
®
Fascia Installation Recommendations .................... 28
Framing and Fastening Tips ............................................... 28
Rooftop and Sleeper Deck Systems .................................. 30
Code Compliance ................................................................. 31
Gapping and Overhang ....................................................... 32
Stairs .................................................................................... 33
How to Install Decking
Tips for Installing a Trex Hideaway
®
Hidden Fastening
System (Stainless Steel or Universal) .............................. 34
Installing Angled Deck Boards in Corners .................... 34
How to Butt Seams.......................................................... 34 .
Routing Square Edged Boards ....................................... 34
How to Install Trex Hideaway Universal Hidden Fasteners
Parts List/Tools Needed ................................................ 35
Installing Start Clips and First Board............................. 35
Installing Universal Fasteners ........................................ 35
Installing Second Board .................................................. 35
Complete Installation ...................................................... 35
Installing Last Board
Option 1: Using Fascia Board ...................................... 35
Option 2: With Deck Board Overhang ........................ 36
Option 3: Face Screwing both Decking and Fascia ... 36
How to Install Trex Escapes
®
Boards with Trex
Hideaway Universal Fasteners ........................................ 36
How to Replace Trex Boards Installed with Trex
Hideaway Universal Fasteners ....................................... 36
How to Install Stair Treads ..................................................37
Option 1: Face Screw ........................................................37
Option 2: Using 2x4 Wood Support Blocks ....................37
How to Install Trex Transcend
®
Porch Floorboards
Parts List/Tools Needed ................................................ 38
Installing Start Clips and First Porch Board ................. 38
Installing Trex Hideaway Universal Hidden Fasteners . 38
Installing Second Porch Board ....................................... 38
Installing Last Porch Board ............................................ 39
Option 1: Using Fascia Board ...................................... 39
Option 2: With Porch Board Overhang ...................... 39
How to Install Porch Stair Treads ...................................... 39
Option 1: Hidden Fasteners and Face Screwing ........... 39
Option 2: Hidden Fasteners and 2x4 Foot Blocks ........ 39
Location and Installation of Surface Mount
Post – Decking ................................................................. 40
Parts List/Tools and Materials Needed ........................ 40
How to Install Post Mounts on Pressure-Treated
Wood Framing .............................................................. 40
Corner Post Installation .......................................... 40
Line Post Installation ................................................ 41
How to Install Guide Blocks ............................................. 41
How to Install Railing System of Choice ........................ 42
Location and Installation of Post Mounts – Concrete ..... 42
Parts List/Tools Needed ................................................ 42
Pre-drill Holes .................................................................. 42
How to Install Guide Blocks ............................................ 43
How to Install Railing System of Choice ........................ 43
How to Install Joist Mount Posts
Parts List/Tools Needed ................................................ 44
Inside Mount
Front Rim Plate – Between Joists .............................. 45
Front Rim Plate – Next to Joist ................................... 45
Side Joist ...................................................................... 46
Joist Mount Post – Inside Mount/
Continued
4
INSTALLATION GUIDE
4
4
NOTE: Construction methods are always improving. Please refer to www.trex.com for the most up-to-date installation requirements.
TREX INSTALLATION GUIDE
CONTENTS/CONTINUED
Corner ............................................................................47
Fascia Mount
Front Rim Plate – Next to Joist ................................... 48
Side Joist – With Blocking .......................................... 49
Outside Frame Corner ................................................. 50
Composite Post Applications
Installation of Guide Blocks and Railing ..................... 51
SECTION FIVE: Railing
Post Sleeves, Caps and Skirts SKUs ............................. 53
Signature Post Sleeves, Caps and Skits SKUs ............. 53
Signature Aluminum Railing SKUs ................................. 54
Transcend Railing SKUs .................................................. 55
Select Railing SKUs ......................................................... 56
Aluminum Gates SKUs .................................................... 56
Aluminum ADA Compliant Handrail SKUs .................... 56
Trex Transcend
®
Railing
Parts List/Determining Balusters Needed ....................57
Trex Transcend Railing Con gurations
......................... 58
How to Install Standard Railing ...................................... 59
How to Install Cocktail Railing .........................................61
How to Install Traditional Railing .................................... 62
How to Install Round or Square Aluminum
Balusters ....................................................................... 63
How to Install Standard Glass Panel Railing ................. 64
How to Install Cocktail Style Glass Panel Railing ......... 66
How to Install Traditional Style Glass Panel Railing ......67
How to Install On-An-Angle Railing ................................ 69
How to Install Crown and Universal Birds
Mouth Railing ............................................................... 69
How to Install Crown and Universal Stair Railing ......... 70
Trex Signature
®
(formerly Reveal
®
) Railing
Parts List/Determining Balusters Needed ....................73
Installing Signature Posts and/or Signature
Crossover Posts on Decking or Concrete ..................74
Installing Pressure-Treated Post, Post Sleeves,
and Skirts to Use with Reveal Railing ......................74
Installing Signature Posts on Concrete
...................... 75
Railing Confi gurations ......................................................76
Bracket Hardware – Horizontal Applications
................77
How to Install Horizontal Railing .....................................78
How to Install Horizontal Swivel Brackets..................... 84
How to Install Horizontal Swivel Railing ........................ 85
How to Install Signature Cocktail Railing .......................87
How to Install Signature Traditional Railing .................. 88
How to Install Foot Blocks – Horizontal Railing ............ 89
Bracket Hardware – Stair Applications
........................ 90
How to Install Signature Stair Posts and Stair Railing . 92
Attaching Stair Brackets (Fixed Stair, Stair Swivel,
and Compound Swivel) to Signature Posts and
Pressure-Treated Posts and Post Sleeves ................ 93
How To Install Signature Cocktail Stair Railing ........... 101
How To Install Signature Traditional Stair Railing .......103
How to Install Aluminum Gate .......................................105
Trex Signature Panels
Parts List/Tools Needed ...............................................107
Bracket Hardware – Horizontal Applications ..............108
How to Install Panels
...................................................... 110
How to Install Foot Blocks ............................................. 113
Trex Select
®
Railing
Parts List/Determining Balusters Needed .................. 114
Select Railing Confi gurations ........................................ 115
How to Install Trex Select Railing
.................................. 115
How to Install Cocktail Railing ....................................... 118
How to Install Traditional Railing ................................... 119
How to Install On-Angle-Railing ....................................120
How to Install Trex Select Stair Railing ......................... 121
Trex Aluminum ADA Compliant Handrail
ADA Handrail Guidelines ................................................124
ADA Railing Profi les ........................................................125
How to Install Trex Aluminum ADA Compliant
Handrail .......................................................................126
90º Wall Return ...........................................................126
Wall Mount ...................................................................126
Rail-to-Rail Connections/Internal Connector ..........126
Elbows (90º, 36º, 3, 31º, 5º) ...................................127
Handrail Return 18..................................................127
Corner Mount ..............................................................127
SECTION SIX: Warranties
Trex Transcend
®
, Trex Enhance
®
, Trex Select
®
, and Trex
®
Universal Fascia Limited Fade & Stain Warranty ................ 129
Trex
®
Limited Warranty ....................................................... 131
Trex Signature
®
/Reveal
®
Railing Limited Warranty ........132
Color Palette ..............................................Inside Back Cover
5
GENERAL INFORMATION
SAFETY
When working on any construction project, you should
wear protective clothing and safety equipment. Wear
safety glasses, gloves, a dust mask and long sleeves,
particularly when cutting in confi ned spaces.
Trex decking and railing are heavier and more fl exible
than wood. DO NOT try to lift the same quantity of
Trex boards as you would traditional lumber. Go to
www.trex.com for Safety Data Sheets (SDS).
TOOLS
You can create intricate shapes, profi les, and patterns
with Trex. Most installments require no special tools.
For best results, use carbide-tipped blades and router
bits.
When using a miter
saw, we recommend
using the Trex
Blade
*. This
comes in 3 different
sizes and is ideal
for cutting all our
decking and railing
products (these are
not recommended
for cutting Trex
Elevations
®
). Refer
to www.trex.com for
more information.
Install Trex
recommended
fasteners with
standard power drills
or approved screw
guns.
If your choice is to use
the metal Trex Hideaway
Hidden Fasteners, using
the pneumatic gun by
TigerClaw
®
* is a terrifi c
option. This will allow for
a quicker install time.
Trex Gun Pail includes
900-count connector clips
and TC-SG collated pneumatic screws.
Trex
routs beautifully to
give extremely crisp edges.
The groove cutter/router
bit is used with the Trex
Hideaway fastening
system.
CAUTION
DO NOT rout balusters. Routing will change the
surface of Trex products.
*Tiger Claw® is a registered trademark of Tiger Claw, Inc.
* Trex Blade
is manufactured and sold by Freud Tools, Inc. under a
Trademark License Agreement with Trex Company, Inc.
6
GENERAL INFORMATION
NOTE: Construction methods are always improving. Please refer to www.trex.com for the most up-to-date installation requirements.
TREX TRANSCEND
®
, TREX ENHANCE
®
, AND TREX SELECT
®
CARE AND
CLEANING GUIDE
All exterior building materials require cleaning. Generally, soap and water is all that is required to clean Transcend,
Enhance, and Select products. For further information, see below.
PROBLEM SOLUTION
Dirt and Debris
The affected area should be sprayed off with a hose to remove surface debris. Use warm
soapy water and a soft bristle brush to remove dirt and debris from the embossing pattern.
Hard Water Staining
Hard water is water with a high amount of mineral deposits like lime, silica and calcium.
When the water dries, deposits are left behind, leaving unsightly spots on surfaces. This
is not a defect of Trex products but an issue with the water itself. Generally these deposits
can be cleaned with white vinegar on decking surfaces or use of Magic Eraser
®
on railing
surfaces. Rinsing is required so care should be taken to not use hard water for this purpose,
and if it must be used, dry with a cloth or use a blower to dry surfaces.
Chalk Lines
Most colored chalks are permanent and may discolor the surface. Use only Irwin Strait-
Line
®
* Dust-Off Marking Chalk (purple), available at Irwin.com
Tannins Due to Debris
Remove all debris from the deck using a hose or broom. Once the deck surface is dry,
apply a deck “brightener”** to the deck as directed by the manufacturer. Deck Brighteners
contain oxalic acid, which will also remove tannins.
Ice and Snow
A plastic shovel may be used to remove snow from the deck. Use calcium chloride or rock
salt to melt the snow and ice from the deck surface.
Oil, Grease, and Food
All food spills should be removed as soon as possible. The surface must be cleaned
within seven days to maintain the stain warranty. To remove, spray off with a hose
and use warm, soapy water and a soft bristle brush to remove spills from the embossing
pattern.
Mold and Mildew
If debris such as pollen and dirt is allowed to remain on the deck surface, mold can feed on
the biofilm. Using a hose and warm, soapy water with a soft bristle brush is recommended
to remove the food source and mold.
Using a Pressure
Washer (Concrete,
Stucco, or Ground-in
Construction Dirt)
A pressure washer with no greater than 3100 psi*** that has a fan attachment/
adjustment and soap dispenser may be used to remove dirt, concrete dust, or other types
of construction dirt. Spray deck with soap, then follow by gently scrubbing each deck board
with a soft bristle brush. Spray/rinse each individual deck board using a fan tip no closer
than 8-in (203 mm) from the decking surface. RINSE THOROUGHLY. If dirty water from
cleaning is left to dry, this will cause a film to remain on the decking surface.
Maintaining
Transcend and
Select Railing
NEVER use acetone or other solvents on Trex Transcend or Select railing to maintain the
beauty of the surface. For color transfer issues (from attachment of baluster spacer), use
Mr. Clean
®
Magic Eraser
®
Original or Magic Eraser
®
Extra Power**** to help remove this.
For small surface scratches, marks, or scuffs, use Dupli-Color Scratch Seal
Clear Sealer
Pen.*****
7
GENERAL INFORMATION
7
TREX SIGNATURE
®
RAILING CARE AND CLEANING GUIDE
Maintaining the appearance of your Trex Signature railing is important. The occasional wash is recommended
as over time your Signature railing may show signs of weathering as a result of exposure to the elements. The
frequency of cleaning will depend on the environment and exposure to various types of elements.
For installations where the atmosphere is in uenced by bodies of salt water or other contaminant
conditions, cleaning is required every 6 to 9 months. Failure to adhere to the required cleaning guidelines
will void the Trex Limited Warranty with respect to any condition resulting from such failure. For purposes
of any warranty claim, you should retain documentation of the cleaning date, cleaning method used, brand
and amount of chemical used, and invoice from cleaning company (or a receipt for chemicals used).
Regular cleaning may minimize the effects of weathering and remove dirt, grime and other build-up. The best
method of maintaining the appearance of your Signature railing is to occasionally wash it using a solution of warm
water and a non-abrasive, pH neutral detergent solution. The railing surface should be thoroughly rinsed after
cleaning to remove all residues. Use a soft white cloth, sponge or a soft bristle brush.
DO NOT clean Trex Signature railing with solvents such as thinners or solutions containing chlorinated
hydrocarbons, esters or ketones.
The following cleaners are recommended for cleaning Trex Signature railing:
» Formula 409
®
Cleaner Degreaser/Disinfectant*
» Spray Nine
®
Cleaner/Disinfectant**
» Simple Green
®
All Purpose Cleaner***
» Fantastik
®
All Purpose Cleaner****
» Windex
®
Cleaner*****
* Formula 409® Cleaner Degreaser/Disinfectant is a trademark of Clorox Company.
** Spray Nine® All Purpose Cleaner/Disinfectant is a trademark of Illinois Tool Works Inc.
*** Simple Green® All Purpose Cleaner is a trademark of Sunshine Makers Inc.
**** Fantastik® All Purpose Cleaner is a trademark of SC Johnson & Son Inc.
***** Windex® is a trademark of SC Johnson & Son Inc.
TREX TRANSCEND
®
, TREX ENHANCE
®
, AND TREX SELECT
®
CARE AND
CLEANING GUIDE/CONTINUED
PROBLEM SOLUTION
Job Site Storage
Store decking on a fl at level surface, and ALWAYS use proper supports (dunnage).
DO NOT store directly on the ground. When stacking decking bundles, supports (dunnage)
should start approximately 8-in (203 mm) from each end and be spaced approximately 2-ft
(0.61m) on center. In addition, supports (dunnage) should line up vertically/perpendicular
to the decking product. Adjust support blocks (dunnage) accordingly if bundles are loose.
For Select decking, 1x12 and 1x8 products, the maximum stack height is 12 bundles. For
all other decking products maximum stack height is 14 bundles (IMPORTANT TO NOTE
THAT PROPER DUNNAGE SPACING MUST BE IN PLACE FOR THESE HEIGHTS).
When stacking multiple bundles, ensure that dunnage lines up vertically down through
each stack. ALWAYS cover decking products on site until ready to be installed.
NOTES:
» Refer to www.trex.com to view a general care and cleaning video for Transcend, Enhance, and Select decking.
» Refer to www.trex.com for a care and cleaning guide for Trex Early-Generation Composite and PVC Decking.
*Strait-Line® is a registered trademark of Irwin Industrial Tool Company.
**Use of products containing bleach or acid will lighten the lighten the surface of Trex. Use in an inconspicuous area to determine whether you like the
effect. Neither product will affect the structural integrity of Trex.
***Use of a pressure washer greater than 3100 psi could damage the boards and void the warranty.
****Mr. Clean® and Magic Eraser® are registered trademarks of The Procter and Gamble Company.
*****Scratch Seal™ Clear Sealer Pen is a registered trademark of Dupli-Color Products Company.
8
PLANNING AHEAD
PLANNING
AHEAD
9
PLANNING AHEAD
Trex Decking:
» When installing any Trex decking product, especially
Trex Transcend Tropicals, it is a good idea to mix
and match all of the boards on the job site prior to
installation to ensure an appealing mix of light and
dark tones.
» DO NOT combine Trex Select decking with other Trex
decking products. Trex Select boards are thinner
than Transcend and Enhance boards.
Railing (Including ADA Handrail):
» First, pick the railing style you want.
» Calculate your spanning based on the railing you chose.
» Determine the number of balusters you will need
based on the railing you choose.
NOTE: Trex Transcend and Select railings are made
to be installed at maximum of 6' (1.83 m) or 8'
(2.44 m) on center (depending upon type of railing
you choose). Trex railings are not true 6' (72") or
8' (96") in length. Trex Signature railings are made
to be installed at maximum 6' or 8' CLEAR SPAN
BETWEEN POSTS.
»
Determine post locations prior to installing any
decking. In most cases, posts are usually installed
before decking is installed.
» Confirm with your local building official if ADA
Handrail is required, and if so plan spanning for
posts accordingly to allow for attachment of Trex
ADA Handrail. ADA Handrail requires a span of
6' OC for posts.
» Grill placement: A good recommendation to help
prevent damage to your railing is to not have a grill
too close to your railing. Allow for ample airspace
between the back/sides of your grill to help prevent
charring or staining to the railing.
See pages 5772 for Transcend railing installation, pages
73–104 for Signature railing installation,
pages 114–123 for Select railing installation, and
pages 124–127 for ADA Handrail installation.
Trex Lighting:
» Plan locations of lights, power supply, timer, and
dimmer. These should be accessible for service if
necessary.
» Install wiring before decking and railing have been
installed.
» DO NOT run wires between joists and deck boards.
See pages 12–24 for Trex
® OutdoorLighting
installation.
Trex® RainEscape® Deck Drainage System:
» Plan ahead for deck layout to allow for proper
placement of Trex RainEscape within the joist system.
» Make sure joists are straight and square.
See www.trex.com for more information on Trex
RainEscape recommendations and installation. Trex
RainEscape is manufactured and distributed by Dri-Deck
Enterprises, LLC, under a trademark license with Trex
Company, Inc.
Installing Hot Tubs, Planters, and Seating:
» Plan ahead proper joist spanning if required (this is
especially important if installing a hot tub).
» Refer to page 31 for Trex Decking Span Chart for
specifi c loads.
Call 1-800-BUY-TREX for detailed questions.
Installing Fireplaces and/or Fire Pits With Trex
Decking:
» Determine if fi re will be gas or wood burning
(NOTE: Most fi re pits shown in Trex images are gas
burning).
» For gas, the fi re pit is installed by cutting around the
Trex decking. It is not to be installed on top of Trex
decking. A fi re-resistant material is installed under
the fi re pit and a protective “wall” made from stone or
other fi re-resistant material is installed to hold fi re pit
in place and also protect the decking from heat.
» For wood, fi re pits are not recommended on top
of Trex decking unless using a product called
DeckProtect
®*
. Wood-burning fi re pits can damage
the decking due to extreme heat from the bottom
of the fi re pit and/or burning embers “shooting”
onto the decking. DeckProtect
®
was tested on all
Trex decking and there were no issues with burning
of the decking surface when placed directly under
a standard size portable fi re pit along with the
accompanying rack (NOTE: Rack is not available
for all sizes, so check with manufacturer fi rst
for verifi cation). Trex does recommend that the
PLANNING AHEAD
*DeckProtect® is a registered trademark of Infinite Heat Solutions.
10
PLANNING AHEAD
DeckProtect
®
padding/rack be moved from time to
time for general cleaning underneath. It should be
noted that even when using DeckProtect
®
, burning
embers could “shoot” beyond the protective mat and
burn the deck.
For more information about this product, please
visit their website at www.deckprotect.net or call
1-800-BUY-TREX. DeckProtect
®
is a registered
trademark of Infi nite Heat Solutions.
Installing a Pergola on Trex Decking:
» Keep in mind if you are planning to install a Trex
®
Pergola
on your deck, you will need access to the
underside of the deck. Trex Pergola mounts with a
10" x 10" (254 mm x 254 mm) aluminum plate on the
underside of the deck, creating a clamping effect on
both the top and bottom of the deck for maximum
strength. If installed, water barriers and any under
deck coverings will have to be removed to properly
install the pergola posts.
» You need to consider the location of your pergola
posts in respect to joists. However, you do not have
to mount your plates between joists. It is possible to
place blocks on the bottom of the joists and mount
the Trex Pergola brackets through the blocks.
Trex
®
Pergola™ products are manufactured and sold by Home
& Leisure, Inc., d/b/a/ Structureworks Fabrication under a
Trademark License Agreement with Trex Company, Inc. A 25-year
Limited Warranty is provided by manufacturer.
Installing Tre Spiral Stairs:
» Refer to www.trexspiralstairs.com for detailed
information on how to plan and install Trex Spiral
Stairs.
Trex
®
Spiral Stairs™ are manufactured and sold by M. Cohen
and Sons, Inc., d/b/a The Iron Shop, under a Trademark License
Agreement with Trex Company, Inc. A 25-year Limited Warranty is
provided by manufacturer.
Installing Trex® Outdoor Kitchens Cabinetry and
Storage™:
» Refer to www.trexoutdoorstorage.com for detailed
information on how to install Trex Outdoor Kitchens
and Cabinetry Storage products.
Trex
®
Outdoor Kitchens Cabinetry and Storage™ products are
manufactured and sold by NatureKast, LLC., under a Trademark
License Agreement with Trex Company, Inc. Warranty is provided
by manufacturer.
PLANNING AHEAD/CONTINUED
Herringbone Pattern
Tile Pattern
Picture Frame Pattern
Special Patterns
When planning a unique pattern, you will need to adjust the framing to support the surface pattern. Refer to the
span and gapping charts on pages 30–31. Many decks are designed to take advantage of angles, as shown below.
NOTE: You can always reference the Design Tools
Section on www.trex.com for additional planning
ahead aids.
NOTE: Construction methods are always improving. Please refer to www.trex.com for the most up-to-date installation requirements.
11
LIGHTING
LIGHTING
12
LIGHTING
Pyramid or Flat Post Cap Light
» 4" x 4" LED Post Cap Light
[4.55 in x 4.55 in (115 mm x 115 mm)
actual internal dimensions]
Use with Trex 4 in Composite Railing Posts
» 5.5 ft (1.67 m) Male LightHub
®
Lead
Aluminum Post Cap Light
» 2.5" x 2.5" LED Aluminum Post Cap Light
[2.6 in x 2.6 in (66 mm x 66 mm) actual internal dimensions]
Use with Trex 2.5 in Aluminum Railing Posts
» 5.5 ft (1.67 m) Male LightHub Lead
LED Riser Lights
» 4 LED Riser Lights
[1.25 in (31 mm) OD]
» 5.5 ft (1.67 m) Male LightHub Lead
Dimmer
» Single Channel with Remote
1 in (25 mm) Forstner Bit—Pack of 6
Recessed Deck Lights
» 4 LED Recessed Lights
[1 in (25 mm) OD]
» 5.5 ft (1.67 m) Male LightHub Lead
Transformer with Timer
» Output Voltage: 12VDC
» Output Power: 100W or 30W
» Output Current: 8.3A or 2.5A
» Photo-Activated Timer
» 20 ft (6.09 m) LightHub Wire Extension Cable
Multi-zone Transformer Adapter
LightHub Accessories
» 3-Way Splitter
» 6-Way Splitter
» 5 ft (1.52 m) Wire Extension Cable
» 10 ft (3.04 m) Wire Extension Cable
» 20 ft (6.09 m) Wire Extension Cable
» 40 ft (12.19 m) Wire Extension Cable
» 60 ft (18.28 m) Wire Extension Cable
» Female to Female Adapter
LANDSCAPE LIGHTING
DECK LIGHTING
Deck Rail Light
» LED Deck Rail Light
[2.75 in (69 mm) OD]
» 5.5 ft (1.67 m) Male LightHub Lead
Wedge Deck Rail Light
» LED Wedge Deck Rail Light
[1.875 in wide x 3 in high (47 mm x 76 mm) actual dimensions]
Compatible with all Trex Railing Posts
» 5.5 ft (1.67 m) Male LightHub Lead
Outdoor Lighting SKUs
TEXTURED CHARCOAL BLACK: BKLAMPLED C
TEXTURED BRONZE: BZLAMPLEDC
TEXTURED CLASSIC WHITE: WTLAMPLEDC
TEXTURED CHARCOAL BLACK: BKALPOSTLAMPLED
TEXTURED BRONZE: BZALPOSTLAMPLED
TEXTURED CLASSIC WHITE: WTALPOSTLAMPLED
TEXTURED CHARCOAL BLACK: BKRISERLED4PKC
TEXTURED BRONZE: BZRISERLED4PKC
TEXTURED CLASSIC WHITE: WTRISERLED4PKC
Rounded Path Light
Stepped Path Light
Well Light
Multifunction Light
Spotlight*
BKRDPATH2PK, BZRDPATH2PK
BKSPATH2PK, BZSPATH2PK
BKWELL, BZWELL
BKMULTI, BZMULTI
BKSPOT, BZSPOT
*Includes: 36v Step-up Transformer & Female to Female Adapter
DLDIMMER
DLBIT6PK
RECESSLED4PKC
8.3A, 100W: 83DLTRANSFORMER
2.5A, 30W : 25DLTRANSFORMER
DL5TFSPLIT1PK
DL3SPLIT6PK
DL6SPLIT4PK
DL5FTWR4PK
DL10FTWR4PK
DL20FTWR4PK
DL40FTWR2PK
DL60FTWR1PK
DL
FADAP6PK
PYRAMID CAPS
BKPYLEDCAP4X4C
WTPYLEDCAP4X4C
FPPYLEDCAP4X4C
THPYLEDCAP4X4C
VLPYLEDCAP4X4C
GPPYLEDCAP4X4C
RSPYLEDCAP4X4C
FLAT CAPS
BKSQLEDCAP4X4C
WTSQLEDCAP4X4C
FPSQLEDCAP4X4C
THSQLEDCAP4X4C
VLSQLEDCAP4X4C
GPSQLEDCAP4X4C
RSSQLEDCAP4X4C
TEXTURED CHARCOAL BLACK:
BKALCAPLED25
TEXTURED BRONZE: BZALCAPLED25
TEXTURED WHITE: WTALCAPLED25
ACCESSORIES
LIGHTING & DESCRIPTION ITEM NUMBER
13
LIGHTING
A
B
C
D
E
HOW TO INSTALL TREX DECKLIGHTING
PARTS
A
A
Pyramid Post Cap Light
Riser Light SplitterDeck Rail Light Recessed Deck Light
B C D E
x2x2 x2x2
Flat Post Cap Light
1/2"
(13 mm)
1"
(25 mm)
NOTE: All wiring and splitters are mounted to inside of
framing. Picture is just representation of where to place
these in general.
WARNING:
» DO NOT INSTALL DECKLIGHTING IN CLOSE
PROXIMITY TO POOLS OR HOT TUBS AS
CHEMICALS FROM THE WATER CAN DAMAGE
LIGHTING FIXTURES.
» DO NOT INSTALL WIRING UNDER HEAVY
WEIGHT OR LOAD AS THIS CAN DAMAGE
WIRING.
Lighting and Wiring Overview
TOOLS NEEDED
» 5ft, 10ft, 20ft, 40ft, and 60ft connection/extension
wires sold separately (these are male-to-male
connection wires).
HELPFUL TIPS
» Please note that Trex lighting operates on DC
power. NEVER mix AC and DC fi xtures on the
same circuit. Doing so will result in extremely
premature fi xture failure and is not covered by
the Trex limited warranty. You must use a Trex
transformer on all Trex lighting installations.
» Leave slack in wire to make fi xture terminations.
» Recessed lights work well spaced 4' (1.22 m) to
6' (1.83 m) on center around perimeter of deck.
» Deck rail lights work well at changes in levels of a
deck—at the top or the bottom of the stairs, or in
conjunction with post cap lights.
» Recommended riser light placement is two lights
per standard width tread. Otherwise, spacing of
2' to 3' is considered optimal.
» Drill holes perpendicular to the surface, being
careful to hold drill steady, to avoid producing an
enlarged hole. If hole is enlarged, light fixture will
have a loose fit. Use of a flexible outdoor semi-
permanent adhesive (silicone caulk) may be
required to anchor light in place.
» Riser and deck rail light holes can be through
holes. However, recessed light holes should be
drilled to a depth of 3/4" (19 mm). Over-drilled
recessed light holes will require use of silicone
caulk to anchor light in place.
» Splitters should be placed under the deck at the
base of each post that has lighting installed. If not
installing lighting on posts, splitter spacing will be
dependent on spacing of light fixtures.
» Cap all unused female connections with caps
provided or weather-resistant silicone to prevent
water damage or corrosion.
» The splitter is cross-linked so there is no specified
plug for lights versus lead wires.
» Leads attached to each light are approx. 5' 6"
(1.5 m to 1.8 m) in length and have male terminals
to plug into splitter.
» Use a separate dimmer control for each light type
for maximum control (5-way transformer splitter
may be required).
» It is recommended to have power source installed
and turned on when installing lights to ensure all
components work.
» When installing wiring, avoid extreme angles,
pressure, or tension on the wiring, as this can
cause pinching of the wiring and create a
lighting failure.
NOTE: Avoid railing brackets and locations for deck rail
lights when running wires up posts.
NOTE: It is recommended to install wiring and splitters
before decking and railing have been installed. DO NOT
run wires between joists and deck boards.
14
LIGHTING
NOTE: Construction methods are always improving. Please refer to www.trex.com for the most up-to-date installation requirements.
General Information
» Refer to www.trex.com for instructional videos on
how to install Trex Decklighting.
» USE TREX TRANSFORMER ONLY. Use of any other
transformer voids warranty.
Planning
NOTE: When designing your deck, plan locations of
lights, power supply, timer, and dimmer. These should be
accessible for service. Installing a GFCI outlet is REQUIRED
to help prevent damage to lighting from electrical surges.
1. The dimmer remote will work in a
30' (9 m) radius of the unit.
2. Dimmer should be installed in a
dry location.
3. Timer must be installed
vertically with receptacle
facing downwards. Timer must
be at least 1' (.305 m) from
ground level when installed as
per federal safety code height
regulations. Timer must be in view of the sun to use
the dusk/dawn feature.
Installing Wiring
NOTE: It is recommended to install wiring and splitters
before decking and railing have been installed.
» Use male-to-male connection wire (lengths vary)
that will connect to each required splitter.
1. Wiring must be run under
decking structure and
behind stringers. DO NOT
run wires between deck
boards and joists. Staple to
frame with cable staples at
least 1/4" (6 mm) wide.
DO NOT crush wire
insulation with staple.
2. Wiring can be run under deck and behind risers.
Staple to frame with cable staples at least 1/4"
(6 mm) wide. DO NOT crush wire insulation with
staple.
3. Remove 5' (1.52 m) lead wire that is connected to post
cap and attach wire to post with male connection at
top of post (female connection would be at bottom of
post and connect into splitter). Avoid running wire on
side of post where railing brackets or deck rail lights
will be installed. Leave approximately 6" (152 mm) of
lead at top to make connections. Staple to frame and
posts with cable staples at least 1/4" (6 mm) wide.
DO NOT crush wire insulation with staple.
Making Connections
1. Install splitters to
inside of framing using
hardware provided.
Install at every post
base where lighting is
present and depending
on spacing in between
each riser and recessed
light.
2. Attach male lead from lights to female connections
on splitter. Also attach male-to-male connection
wires in between each splitter. Continue until all
wiring from lights are attached to splitters and
connector wires are attached in between splitters.
3. Cap off all unused female connections on splitters
using caps provided or weather-resistant silicone.
HOW TO INSTALL TREX DECKLIGHTING/CONTINUED
GFCI
Outlet
Timer
Transformer
To Splitter
Dimmer
(Optional)
1
3
6"
(152 mm)
1
1
2
2
Light
connection
Connection
wire
Connection wire
3
2
TRANSFORMER CAPACITY BY TYPE
8.3A Transformer
(83 DL TRANSFORMER)
Type of
Light
2.5A Transformer
(2.5 DL TRANSFORMER)
Riser 285 90
Recessed 285 90
Post Cap 85 22
Deck Rail 285 90
Above listing is for maximum number of each individual types of lights.
If mixing and matching lighting, contact Trex to determine if more than
one transformer is required.
15
LIGHTING
HOW TO INSTALL TREX DECKLIGHTING/CONTINUED
Timer Operation Instructions
1. Select the mode of operation:
» Dusk to Dawn
» 2–8 hours
» Always “ON”
» “OFF”
Program repeats daily.
When power is fl owing to lights,
green light above POWER is on.
Installing Post Cap Lights
NOTE: Install post cap lights after the railing system,
post sleeve skirt, and post sleeve have been installed.
1. Connect male lead from wiring to female connector
from cap. Also attach male-to-male connection
wires in between each splitter. Continue until all
wiring from lights are attached to splitters as well as
connector wires are attached in between splitters.
(See Making Connections section for details.)
2. After verifying wiring is correct by turning lights on,
attach cap to top of post with silicone caulk.
Installing Deck Rail Lights
NOTE: Instructions shown below are for new deck
installation and are shown BEFORE railing system has
been installed.
1. Place post sleeve over
pressure-treated post
and mark desired
height, centered on post
sleeve for deck rail light
location.
NOTE: If deck boards are
not installed yet, place a
deck board on framing to
ensure post sleeve is at correct height.
2. Drill a 1" (25 mm) hole through post sleeve. Drill deep
enough to mark location on pressure-treated post.
3. Remove the post sleeve from the post.
4.
Drill out existing hole on pressure-treated post 3/4"
(19 mm) deep. Drill two additional holes vertically
below main hole—this will allow space for wiring after
post sleeve is attached.
5. Leave enough slack at top of lead wire and attach
lead wire to post using staples. Attach lead wire to
splitter under decking.
TIP: To hold lead wire in place at drilled out location use
painters tape.
6. Slide post sleeve back over post. If using a post sleeve
skirt, make sure to install the skirt fi rst. Connect
plug on deck rail light to lead wire and tuck wiring into
previously drilled out pockets on post.
7.
Align holes for screws horizontally
and attach fi xture
base to post with provided screws.
2
2
3
1
6"
(152 mm)
1
1
2
Post
Post
Sleeve
1
2
3
4
1
5
2
2
1
6
1
7
2
16
LIGHTING
NOTE: Construction methods are always improving. Please refer to www.trex.com for the most up-to-date installation requirements.
8.
Line up polycarbonate
lens with fi xture housing.
Twist onto fi xture base.
Continue until all wiring
from lights are attached
to splitters as well as
connector wires are
attached in between
splitters. (See Making
Connections section for details.)
NOTE: If railing has already been installed, lead wires
will need to be fi shed through the post sleeve to reach
the desired location for the deck rail light. In some cases,
if the provided lead wire does not fi t (due to connector
size), the wire connectors can be cut off and wire nuts
can be used. Test lights with the power on. If lights that
are wired with this method do not function, then switch
the connector wires.
Installing Riser Lights
NOTE: Install riser lights after stairs and risers have
been installed.
1. Mark locations for
each light, generally
4" (102 mm) above tread.
Consult local codes for
lighting requirements.
NOTE: If possible, avoid
locations over stringers
as holes will be more
dif cult to create.
2. Drill a 1" (25 mm) diameter hole at least 1" (25 mm)
deep into riser. If riser material is thicker than
1" (25 mm), use a 1/2" (13 mm) drill bit to create a
passage for wires.
3. Thread wires through hole. Press light into hole,
ensuring lens is horizontal.
Make connections behind
stairs from male lead wire from recessed light into
female connection on splitter. Also attach male-to-male
connection wires in between each splitter. Continue
until all wiring from lights are attached to splitters and
connector wires are attached in between splitters.
(See Making Connections section for details.)
NOTE: DO NOT install riser light or deck rail light into top
or bottom rails or balusters.
Installing Recessed Deck Lights
NOTE: Install recessed deck lights after installing decking.
1. Mark locations for lights
in deck boards.
NOTE: If possible, avoid
locations over joists as
holes will be more diffi cult
to create.
2. Drill a 1" (25 mm)
diameter hole 3/4"
(19 mm) deep into deck
board. Hole cannot
go all the way through
deckboard or light will
fall through. Make sure
drill bit is perpendicular
to board. Drill a 1/2"
(13 mm) diameter hole
in base of the fi rst hole through deck board.
3. Thread wires through
hole. DO NOT pull LED
into hole by pulling
on wires. This may
damage wires or LED.
Press light into hole until
ush with surface. Make
connections under deck
from male lead wire from
riser light into female
connection on splitter. Also attach male-to-male
connection wires in between each splitter. Continue
until all wiring from lights are attached to splitters and
connector wires are attached in between splitters.
(See Making Connections section for details.)
1
8
2
HOW TO INSTALL TREX DECKLIGHTING/CONTINUED
4"
(102 mm)
4"
(102 mm)
1
2
1
2
3
1
2
1
3
1
2
2
3/4" (19 mm)
17
LIGHTING
HOW TO INSTALL TREX LANDSCAPELIGHTING
PARTS
A
D
E
I
F
H
B
C
J
Spotlight Stepped
Path Light
Multifunction
Light
Well Light
Splitter
Multi-zone Transformer Adapter
(For use with Trex Spotlight or
for multiple dimmer zones)
Male-to-Male
Connector
Wire
Female-to-Female
Adapter
G
Step-up Transformer
(For use with Trex
Spotlight only)
Round
Path Light
TOOLS NEEDED
3/4"
(19 mm)
HELPFUL TIPS
» Location of Trex LandscapeLighting is up to
customer as to where they would like lighting
components placed. Different length of lead wires
can be purchased depending on the distances
between lights.
» Please note that Trex lighting operates on DC
power. NEVER mix AC and DC fi xtures on the
same circuit. Doing so will result in extremely
premature fi xture failure and is not covered by
the Trex Limited Warranty. You must use a Trex
transformer on all Trex lighting installations.
» Leave slack in wire to make fi xture terminations.
Keep in mind slack will also be required to
properly bury wire.
» Trex Landscape wires are approved for underground
use. Wire is made from silver-coated copper.
» Trex Landscape lights will require the use of a
female-to-female adaptor to connect light to male
connector wire (this adapter is included with each
xture and is also sold separately).
» All Trex Landscape lights use male-to-male
connector wires, sold in lengths of 5' (1.52 m),
10' (3.05 m), 20' (6.1 m), 40' (12.2 m), and
60' (18.3 m) (sold separately).
» All lights EXCEPT the spotlight can be wired together
on a circuit.
» Trex Spotlights require different wiring
confi gurations; refer to detailed instructions
on following pages for specifi cs.
» Only use a standard household AC GFCI
protected outlet to help prevent damage from
power surges or lightning.
» When using timer, ensure this is in full view of the
sun if using the dusk/dawn feature.
» It is recommended to have power source attached
when installing lights to ensure all components work.
» When burying wire in live sod use spade shovel
to make a slit in the soil. Bury the wire 1"–3"
(25 mm–76 mm) deep and tamp down the soil.
Water heavily to allow the soil to resettle and
minimize impact on the installation site.
» When installing wiring, avoid extreme angles,
pressure, or tension on the wiring, as this can
cause pinching of the wiring and create a lighting
failure.
WARNING:
BEFORE ANY TREX LANDSCAPELIGHTING
IS INSTALLED, IT IS THE INSTALLERS
RESPONSIBILITY TO ENSURE THAT ALL
UNDERGROUND UTILITIES/LINES ARE
LOCATED (GAS LINES, ELECTRICAL LINES, DATA
LINES, WATER LINES, ETC.) PRIOR TO ANY
WORK BEING DONE.
18
LIGHTING
NOTE: Construction methods are always improving. Please refer to www.trex.com for the most up-to-date installation requirements.
TRANSFORMER CAPACITY BY TYPE
Type of
Light
8.3A (100W)
Transformer
(83 DL TRANSFORMER)
2.5A Transformer
(2.5 DL TRANSFORMER)
Well Light 74 23
Path Light 52 16
Wall Wash
Light
52 16
Above listing is for maximum number of each individual types of lights.
If mixing and matching lighting, contact Trex to determine if more than
one transformer is required. Please visit Trex .c o m for an interactive
capacity calculator.
1. Locate placement of lights and lead wiring. Plan
accordingly if you choose to bury wire under
concrete or other
permanent structures.
2. Place all lights in desired
location. If necessary
use 3/4" (19 mm) auger
with optional extension
in a drill to penetrate
the surface enough to
ensure the fixture is
firmly implanted (SEE
WARNING ON PAGE 17).
3. Run all wires from the power source locations to the
lights on top of the soil, being mindful to leave slack.
Pay special attention if using separate circuits with
independent dimmers (grouping lights by type is
recommended).
4. Connect all lights. Wire the optional dimmer
(recommended) between the main 20' (6.1 m)
transformer to male lead and the transformer
for each circuit. Ensure connections (including
splitters), fixtures, and power sources all work
properly.
4a. Use male-to-male extension cables to make
connections to splitters (all sold separately). Cap
off all unused female connections on splitters using
caps provided or weather-resistant silicone.
5. You can mix and combine all lights except the spotlight
on the same circuit but make sure you
DO NOT exceed the maximum number of lights per
transformer. If running separate circuits with dimmers
on each circuit, using a separate transformer for each
circuit can simplify installation. However, use of a
multi-zone transformer adapter will allow for separate
circuits on the same transformer.
6. It is recommended the installer preview light
placement in the dark to ensure desired effect is
achieved.
7. Once the light, wire, and
splitter placement is
finalized, work from the
light fixtures towards the
power source to bury
the wire to the desired
depth. No more than
1"–3" (25 mm–76 mm) is
required.
1
HOW TO INSTALL TREX LANDSCAPELIGHTING/CONTINUED
(TREX WELL LIGHT, PATH LIGHTS, AND MULTIFUNCTION LIGHTS)
2
1˝–3˝
(25–76 mm)
7
4a
3
Connector Wire
Light
Wire
4
19
LIGHTING
Spotlight
Wire
Female-to-
Female
Adapter
2
TRANSFORMER CAPACITY BY TYPE
Type of Light
8.3A Transformer
(83 DL TRANSFORMER)
Spotlight 12
Above listing is for maximum number of each individual types of lights.
If mixing and matching lighting, contact Trex to determine if more than
one transformer is required.
NOTES:
» Each Trex Spotlight requires use of a dedicated
36V Step-up Transformer (included with each Trex
Spotlight). WARNING: Step-up Transformer DOES
NOT have fault protection, thus care must be taken if
testing.
» Spotlights must use a dedicated line running
directly from the included 36V Step-up Transformer.
Maximum of 12 spotlights are allowed per one
8.3 (100W)-amp transformer. (NOTE: Must use
three multi-zone transformer adapters if installing
all 12 spotlights to single 5A transformer as multi-
zone transformer adapter is designed for up to five
spotlights.) Spotlights have a male lead and require
the use of a female-to-female adaptor to connect
spotlight to connector wire. The spotlight fixture has
a male lead. Install the extension cable accordingly.
DO NOT mix any other lights on the spotlight circuit.
Applying 36V to any other fixture types will result in
very short diode life and will void warranty.
» DO NOT LOOK DIRECTLY INTO SPOTLIGHT
WHEN ON. THIS LIGHT IS VERY BRIGHT.
1. Locate placement of spotlights and lead wiring.
Plan accordingly if you choose to bury wire under
concrete or other
permanent structures.
2. Connect male lead from
light to female to one
end of female adaptor.
3. Connect opposite end of female adaptor to male
connector wire. Choose appropriate length wire
based on your needs. Run all wire on the surface
back to the location of the power supply.
4. Connect opposite end of male connector wire cable
to female end on Step-up Transformer. If using more
than one spotlight, use multi-zone transformer
adapter on Step-up Transformer, making sure
that each spotlight is utilizing its own 36V Step-up
Transformer. Wire the Step-up Transformer or
multi-zone transformer adapter to the 8.3A (100W)
main transformer.
5. If using an optional dimmer (recommended),
simply place the dimmer between the multi-zone
transformer adapter and main transformer.
6. Test lights to ensure power supply, connections,
and light fixtures all work
properly and placement
is appropriate.
7. Ensure that all unused
connections on multi-
zone transformer
adapter are covered
using weather-resistant
silicone.
HOW TO INSTALL TREX LANDSCAPELIGHTING/CONTINUED
(TREX SPOTLIGHT)
4
Connector
Wire
Multi-zone
Transformer
Adapter
To Multi-zone
Transformer Adapter
Step-up
Transformer
5 Step-up
Transformers
3
Female-to-
Female
Adapter
Male
Connector
Wire
5
Multi-zone
Transformer Adapter
5 Step-Up
Transformers
Dimmer
To Main
Transformer
7
20
LIGHTING
8. Ensure that lights are
all working with all
wiring attached prior to
burying any wire.
No more than 1"–3"
(25 mm–76 mm) is
required.
HOW TO INSTALL TREX LANDSCAPELIGHTING/CONTINUED
(TREX SPOTLIGHT)
1˝–3˝
(25–76 mm)
8
A. ALWAYS keep antenna
fully extended for max
range.
B. Up/Down arrows
gradually dim or brighten
lighting.
C. On/Off button cycles
lights ON/OFF.
D. Mode button cycles
through 3 preset
dimming levels: High,
Medium, Low, and Off.
NOTE: First make sure the
red light is illuminating on
the remote. If there is no red
light and the product is new,
contact 1-800 BUY-TREX
for a replacement. If the
product is not new, the A27
battery is replaceable.
1. Install dimmer per
instructions and make
sure lights are On and
working properly.
2. Unplug the transformer
to turn lights Off.
3. Press and hold both the up and down arrow on the
dimmer remote simultaneously.
4. With the dimmer arrow buttons held down, plug the
transformer back in. The lights should blink once to
confi rm programming.
5. Release the up and down arrows on the remote and
test remote to con rm proper operation.
HOW TO PROGRAM DIMMER REMOTE
2
3
4
1
2
A
B
C
D
  • Page 1 1
  • Page 2 2
  • Page 3 3
  • Page 4 4
  • Page 5 5
  • Page 6 6
  • Page 7 7
  • Page 8 8
  • Page 9 9
  • Page 10 10
  • Page 11 11
  • Page 12 12
  • Page 13 13
  • Page 14 14
  • Page 15 15
  • Page 16 16
  • Page 17 17
  • Page 18 18
  • Page 19 19
  • Page 20 20
  • Page 21 21
  • Page 22 22
  • Page 23 23
  • Page 24 24
  • Page 25 25
  • Page 26 26
  • Page 27 27
  • Page 28 28
  • Page 29 29
  • Page 30 30
  • Page 31 31
  • Page 32 32
  • Page 33 33
  • Page 34 34
  • Page 35 35
  • Page 36 36
  • Page 37 37
  • Page 38 38
  • Page 39 39
  • Page 40 40
  • Page 41 41
  • Page 42 42
  • Page 43 43
  • Page 44 44
  • Page 45 45
  • Page 46 46
  • Page 47 47
  • Page 48 48
  • Page 49 49
  • Page 50 50
  • Page 51 51
  • Page 52 52
  • Page 53 53
  • Page 54 54
  • Page 55 55
  • Page 56 56
  • Page 57 57
  • Page 58 58
  • Page 59 59
  • Page 60 60
  • Page 61 61
  • Page 62 62
  • Page 63 63
  • Page 64 64
  • Page 65 65
  • Page 66 66
  • Page 67 67
  • Page 68 68
  • Page 69 69
  • Page 70 70
  • Page 71 71
  • Page 72 72
  • Page 73 73
  • Page 74 74
  • Page 75 75
  • Page 76 76
  • Page 77 77
  • Page 78 78
  • Page 79 79
  • Page 80 80
  • Page 81 81
  • Page 82 82
  • Page 83 83
  • Page 84 84
  • Page 85 85
  • Page 86 86
  • Page 87 87
  • Page 88 88
  • Page 89 89
  • Page 90 90
  • Page 91 91
  • Page 92 92
  • Page 93 93
  • Page 94 94
  • Page 95 95
  • Page 96 96
  • Page 97 97
  • Page 98 98
  • Page 99 99
  • Page 100 100
  • Page 101 101
  • Page 102 102
  • Page 103 103
  • Page 104 104
  • Page 105 105
  • Page 106 106
  • Page 107 107
  • Page 108 108
  • Page 109 109
  • Page 110 110
  • Page 111 111
  • Page 112 112
  • Page 113 113
  • Page 114 114
  • Page 115 115
  • Page 116 116
  • Page 117 117
  • Page 118 118
  • Page 119 119
  • Page 120 120
  • Page 121 121
  • Page 122 122
  • Page 123 123
  • Page 124 124
  • Page 125 125
  • Page 126 126
  • Page 127 127
  • Page 128 128
  • Page 129 129
  • Page 130 130
  • Page 131 131
  • Page 132 132
  • Page 133 133
  • Page 134 134
  • Page 135 135
  • Page 136 136

Trex WT12088 Installation guide

Type
Installation guide

Ask a question and I''ll find the answer in the document

Finding information in a document is now easier with AI