Page is loading ...

Installation and Maintenance guide
GJPACW1V-15/20/30/40/60
GJPACW1-15/20/30
EN
________________________________________________________________________________________________
Gullberg & Jansson AB | Smältaregatan 6 | SE - 263 39 Höganäs
Tel: +46 (0) 42 34 05 90 | Fax: +46 (0) 42 34 02 10 | E-mail: inf[email protected] | www.gullbergjansson.se


Preface
Congratulations on your purchase of a pool heat pump from Gullberg & Jansson AB. We hope
it meets your expectations and provides you with many years of energy ecient heating.
In this Installation and Maintenance Guide you can read how installation, operation, service
and maintenance are to be performed to ensure correct function. It is therefore important
that you read through the manual carefully before starting or serving the unit. Gullberg
& Jansson can not be held responsible for damage resulting from incorrect installation,
incorrect fault tracing or incorrect maintenance.
Yours sincerely,
Gullberg & Jansson AB
Subject to possible misprints and design alterations. Gullberg & Jansson AB is not responsible for misinterpretations, any obvious
misprints and consequences resulting from these.
FOR YOUR OWN RECORDS
Please complete the details below. Keep these close to hand should anything happen.
Product:
Installed by: Telephone:
Serial number:
Date of installation:
The proof of installation for registration at
Gullberg & Jansson AB is enclosed with the
installation. It is important that this is completed
and posted at the earliest possible date!
!


Table of contents
General information
Product description 35
Functional principle 35
Component part and accessories 36
Important information 36
Transport and storage 36
Installation 36
Use and operation 36
Maintenance procedures 36
Service and support 36
Miscellaneous 36
Checklist installation 37
Guarantee conditions 37
Safety Regulations 37
Installation
Outline diagram 39
Positioning the unit 39
Set up 39
Distance to the pool 40
Leading o condensation water 40
Pipe connections 40
Bypass coupling 40
Electrical installation 40
Starting up the unit 40
Use and operation
Description of LED controls 43
How to change operating parameters 43
How you select the operating mode 44
Explanation of sensor values 44
Setting the time 45
Timer setting and activation 45
Deactivation of the timers 45
Maintenance, service and
fault tracing
Winter drainage 47
Maintenance 47
Fault tracing 47
Error code table 47
Fault charting table 48
Technical specication
Connection key Chiller 300.2 49
Wiring diagram 50
One-phase connection 50
Three-phase connection 51
GJPACW1V-15/20/30/40/60 52
Component placement 52
Technical data 53
Dimensions and connections 53
GJPACW1-15/20/30 54
Component placement 54
Technical data 55
Dimensions and connections 55
Appendices
Questions and answers 57


General information
Product description
The models GJPACW1-15/20/30 and
GJPACW1V-15/20/30/40/60 are a range of specically
developed air/water heat pumps designed for energy
ecient heating of swimming pools or spa pools. The models
have been developed and designed for the Scandinavian
climate by Gullberg & Jansson AB. The pool heat pumps are
designed to work with good eciency and a low noise level.
All models feature:
Titanium heat exchangers resistant to chlorine and salt •
water
Environmentally friendly and eective coolant (R410a)•
Digital LED control with timer•
Dynamic defrosting function for an extended pool •
season
Flow switch and union couplings for safe operation and •
easy installation
Stainless steel casing•
Functional principle
The pool heat pumps GJPACW1-15/20/30 and
GJPACW1V-15/20/30/40/60 are primarily used for heating,
but can also be used for cooling. The models are controlled
via a ow switch and in order to work the pool’s circulation
pump must be running.
The pool heat pump works with the greatest energy
eciency when there are small dierences in temperature
between the inlet and outlet. The recommendation is 1-2
degrees dierence between the inlet and outlet. The water
ow is regulated via a bypass coupling. Read more about the
bypass coupling in section 2 – Installation.
All models are developed to guarantee good eciency in
the Nordic climate. However, it is important to be aware that
the degree of eciency is dependent on the surrounding
outdoor temperature and the temperature of the pool
water. The heat pump can be seen to perform with dierent
eciency during dierent parts of the year depending on
the outdoor conditions. At the start of the season, when
the water in the pool is cold, the heat pump needs to
work continuously for a long period to produce the right
temperature in the pool. When the pool water has reached
the required temperature, the heat pump automatically stops
and starts as required. It is always cost-eective to cover the
pool when not in use, especially at night. Approximately 60
– 70 % of the heat disappears from the water surface of the
pool. Covering also reduces the heat pump’s running time.
A Gullberg & Jansson heat pump must always be installed
outdoors, as it collects its energy from the surrounding air.
It must be well ventilated and must not be enclosed or in
any other way shielded so the air circulation is impaired. The
circulation of the air between the intake and exhaust impairs
eciency. Avoid installation close to sensitive walls, for
example, bedroom rooms.
Frost or ice can form on the heat pump’s evaporator. This is
completely normal. An automatic defrosting cycle will start to
melt the ice. After the defrosting cycle the heat pump starts
its standard program and continues to heat the pool.
The models are designed for pool heating during May to
September, which can be considered as a normal pool
season. The swimming pool heat pump normal working
condition is between 5 and 40 °C ambient temperature and
between 15 and 40 °C inlet water temperature.
This chapter provides background information about the pool heat pumps covered in this Installation and Maintenance Guide.
Important information, guarantee conditions and safety instructions are also presented here. This chapter is intended for both users
and installation engineers.
1
35
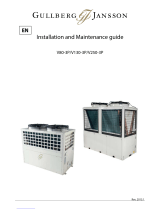
POOL
Outline diagram for installation of GJPACW1(V)-XX.
Chlorinator
Sand lter Circulation pump

37
General information
36
Component part and accessories
Main unit – GJPACW1(V)-XX1.
Installation accessories2.
Installation instructions•
Union couplings•
Damping rubber blocks•
Winter cover•
Important information
Especially important points concerning transport and
storage, installation, usage, maintenance and fault tracing are
presented below.
Transport and storage
Models designed to be transported vertically must be
transported in this way. This is because the suspension inside
the compressor can be damaged if the unit is laid down. If
the heat pump is tilted during installation or draining this
should be done with care and for the shortest time possible.
The original packaging is intended to be used to reduce the
risk of transport damage.
Remove the packaging and before installation check that the
heat pump has not been damaged during transport. Report
any transport damage to the forwarding agent.
Installation
The pool heat pump must be installed by a qualied
installation engineer and placed outdoors. The unit must
stand rmly, straight and raised from ground level. Provide a
rm and at surface, for example, garden slabs, concrete bed,
Leca blocks or similar.
Noise propagation must be taken into consideration when
positioning during installation. Positioning of the unit must
be done so that noise from the compressor and fan disturb
the environment as little as possible.
Large amounts of melt and condensation water can be
discharged during defrosting and operation. Consequently, it
is important to provide good drainage and run-o.
The units must stand freely so that air is not prevented to
pass the evaporator. Avoid a placement that produces cold
air circulation as this reduces the output of the heat pump.
Use and operation
The parameters on the display are set at the factory and do
normally not need to be adjusted. The temperature is set
to 27 °C. If you wish to increase the temperature, check rst
to ensure that your wishes of a high temperature do not
contravene any guarantees concerning the general pool
construction.
Maintenance procedures
It is important to drain the water from the pool heat
pump before the winter. The material guarantee does not
cover damage due to freezing on account of insucient
maintenance. The heat exchanger can also be ushed out to
remove any remaining deposits ahead of winter drainage.
Read more about drainage in section 4 - Maintenance, service
and fault tracing.
Perform regular checks to ensure that the inlet grille is not
blocked by leaves, snow, etc. In addition, make sure that
excessive frost or ice does not build up below the unit during
cold weather conditions.
The outer case can be cleaned using a damp cloth if
necessary. Take care not to scratch the unit. To minimize
ageing of the surface, it’s recommended to apply wax at least
once every year.
Service and support
GJPACW1-15/20/30 and GJPACW1V-15/20/30/40/60 are
designed for reliable operation and a long life. If a fault
should occur you should always contact the installation
engineer who carried out the installation. If the installation
engineer in turn considers it to be a question of a material
or manufacturing fault, he/she will contact us for inspection
and action to rectify the problem. Always state the product’s
manufacturing number. The number can be found on the
rating plate below the LED display. A basic guide to fault
tracing is presented in section 4 - Maintenance, service and
fault tracing.
Miscellaneous
The unit may only be repaired by a qualied installation
engineer or an accredited workshop. Original spare parts
must be used for repairs.
Solar collectors and heat pumps can be combined, however,
please contact the dealer or G & J regarding any uncertainty
with the installation. It is important to avoid connecting the
hot solar collector water directly to the pool heat pump. If the
solar collector water becomes too hot you risk damaging the
heat pump beyond repair.
The proof of installation for registration at Gullberg & Jansson
AB is enclosed with the installation. It is important that this is
completed and posted at the earliest possible date!
Installation material is enclosed inside the
machine. Open the cover and remove the
material before installation. Note that the
installation engineer provides pipes and
the bypass coupling for the installation.
!

General information
37
Checklist installation
The following checklist provides a general description of how
the installation is carried out.
Place the heat pump on a rm and horizontal surface.
;
Make sure that the area is well drained and supply
enough air for the evaporator.
Open the service hatch and remove the enclosed
;
installation kit. Ensure that all component parts have
been delivered.
Mount the heat pump, with a bypass, in series after the
;
sand lter. Exercise care to ensure the inlet and outlet are
installed correctly.
Connect the electricity.
;
Operating mode Check carefully to ensure there is
;
sucient circulation before start up.
Adjust the ow to the pool heat pump to the right level
;
Check the settings
;
Read more about the installation in section 2.
Guarantee conditions
The component parts of the system must be transported,
stored, installed and used in accordance with the provisions
set out in the manual.
Repairs must be carried out by an accredited installation
engineer. Original parts must be used for repairs.
The guarantee becomes void if the conditions above are
violated.
Safety Regulations
It is especially important to take into account the following
safety instructions when handling, installing and using the
heat pump:
Only qualied persons may work on the product’s •
cooling system.
Always disconnect the power supply before working on •
the system.
36


39
Installation
A comprehensive installation description is provided in this chapter. This chapter is primarily intended for installation engineers, but
can also be read by the end user to increase his/her knowledge.
2
Positioning the unit
The pool heat pump will work ideally under the following
conditions:
Access to fresh air.
;
High enough water circulation.
;
Correct electrical installation.
;
In principle the pool heat pump can be placed anywhere
outdoors. However, do not place the pool heat pump
enclosed with restricted access to the air intake and air
exhaust (see the gure below). A structure with a roof is not
necessary. If you want to build in the heat pump, remember
that exhaust air must be ventilated properly!
See the illustration below for horizontal and vertical fan
models.
Set up
The pool heat pump must be placed on a rm, horizontal
base and should not be placed next to or be installed with
brackets on sensitive walls with a lightweight structure. The
unit must be placed so that noise from the compressor and
fan disturb the surroundings as little as possible.
The unit must stand rmly, straight and raised from ground
level. Ensure a rm and at surface is provided, for example,
garden slabs, concrete bed, Leca blocks or similar.
Large amounts of melt and condensation water can be
discharged during defrosting and operation. Consequently,
it is important to provide good drainage and run-o. Up to
10 litres of condensation water per hour can form during
operation.
The outdoor section must be placed so that the air supply to
the evaporator coil is sucient. Otherwise the power output
and eciency will be impaired.
Outline diagram
Air intake
2000 mm
500 mm
800 mm
Air intake
2500mm
700mm
300mm
500mm
700mm
Refer to the labels on the unit before connecting the inlet and outlet.
POOL
Chlorinator
Sand lter Circulation pump

41
When connecting 3-phase units, make sure
that the phases are in correct order or the
machine won’t start. If the machine won’t
start at the rst setup, please swap two
phases around and the machine will start.
!
40
Distance to the pool
The pool heat pump is normally installed in connection to
the pool’s purication system to minimise pipe routing. If the
pipes are insulated heat loses will be minimal provided that
the overall pipe length is less than 30 metres (pool water in
and pool water return). An approximate estimation of the
heat loses over an overall pipe length of 30 metres is 0.6
kW per hour for each 5 degrees of temperature dierence
between the pool water and the air surrounding the pipes.
This is equivalent to an increased running time for the heat
pump of 3-5 %.
Leading o condensation water
Outdoor air is cooled in the evaporator by approximately
5-10 degrees. The water vapour then condenses on the
evaporator coil ns. If the air humidity is high this can result
in many litres of water per hour. To counter this, there are
several drainage holes in the base plate to lead o the water.
It is important to consider the position of the unit so that the
condense water can be led o correctly.
Pipe connections
The pool heat pump is connected to the pool’s circulation
system with the help of the supplied 50 mm union couplings.
Screw connections to the heat exchanger must be tightened
by hand.
A bypass coupling must be tted to adjust the right partial
ow to the pool heat pump, and to simplify service.
Bypass coupling
We recommend that a bypass coupling is tted to all
installations in order to adjust the right partial ow to the
pool heat pump. The right partial ow results in balanced
operation and reduced wear on the heat pump’s most
expensive section, the heat exchanger.
Adjusting the bypass
Correct adjust of the bypass can be done in dierent ways.
One of the easiest ways can be summarized as follows:
Open all the valves
1.
Check parameter A and b, see section 3.2.
If the dierence is above 2 degrees, gradually close the 3.
bypass valve until the dierence is between 1-2 degrees
If the display shows EE03 this means that the ow switch in
the system receives insucient water, so the bypass valve
must be closed more to increase the ow through the pool
heat pump.
First open all the valves to simplify adjustment of the bypass.
Electrical installation
The electrical connection is made to the pool heat pump’s
junction box located behind the front panel. A working
switch (with or without a fuse) must be connected and be
positioned fully visible next to the unit. The working switch
protects against unintentional starting, for example, when
servicing the unit. Even if the heat exchanger is electrical
isolated from the remainder of the system and separates the
pool water from the electricity, the unit must be connected
to earth to provide satisfactory short-circuit protection.
There is an additional connection on the terminal block, 1
and 2. This connection can be used if you wish to connect a
separate circulation pump to the pool heat pump.
See the wiring diagram in section 5 for more detailed
information about the electrical connection.
Starting up the unit
In order to heat the pool or spa water, the pool’s circulation
pump must start and water needs to circulate through the
heat exchanger. The following procedure should be followed
when starting the pool heat pump for the rst time:
Start the pool’s circulation pump. Check for any leakage
1.
and that there is a ow to and from the pool.
Switch on the supply voltage and check the current
2.
running settings.
Installation
Do not confuse condense water
for water leakage.
!
Bypass valve

41
Press ON/OFF on the display, the unit should start after a 3.
few seconds.
After a few minutes, check that the exhaust air is colder
4.
than the outdoor air temperature (5-10 ºC).
Stop the pool’s circulation pump and make sure that the
5.
pool heat pump stops automatically.
Let the system run around the clock until the required
6.
temperature is reached. The pool heat pump will know
when the temperature has been reached, but will not
switch o until the required temperature has been
exceeded by 1º. The pool heat pump will then start again
when the temperature in the pool drops by 1º below the
required temperature.
Flow switch: The pool heat pump is equipped with a ow
switch that prevents starting in the event of insucient water
ow.
Time delay: The compressor will start after a delay of
approximately 1 minute to prevent repeated restarts and
compressor wear. Even a brief power failure activates the
start delay of 1 minute.
Installation
40


43
Use and operation
3
Description of LED controls
A description of the LED display is given below. All
parameters are set at the factory and do not need to be
adjusted before start up. During operations, press to
check the current status of the unit. Here the set parameters;
incoming water / outgoing water / evaporator / ambient
temperature, can be checked. If no buttons are pressed
within 5 seconds the LED display shows the incoming water
temperature. When the unit is in standby mode, it shows the
current time.
How to change operating parameters
Put the unit to standby mode by pressing the ON/OFF-1.
button. The clock is shown.
Select a parameter between 0-9 by pressing the arrows.
2.
Press in MODE while at the same time pressing ON/OFF.3.
When the parameter value ashes the setting can be 4.
made by pressing the arrows.
After 5 seconds the clock is shown and the setting is
5.
accepted.
Check the setting by using the arrows.
6.
Start the unit again by pressing ON/OFF.7.
M
Defrosting
Heating
Cooling
Timer
ON
Timer
OFF
M
Defrosting
Heating
Cooling
Timer
ON
Timer
OFF
M
Defrosting
Heating
Cooling
Timer
ON
Timer
OFF
M
Defrosting
Heating
Cooling
Timer
ON
Timer
OFF
M
Defrosting
Heating
Cooling
Timer
ON
Timer
OFF
M
Defrosting
Heating
Cooling
Timer
ON
Timer
OFF
M
Defrosting
Heating
Cooling
Timer
ON
Timer
OFF
M
Defrosting
Heating
Cooling
Timer
ON
Timer
OFF
Press CLOCK to
set the time
Press TIMER ON
to set the time
for startup
Press TIMER OFF
to set the time
for shutdown
Press ON/OFF
to start/stop the
heat pump
Press MODE
to change the
operating mode
Press to
check and adjust
the operating
parameters
Parameter 0: Required pool temp.
in cooling mode. (8 - 28 °C)
Parameter 1: Required pool temp.
in heating mode. (15 - 40 °C)
Parameter 2: Time between
defrosting. (30 - 90 min)
Parameter 3: Start temperature for
defrosting. (-30 - 0 °C)
Parameter 6: Quantity system.
NOTE! Not to be changed!
Parameter 5: Maximal defrosting
time (0 - 15 min)
Parameter 4: Stop temperature for
defrosting. (0 - 30 °C)
Note that the unit must be
in standby mode in order to
change any parameters.
!

4544
Use and operation
M
Defrosting
Heating
Cooling
Timer
ON
Timer
OFF
M
Defrosting
Heating
Cooling
Timer
ON
Timer
OFF
M
Defrosting
Heating
Cooling
Timer
ON
Timer
OFF
M
Defrosting
Heating
Cooling
Timer
ON
Timer
OFF
M
Defrosting
Heating
Cooling
Timer
ON
Timer
OFF
Press ON/OFF to start the heat 1.
pump. The display shows the
inlet temp. and the operating
mode during normal operations.
If parameter 8 is set to 1 it is
2.
possible to switch between
cooling and heating modes by
pressing MODE.
Operating mode set to cooling
How you select the operating mode
Operating mode set to heating
Explanation of sensor values
M
Defrosting
Heating
Cooling
Timer
ON
Timer
OFF
M
Defrosting
Heating
Cooling
Timer
ON
Timer
OFF
M
Defrosting
Heating
Cooling
Timer
ON
Timer
OFF
Inlet temperature Temperature of the evaporator coilOutlet temperature
M
Defrosting
Heating
Cooling
Timer
ON
Timer
OFF
M
Defrosting
Heating
Cooling
Timer
ON
Timer
OFF
Ambient air temperatureDischarge temperature
Parameter 7: Automatic restart on
power failure. (0 = No / 1 = Yes)
Parameter 9: External pump. (0 =
Always running / 1 = Running at
the same time as the compressor)
Parameter 8: (0 = Cooling mode / 1
= Heating mode or cooling mode /
2 = Not used / 3 = Heating mode)

45
Use and operation
M
Defrosting
Heating
Cooling
Timer
ON
Timer
OFF
Press CLOCK. Current time is shown in 1.
the display.
Press CLOCK. The hours will start
2.
blinking, and can be adjusted with the
arrows.
Press CLOCK again. The minutes will
3.
start blinking, and can be adjusted
with the arrows.
Press CLOCK again to set the time.
4.
Setting the time
Setting the time
M
Defrosting
Heating
Cooling
Timer
ON
Timer
OFF
The heat pump can be started and
shutdown using a timer. The LED above the
button indicates an active timer.
To set the start timer follow the instructions
below:
Press TIMER ON. Current timer setting
1.
is shown in the display.
Press TIMER ON again. The hours will
2.
start blinking and can be changed by
using the arrows.
Press TIMER ON again. The minutes
3.
will start blinking and can be changed
using the arrows.
Press TIMER ON again to set the timer.
4.
To set the stop timer follow the instructions
below:
Press TIMER OFF. Current timer setting
5.
is shown in the display.
Press TIMER OFF again. The hours will
6.
start blinking and can be changed by
using the arrows.
Press TIMER OFF again. The minutes
7.
will start blinking and can be changed
using the arrows.
Press TIMER OFF again to set the timer.
8.
Timer setting and activation
Setting the start timer
M
Defrosting
Heating
Cooling
Timer
ON
Timer
OFF
Setting the shutdown timer
Press TIMER ON/OFF.1.
Press CLOCK. The LED above the timer 2.
button shouldn’t be lit and the timer is
now deactivated.
Deactivation of the timers
44


47
Maintenance, service and fault tracing
4
Winter drainage
It is extremely important to remember to winter drain
the machine before winter storage! The guarantee does
not cover damage to the titanium heat exchanger due to
freezing! Drainage is easy to perform, by unscrewing the pipe
connections on the inlet and outlet pipes. Check that the
machine is really drained. It is a good idea to ush out the
heat exchanger in connection with winter drainage using,
e.g. a garden hose to remove any chlorine residue.
Maintenance
Clean the pool/spa lter regularly to ensure sucient ;
circulation.
Check that the area surrounding the unit provides good
;
drainage and ventilation.
It is a good idea to clean the heat exchanger to promote
;
good function and energy savings. This is easily done
with winter drainage. Flush the heat exchanger using e.g.
a garden hose and drain thoroughly. This will reduce the
risk of chlorine deposit build up.
Check the power supply and cable connections regularly.
;
If the unit does not function as designed, shut it down
and contact the installation engineer.
Check that the evaporator is clean. Use a brush and
;
vacuum to remove any dust or leaves. Don’t use a high
pressure jet! Regular cleaning will guarantee maximum
eciency.
Clean the surface using a sponge or the like. To minimize
;
ageing of the surface, it’s recommended to apply wax at
least once every year.
Ahead of the winter – drain and cover!
;
Fault tracing
If a fault should occur you should always contact the
installation engineer who carried out the installation. If he/
she in turn considers it to be a question of a material or
manufacturing fault, he/she will contact us for inspection
and action to rectify the problem. Always state the product’s
manufacturing number. Information can be gained from the
following fault tracing guide. Frequently asked questions
with answers are also presented in the section 6. Always read
through this section before contacting your dealer.
Operating disturbance Error message Cause Action
Sensor error inlet (INWT) PP01 Sensor not connected, broken
cable or short circuit Check or replace the sensor
Sensor error outlet (OUTWT) PP02 Sensor not connected, broken
cable or short circuit Check or replace the sensor
Sensor error evaporator
(PIPE1) PP03 Sensor not connected, broken
cable or short circuit Check or replace the sensor
Sensor error hot gas sensor
(PIPE2) PP04 Sensor not connected, broken
cable or short circuit Check or replace the sensor
Sensor error outdoor sensor
(ROOMT) PP05 Sensor not connected, broken
cable or short circuit Check or replace the sensor
Too high temp. dierence
between inlet and outlet PP06 Insucient water ow, 12 degrees
dierence between inlet and outlet Check the water ow
Anti-freeze protection PP07 Inlet under 4 °C and outdoor air 0
°C or colder Automatic heating mode
Flow switch EE03 Low ow or no water in the system Check the water ow, adjust the
bypass, replace the ow switch
High pressure or low pressure
pressostat EE04 Gas quantity too high or low. Contact installer.
Communication error EE08 No contact with the control unit Check the connection between
the control unit and display
Error code table
In the event of any uncertainty before winter
drainage, contact your dealer! An iced-up heat
exchanger due to forgotten winter drainage is
not covered by the guarantee!
!

48
Maintenance, service and fault tracing
Operating disturbance Cause Action
Set pool temperature not
reached
The heat pump is in standby mode.1.
The heat pump is in cooling mode.2.
The heat pump is too small for the 3.
pool.
The outdoor air temperature is too low.
4.
The pool’s insulation is not sucient.5.
The discharge gas temperature is too 6.
low.
Press the ON/OFF button.
1.
Change the operating mode to heating 2.
mode as set out in the section 3.
Larger heat pump required.
3.
The season is over. Larger heat pump 4.
required.
The pool needs to be covered.
5.
The discharge gas sensor, parameter d, 6.
should show more than 45 °C.
The heat pump ices up again.
Pool temperature is lower than 15 °C.1.
Unusually high humidity.2.
Ambient temperature is lower than 5 3.
°C.
Reset parameters for defrosting to a
1.
longer defrosting time and a higher stop
temperature. If necessary run in cooling
mode to melt the ice. See section 3.
Flow switch generates EE03. The ow is too low.
1.
Check that the purication system is 1.
running
Check the sand lter and ush if
2.
necessary.
Check the bypass setting.
3.
Fault charting table
/