Page is loading ...

EN - Installation and reference manual
IMPORTANT - These instructions apply only to the 816 actuator. Control
box installation/operation is described in a separate control box manual.
Linear actuator
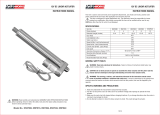
Apollo 1500 / 1550 / 1551
816 LA

Apollo 816 LA Linear Actuator
Installation Reference Manual
22 support.hysecurity.com
TABLE OF CONTENTS
SECTION 1: APOLLO 816 ACTUATOR OVERVIEW....................3
SECTION 2: INSTALLATION SAFETY..........................................4
SECTION 3: TOOLS NEEDED FOR INSTALLATION...................4
SECTION 4: 816 ACTUATOR MECHANICAL INSTALLATION....5
SECTION 5: 816 TO CONTROL BOARD CONNECTIONS.........13
5.1 816 to 936 CONTROLLER WIRING.........................14
5.2 816 to 1050 CONTROLLER WIRING.......................16
5.3 816 to Mercury 310 CONTROLLER WIRING...........18
SECTION 6: SETTING 816 OPEN/CLOSE LIMITS......................19
6.1 816 Limits: 936 or 1050.............................................20
6.2 816 Limits: Mercury 310............................................22
SECTION 7: PART DRAWINGS....................................................23
SECTION 8: WARRANTY..............................................................26
Contact Information: Visit https://support.hysecurity.com/hc/en-us for installation manuals, replacement part
instructions, part diagrams and more. Qualied HySecurity distributors are experienced and trained to assist in
resolving installation problems. For the name of a qualied distributor near you, call HySecurity at 800-321-9947.
*Before contacting your distributor or HySecurity Technical Support, obtain the serial number of your operator.

Apollo 816 LA Linear Actuator
Installation Reference Manual
33
MX4684 Rev.D ©2021
• 816-1 - Actuator with 12’ harness
• 816-2 - Actuator with 42’ harness
Actuator
Hardware Kit
(P/N 1125)
Gate Bracket,
Black
(P/N 10025215)
Apollo 816 La Actuator Parts Identication
PART# DESCRIPTION QTY
816-1 Actuator with 12 Foot Harness 1
816-2 (Dual Gate Only) Actuator with 42 Foot Harness 1
1116 Pivot Arm 1
10025215 Gate Bracket 1
1125 Actuator Hardware Kit 1
Apollo 816 La Actuator Specications
Drive Electromechanical
Gate Length Max. 16 ft (5 M ) Leaf
Gate Weight Max 600 lb (272 Kg)
Open/Close Time (To 90°) 14 - 16 s (Adjustable)
Temperature Rating -4º To 122º F (-20º To 50º C)
Operating Voltage 12 VDC
Actuator Dimensions 42 inches Retracted - 66 inches Extended
User Controls 936,1050, or Mercury 310 Controllers
Listed To Ul325 936, 1050, and Mercury 310 Controlers:
Usage Class I, II,
Congratulations on selecting a Nice Apollo 816 LA linear actuator for your gate opener system. With proper
selection, system design, installation, and maintenance this actuator should provide years of reliable operation.
This manual covers ONLY the installation of the Apollo 816 LA linear actuator.
SECTION 1: APOLLO 816 ACTUATOR OVERVIEW
Pivot Arm (P/N 1116)
IMPORTANT!
For control box installation, wiring, operation, maintenance instructions and all safety information,
refer to the appropriate control box installation manual used for the system being installed.

Apollo 816 LA Linear Actuator
Installation Reference Manual
44 support.hysecurity.com
SECTION 2: INSTALLATION SAFETY
SECTION 3: TOOLS NEEDED
WARNING
READ ALL SAFETY INFORMATION WHEN INSTALLING A SWING GATE SYSTEM! SEE EITHER OF THE
FOLLOWING MANUALS FOR SAFETY INFORMATION:
’CBOX936 Control Box Installation and Program Manual (with 936 controller).
’CBOX1050 Control Box Installation and Program Manual (with 1050 controller).
’MB1050 Control Box Installation and Program Manual (with 1050 controller).
’ACBOX/SolarBOX Installation and Program Manual (with Mercury 310 controller)
CAUTION
’Disconnect power at the control panel before making any electric service power connections.
’Be aware of all moving parts and avoid proximity to any pinch points.
IMPORTANT!
’The gate operator installation is NOT a “do-it-yourself” project. Contract a qualied gate operator installation
company to install this system to ensure a safe and reliable installation.
’It is the responsibility of the property owner to ensure the installer is qualied to carry out the installation in
a safe and professional manner.
’Consult local government agencies for up-to-date rules and regulations to satisfy licensing, codes or
regulations that regulate automated gate system design and installation.
’The gate for which the gate operator is intended to be used should itself be installed correctly so that it is
level and plumb and the gate opens easily and evenly.
’Note that Nice swing gate systems are not intended for installation on an incline.
Below is a list of tools necessary for installation of the Apollo 816 LA actuator:
• Welder (for pivot arm) unless optional bolt-on pivot arm (P/N 446) is used.
• Basic hand tools (screwdrivers, wrenches, pliers, etc.)
• Level (for ensuring pivot arm and actuator are level).
• Framing square (for determining pivot arm location)
• Torch/Chop Saw (for cutting pivot arm)
• Grinder (for sanding Pivot Arm)

Apollo 816 LA Linear Actuator
Installation Reference Manual
55
MX4684 Rev.D ©2021
Fig-1A: "Pull-To-Open" Pivot Arm Installation
INSTALL PIVOT ARM TO GATE: PULL-TO-OPEN
1A
1. Securely mount the pivot arm to the hinge post (Fig-1A).
2. If necessary, cut pivot arm for correct placement of the actuator
mounting hole. Measurements are taken from the center of pivot of the
gate hinge.
3. It is strongly recommended to weld the pivot arm to the hinge post.
SECTION 4: 816 ACTUATOR INSTALLATION
LEFT SIDE VERTICAL VIEW
TOP VIEW
6” 6”
13” 13”
PIVOT ARM PIVOT ARM
PIVOT ARM
1/2”
HINGE POST
CENTER OF HINGE
CENTER LINE OF
ATTACHMENT POINT
FOR GATE BRACKET
CENTER OF HINGE
GATE CLOSED
DIRECTION OF OPENING
HINGE POST HINGE POST
NOTICE
Welding is much preferred
but Nice oers an optional
bolt-on pivot arm (P/N 446)
for when welding is not
possible.
CAUTION
Never weld parts to the gate or posts when the control board
is powered to avoid irrepairable damage to the circuit board!

Apollo 816 LA Linear Actuator
Installation Reference Manual
66 support.hysecurity.com
Fig-1B: "Push-To-Open" Pivot Arm Installation
1B
1. Securely mount the pivot arm to the hinge post (Fig-1B).
2. If necessary, cut pivot arm for correct placement of the actuator
mounting hole. Measurements are taken from the center of pivot of
the gate hinge.
3. It is strongly recommended to weld the pivot arm to the hinge post.
INSTALL PIVOT ARM TO GATE: PUSH-TO-OPEN
TOP VIEW
6” 6”
11” 11”
PIVOT ARM
PIVOT ARM
PIVOT ARM
1/2”
HINGE POST
CENTER OF HINGE
HINGE POST HINGE POST
CENTER LINE OF
ATTACHMENT POINT
FOR GATE BRACKET
CENTER OF HINGE
GATE CLOSED
DIRECTION OF OPENING
LEFT SIDE VERTICAL VIEW
NOTICE
Welding is much preferred but
Nice oers an optional bolt-on
pivot arm (P/N 446) for when
welding is not possible.
CAUTION
Never weld parts to the gate or posts when the control board
is powered to avoid irrepairable damage to the circuit board!

Apollo 816 LA Linear Actuator
Installation Reference Manual
77
MX4684 Rev.D ©2021
Fig-2: Actuator Installation
2MOUNT ACTUATOR TO PIVOT ARM
LOCK
NUT
ACTUATOR
BOLT
PIVOT
ARM
WASHER
1. Mount the actuator to the pivot arm as shown (IMAGE 2-1). Note that the washer goes above the
actuator ange.
2. Tighten the lock nut to prevent movement or shifting when the actuator is running. This will also
prevent excessive “bounce” or “wobble” when the gate stops moving.

Apollo 816 LA Linear Actuator
Installation Reference Manual
88 support.hysecurity.com
AFFIX GATE BRACKET TO ACTUATOR ARM
1/2”x 3” BOLT
GATE
BRACKET
ACTUATOR
ARM
1/2” WASHER
1/2” LOCK NUT
3
Fig-3A: Gate Bracket to Actuator Arm Using Bolt, Washer, & Nut
Fig-3B: Gate Bracket to Actuator Arm Using Hitch Pin and R-Clip
1. If security is of the utmost importance then the bracket may be connected to the actuator arm using
the 1/2” x 3” bolt, washer, and lock nut (Fig-3A).
2. However, to enable quick manual opening of the gate in case of power failure, it is recommended to
use the quick release hitch pin with R-clip (Fig-3B).
HITCH PIN
R-CLIP (INSERT INTO HITCH
PIN HOLE)
HOLE FOR R-CLIP

Apollo 816 LA Linear Actuator
Installation Reference Manual
99
MX4684 Rev.D ©2021
3: AFFIX GATE BRACKET TO ACTUATOR ARM (CONT.)
ACTUATOR
ARM
ACTUATOR
ARM
GATE BRACKET
GATE BRACKET
Fig-3C: Gate Bracket with Bolt, Washer, Nut
Fig-3D: Gate Bracket with Hitch Pin And R-Clip
1/2”x 3” BOLT
HITCH PIN
1/2” WASHER
1/2” LOCK NUT
R-CLIP

Apollo 816 LA Linear Actuator
Installation Reference Manual
1010 support.hysecurity.com
1. Place gate in:
a) OPEN position for PULL-TO-OPEN conguration (Fig-4A).
b) CLOSED position for PUSH-TO-OPEN congurations (Fig-4B).
2. With actuator arm fully retracted, rotate entire actuator on the pivot arm around until the gate
bracket attached to the actuator is positioned on a supporting structure of gate.
3. Mark position of gate bracket on gate or clamp into position.
4POSITION GATE BRACKET ON GATE
Fig-4B: Gate Bracket Location (Push-To-Open)
Fig-4A: Gate Bracket Location (Pull-To-Open)
ACTUATOR
(RETRACTED)
ACTUATOR
(RETRACTED)
PIVOT ARM
PIVOT ARM
WALL
WALL
GATE BRACKET
LOCATION
GATE BRACKET
LOCATION
GATE OPEN
GATE
CLOSED
NOTICE
Do not attach gate bracket to gate pickets. Attach only to structural supports. If unsure of exact
bracket location, tack weld or clamp until gate can be tested.

Apollo 816 LA Linear Actuator
Installation Reference Manual
1111
MX4684 Rev.D ©2021
1. Weld the gate bracket to the gate supporting structure (IMAGE 5-1) or use supplied 3/8” bolts and nuts
from kit (IMAGE 5-2).
2. If welding is not possible, drill two holes to match bracket mounting holes and ax with two 3/8”x2.5”
screws and 3/8” nuts included in the kit (IMAGE 5-2).
IMAGE 5-1: GATE BRACKET WELDED TO GATE
IMAGE 5-2: GATE BRACKET AND HARDWARE (BLACK BRACKET SHOWN)
5AFFIX GATE BRACKET TO GATE
GATE BRACKET
3/8”x2.5” HEX BOLT (x2)
WELD
3/8” NUT (x2)
IMPORTANT!
Ensure bracket centerline is 1/2” above the top of the pivot arm.
IMPORTANT!
Use a bubble level to assure after mounting that actuator is level and plumb.
CAUTION
Never weld parts to the gate or posts when the control board
is powered to avoid irrepairable damage to the circuit board!
NOTICE
Attach gate bracket
only to structural
supports. If unsure of
exact bracket location,
tack weld or clamp until
gate can be tested.
BRACKET CENTERLINE 1 INCH
ABOVE TOP OF PIVOT ARM

Apollo 816 LA Linear Actuator
Installation Reference Manual
1212 support.hysecurity.com
6RUN ACTUATOR CABLE(S) TO CONTROL BOX
1. Run the cable of the actuator closest to the control box through a hole (with rubber grommet) drilled in the
bottom on the control box. If necessary, entry may be made elsewhere on the control box.
2. If a dual gate installation:
3. Dig a trench across the driveway deep enough to accommodate the longer harness cable from the
actuator farthest from the control box.
4. Run the cable through an appropriate conduit and lay this in the trench.
5. Cover the trench and use asphalt patch if needed.
6. Run the 2nd cable into a hole (with rubber grommet) into the bottom of the control box.
NOTICE
Ensure the cable(s) reaches into the control box suciently to reach the MOTOR inputs on the control
board.

Apollo 816 LA Linear Actuator
Installation Reference Manual
1313
MX4684 Rev.D ©2021
Fig-7A: 816 Existing Connector & Battery Leads
ACTUATOR CONNECTOR
BATTERY LUGS
REMOVE CONNECTOR
1. Cut o the connector per Fig-7B.
2. Discard the connector and the red and black battery wires (with lugs).
CUT OFF HERE
8-PIN CONNECTOR
EXISTING SPLICE
SECTION 5: 816 - CONTROLLER WIRING
8 - RED
7 - BLACK
2 - ORANGE
1 - WHITE
6 - N/C
5 - GREEN
4 - RED
3 - BLACK
Fig-7B: Existing Connector & Battery Leads
7
NOTICE
The actuator cable comes with a connector and battery lugs (Fig-7A), which must be cut o before
wiring to the controller.

Apollo 816 LA Linear Actuator
Installation Reference Manual
1414 support.hysecurity.com
Antenna
Receiver
Close
GRD
OK
Open
Stop
Close
Open
+12V
Reset
BlueBus
GRD
+24V
N/C
COM
N/O
N/C
COM
N/O
GRD
GRD
12V
Alarm
Sol. Lock
Main Fuse
Limit 2
Encoder 2
Limit 1
Encoder 1
Motor 2Motor 1
3A
GRD
Reset
Edge
Safety
Shadow
Exit
UL
Fire
Input
GRD
GRD
GRD
GRD
GRD
GRD
GRD
GRD
GRD
+12V
Open
Input
USB
F/W Jumper
Learn
Input +12V a
Options
AutoClose
SlowDown
Force
Close
Stop
+12V
c
3A
b
c
Bypass 15A Fuse
A
A B
A
BA B
A B
B
Close
Close
Open
OpenOpen
COM
COM
Battery
Solar
3A
c
b
5.1 936 WIRING
936: PULL-TO-OPEN (SINGLE) 936: PULL-TO-OPEN (DUAL)
MOTOR 1 MOTOR 2
1. Locate MOTOR 1 and MOTOR 2 connectors on 936 board per IMAGE 8.
2. If single gate, wire MOTOR 1 as shown.
3. If dual gate, wire MOTOR 1 and MOTOR 2 as shown.
8A 936 WIRING: PULL-TO-OPEN
Fig-8: 936 MOTOR CONNECTOR LOCATIONS
Antenna
Receiver
Close
GRD
OK
Open
Stop
Close
Open
+12V
Reset
BlueBus
GRD
+24V
N/C
COM
N/O
N/C
COM
N/O
GRD
GRD
12V
Alarm
Sol. Lock
Main Fuse
Limit 2
Encoder 2
Limit 1
Encoder 1
Motor 2Motor 1
3A
GRD
Reset
Edge
Safety
Shadow
Exit
UL
Fire
Input
GRD
GRD
GRD
GRD
GRD
GRD
GRD
GRD
GRD
+12V
Open
Input
USB
F/W Jumper
Learn
Input +12V a
Options
AutoClose
SlowDown
Force
Close
Stop
+12V
c
3A
b
c
Bypass 15A Fuse
A
A B
A
BA B
A B
B
Close
Close
Open
OpenOpen
COM
COM
Battery
Solar
3A
c
b
MOTOR 1
YELLOW
YELLOW
YELLOW
GREEN
GREEN
GREEN
BLUE
BLUE
BLUE
ORANGE
ORANGE
ORANGE
WHITE
WHITE
WHITE
BLACK
BLACK
BLACK
RED
RED
RED
MOTOR 1 MOTOR 2
NOTICE
If a gate moves in opposite
direction from what is
expected, reverse the motor
power lead wiring (red & black
wires) for that motor.
In dual gate systems, the
longer actuator cable is usually
connoted to MOTOR 2.

Apollo 816 LA Linear Actuator
Installation Reference Manual
1515
MX4684 Rev.D ©2021
Antenna
Receiver
Close
GRD
OK
Open
Stop
Close
Open
+12V
Reset
BlueBus
GRD
+24V
N/C
COM
N/O
N/C
COM
N/O
GRD
GRD
12V
Alarm
Sol. Lock
Main Fuse
Limit 2
Encoder 2
Limit 1
Encoder 1
Motor 2Motor 1
3A
GRD
Reset
Edge
Safety
Shadow
Exit
UL
Fire
Input
GRD
GRD
GRD
GRD
GRD
GRD
GRD
GRD
GRD
+12V
Open
Input
USB
F/W Jumper
Learn
Input +12V a
Options
AutoClose
SlowDown
Force
Close
Stop
+12V
c
3A
b
c
Bypass 15A Fuse
A
A B
A
BA B
A B
B
Close
Close
Open
OpenOpen
COM
COM
Battery
Solar
3A
c
b
936: PUSH-TO-OPEN (SINGLE) 936: PUSH-TO-OPEN (DUAL)
1. Locate MOTOR 1 and MOTOR 2 connectors on 936 board per IMAGE 8.
2. If single gate, wire MOTOR 1 as shown.
3. If dual gate, wire MOTOR 1 and MOTOR 2 as shown.
8B 936 WIRING: PUSH-TO-OPEN
Antenna
Receiver
Close
GRD
OK
Open
Stop
Close
Open
+12V
Reset
BlueBus
GRD
+24V
N/C
COM
N/O
N/C
COM
N/O
GRD
GRD
12V
Alarm
Sol. Lock
Main Fuse
Limit 2
Encoder 2
Limit 1
Encoder 1
Motor 2Motor 1
3A
GRD
Reset
Edge
Safety
Shadow
Exit
UL
Fire
Input
GRD
GRD
GRD
GRD
GRD
GRD
GRD
GRD
GRD
+12V
Open
Input
USB
F/W Jumper
Learn
Input +12V a
Options
AutoClose
SlowDown
Force
Close
Stop
+12V
c
3A
b
c
Bypass 15A Fuse
A
A B
A
BA B
A B
B
Close
Close
Open
OpenOpen
COM
COM
Battery
Solar
3A
c
b
MOTOR 1
YELLOW
YELLOW
YELLOW
GREEN
GREEN
GREEN
BLUE
BLUE
BLUE
ORANGE
ORANGE
ORANGE
WHITE
WHITE
WHITE
BLACK
BLACK
BLACK
RED
RED
RED
MOTOR 1 MOTOR 2

Apollo 816 LA Linear Actuator
Installation Reference Manual
1616 support.hysecurity.com
1050: PULL-TO-OPEN (SINGLE) 1050: PULL-TO-OPEN (DUAL)
9A 1050 WIRING: PULL-TO-OPEN
5.2 1050 WIRING
Fig-9: 1050 MOTOR CONNECTOR LOCATIONS
MOTOR 2
MOTOR 1
1. Locate MOTOR 1 and MOTOR 2 connectors on 1050 board per IMAGE 9.
2. If single gate, wire MOTOR 1 as shown.
3. If dual gate, wire MOTOR 1 and MOTOR 2 as shown.
MOTOR 1
MOTOR 1
YELLOW
GREEN
BLUE
ORANGE
WHITE
BLACK
RED
MOTOR 2 MOTOR 2
BLACK
BLACK
RED
RED
YELLOW
YELLOW
GREEN
GREEN
BLUE
BLUE
ORANGE
ORANGE
WHITE
WHITE
MOTOR 1 MOTOR 2
NOTICE
If a gate moves in opposite
direction from what is
expected, reverse the motor
power lead wiring (red & black
wires) for that motor.
In dual gate systems, the
longer actuator cable is usually
connoted to MOTOR 2.

Apollo 816 LA Linear Actuator
Installation Reference Manual
1717
MX4684 Rev.D ©2021
1050: PUSH-TO-OPEN (SINGLE) 1050: PUSH-TO-OPEN (DUAL)
9B 1050 WIRING: PUSH-TO-OPEN
1. Locate MOTOR 1 and MOTOR 2 connectors on 1050 board per IMAGE 9.
2. If single gate, wire MOTOR 1 as shown.
3. If dual gate, wire MOTOR 1 and MOTOR 2 as shown.
MOTOR 1
MOTOR 1
YELLOW
GREEN
BLUE
ORANGE
WHITE
BLACK
RED
MOTOR 2 MOTOR 2
YELLOW
YELLOW
GREEN
GREEN
BLUE
BLUE
MOTOR 1 MOTOR 2
BLACK
BLACK
RED
RED
ORANGE
ORANGE
WHITE
WHITE
NOTICE
’If a gate moves in opposite direction from what is expected, reverse the motor power lead wiring
(red & black wires) for that motor.
’In dual gate systems, the longer actuator cable is usually connected to MOTOR 2.

Apollo 816 LA Linear Actuator
Installation Reference Manual
1818 support.hysecurity.com
R
U
N
L
E
A
F
D
E
L
A
Y
C
L
O
S
E
T
I
M
E
R
L
R
N
M
O
T
O
R
1
F
O
R
C
E
L
R
N
M
O
T
O
R
2
1. Locate MOTOR 1 and MOTOR 2 connectors on Mercury 310 board per diagram below.
2. If single gate, wire MOTOR 1 as shown.
3. If dual gate, wire MOTOR 1 and MOTOR 2 as shown.
10 MERCURY 310 WIRING
5.3 MERCURY 310 WIRING
MOTOR 1 MOTOR 2
NOTICE
Mercury 310 motor wiring
is the same for push-to-
open and pull-to-open gate
installations.
Fig-10: Apollo 816 Extend and Retract Limit Screws

Apollo 816 LA Linear Actuator
Installation Reference Manual
1919
MX4684 Rev.D ©2021
’There are two internal limit switches in the 816 actuator and must be set to match the desired gate limits
by the installer.
’Two limit adjustment screws on the rear of the 816 actuator motor (see Fig-11A, below) are used to make
these adjustments; one for the limit at the retracted position and the other for the extended position.
’To set the limits, follow instructions on the following pages for the controller being used (936/1050 or
Mercury 310) and refer to Diagram 6-1 (page 22) during the procedure.
Fig-11: 816 Extend and Retract Limit
Screws
Retract Screw
Less
(CCW)
More
(CW)
Extend Screw
More
(CCW)
Less
(CW)
SECTION 6: SETTING 816 OPEN/CLOSE LIMITS
CAUTION
’Ensure power is properly applied to the controller per the associated installation manual.
’Do not extend 816 extension tube too far or risk damage to the actuator. Maximum tube length is 66 inches
(1.65 m).
IMPORTANT!
These instructions are ONLY for adjusting the location of limit sensors inside the Apollo
816 actuator. After setting these limits, see the “Learn Limits” procedure in the appropriate
controller manual for instructions on how to enable the controller to “learn” these limits.

Apollo 816 LA Linear Actuator
Installation Reference Manual
2020 support.hysecurity.com
1. Remove plastic caps from the Extend and Retract limit screws on the Apollo 816 actuator motor (Fig-11).
2. Ensure primary actuator cable is plugged into MOTOR 1 connector on controller. If a dual gate system,
do NOT plug secondary actuator cable into the MOTOR 2 connector.
3. Press/hold Open/Close button to run gate to mid-position.
4. Press/hold Open/Close button to run gate to one of the desired gate limit positions.
5. If the gate does not stop at desired limit position, adjust per one of the following two scenarios (A or B):
A. If gate moves to preferred gate position without stopping (with NO limit LED indication), use buttons
to move gate to preferred limit position, note if actuator arm is extended or retracted, then adjust limit
screw per Scenario A in Diagram 6-1.
B. If gate stops before preferred gate position (with limit LED indication), note if actuator arm is extended
or retracted, then adjust limit screw per Scenario B in Diagram 6-1.
6. To set the other limit, run gate to mid position, then to the other limit and repeat from Step 5.
7. If a dual gate installation, unplug primary actuator from MOTOR 1 inputs and instead plug in the secondary
actuator cable and repeat Steps 3 to 6 for that actuator.
8. After limits are set, replace black plastic caps over 816 actuator Extend and Retract limit screws. If a dual
gate installation, ensure limits are set for each actuator per the above steps.
HINT
Check limit position is set correctly by using the Open or Close buttons to jog gate to mid-position and
then back to the limit. Adjust as necessary. For Limit LED behavior, see DETAIL A in Diagram 6-1 and
Fig-11A-1 and Fig-11A-2 (and note) below.
11A 816 LIMITS: 936 OR 1050
NOTICE
If gate moves opposite of button activated,
reverse red and black wires in actuator
connector.
If limit LEDs indicate wrong gate limit,
reverse the orange & white wires in actuator
connector. Limit LEDs should behave as
follows:
1050 Controller (Fig-11A-1):
Limit LED = Lights red at Close limit and
green at Open limit.
936 Controller (Fig-11A-2):
• Close Limit LED lights red at Close limit
• Open Limit LED lights red at Open limit
6.1 816 LIMITS: 936 AND 1050
Fig-11A-2: 936 Limit LEDSFig-11A-1:
1050 Limit LEDS
Antenna
Receiver
Close
GRD
OK
Open
Stop
Close
Open
+12V
Reset
BlueBus
GRD
+24V
N/C
COM
N/O
N/C
COM
N/O
GRD
GRD
12V
Alarm
Sol. Lock
Main Fuse
Limit 2
Encoder 2
Limit 1
Encoder 1
Motor 2Motor 1
3A
GRD
Reset
Edge
Safety
Shadow
Exit
UL
Fire
Input
GRD
GRD
GRD
GRD
GRD
GRD
GRD
GRD
GRD
+12V
Open
Input
USB
F/W Jumper
Learn
Input +12V a
Options
AutoClose
SlowDown
Force
Close
Stop
+12V
c
3A
b
c
Bypass 15A Fuse
A
A B
A
BA B
A B
B
Close
Close
Open
OpenOpen
COM
COM
Battery
Solar
3A
c
b
MOTOR 2
Limit LED MOTOR 1
Open Limit LED
MOTOR 2
Open Limit LED
MOTOR 1
Close Limit LED
MOTOR 2
Close Limit
LED
MOTOR 1
Limit LED
IMPORTANT!
These instructions are ONLY for adjusting the location of limit sensors inside the Apollo
816 actuator. After setting these limits, see the “Learn Limits” procedure in the appropriate
controller manual for instructions on how to enable the controller to “learn” these limits.
/