Page is loading ...

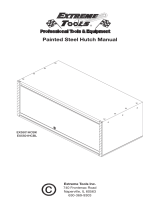
Model: RX722501HC
Extreme Tools, Inc.
740 Frontenac Rd
Naperville, Illinois 60563
630.369.9303
www.ExtremeTools.net
RX722501HC
Parts List
72 inch Steel Top Hutch
shown on RX722519RC
2
2
2
2
4
4
1

Step 1: Attach Slide Splicer Posts to Side Panels
a. Slide Splicer Post Assembly (#9) into bottom opening of the
left-hand Side Panel Assembly(#2).
b. Line up hole in Splicer Post with hole in Side Panel.
c. Insert M4-10mm TORX Screw (#10)
and tighten.
d. Repeat for the right-hand
side.
SPACER
NOTE: If the hutch
is going to be used
over the stainless
steel surface, then
remove the spacer
on the bottom of the
side panel.
Step 2: Install Side Panels on Roller Cabinet
a. Remove plastic end caps from the top of the trim located at the
front corners of the roller cabinet.
b. Slide end of splicer channel into opening where plastic end
cap was located until side panel rests on top of MDF/Stainless
Steel Top.
c. Repeat process for right-hand side.
Plastic
End
Cap
Plastic End Cap
2

Step 3: Secure Side Panels
a. Install one Hold-Down Bracket (#14) on each side
using one at washer (#16) and one M8 bolt (#15)
for each side.
b. If attaching the side locker or side box, do not use
Hold-Down Bracket on that side.
Hold-Down
Bracket
Flat
Washer
M8 Bolt
Step 4: Install Back Panel
a. Pull MDF board/Stainless Steel Top forward approximately 1/8”
from Back Raised Edge (aka: Fence Rail.)
b. Lift Back Panel into place behind the two side panels. Slide the
bottom edge of the Back Panel between the MDF/Stainless
Steel Top and rear fence rail of roller cabinet. Flange on left and
right sides of back panel should be resting against the inside
back edges of both side panels.
c. Use (6) M5 screws (#11) on each side to fasten the back panel to
side panel assemblies.
Back panel ange should
rest inside the Side
Panel
Slide Back Panel down
behind Side Panels with
bottom of Back Panel tting
between roller cabinet fence
rail and top work surface.
Back Raised Edge
(aka: Fence Rail)
Back Raised Edge
(aka: Fence Rail)
3

Step 5: Secure Back Panel & Set Shelf Height
a. Line up the holes on the left-hand Back Panel Flange with the
threaded inserts of the Side Panel.
b. Secure using (6) screws (#11.)
c. Repeat on for right-hand side panel.
d. Determine the desired height for the Adjustable Shelf. Pre-
thread (2) screws (#11) about halfway in on left-hand and
right-hand sides.
Secure side panel to back panel using (6)
M5x16mm Pan Head Screws
Determine adjustable shelf
height. Pre-thread (2) screws
about halfway in on each side
at desired height.
Step 6: Install Adjustable Shelf
a. Locate the (2) open slots on each side of the shelf. Line up the
open slots with the (4) threaded screws that were installed in
Step 5d. Lay down shelf so that (4) open slots t on top of the
(4) screws.
b. Tighten (4) screws.
c. Locate (2) threaded inserts on the back of the shelf. From
the back of the Back Panel, insert (2) screws through the
pegboard and through the threaded inserts and tighten.
Locate threaded inserts
and insert (2) screws
through the pegboard
and insert holes to
secure shelf to Back
Panel.
4

Step 7: Attach Gas Struts to Lid
a. Lay the lid down on packaging material so that the front of the lid
is face down. Be sure to use packaging material under the lid so
that it does not get scratched or damaged.
b. Locate the (2) openings near the Top Panel Stiffener.
c. Hold each gas strut so that the larger cylinder end is up and
the smaller piston end is down. Insert the male portion at the
cylinder end of the gas strut into the opening near the top lid
stiffener. Tighten to secure in place.
d. Repeat step c for the other side.
Top of the lid
Opening to
insert male
portion of
gas strut
Opening to insert
male portion of
gas strut
Front Panel of lid
Step 8: Install the Lid onto the body of the Hutch
LID is HEAVY!
LID INSTALLATION REQUIRES ASSISTANCE to LIFT
and MAY REQUIRE the USE of MECHANICAL EQUIPMENT to
PROPERLY POSITION!
a. Lift the lid into place on top of the hutch body as shown below.
5

Step 8: Secure Lid to Body of Hutch
a. Use the Allen wrench (supplied with the parts) to drive the pre-
threaded M5-16mm Sock Head Screw (#4) into the round
opening on the side of the lid.
b. Insert one plastic hole plug (#5) in each of the socket head
screw openings.
Top of Lid
Side of Hutch
M5-16mm Socket
Head Screw
Drive screw into
opening on side
of lid using Allen
wrench
Step 9: Secure Gas Strut to Side of Hutch
a. Prop open the lid so that it cannot fall.
b. Install the male tting on the piston end of the gas strut into
the opening near the inside top of the side panel.
c. Repeat for the gas strut on the other side.
Secure the male
end of the piston
into the opening
on the side of the
hutch
6

Step 11: Install Rubber Grommets
a. Insert the Rubber Grommets (#8) in the openings toward the
lower right and left sides of the Back Panel. These openings
are where power cords will exit the Back Panel and plug into a
wall outlet.
7
Step 10: Install Power Strip with USB Ports (#7)
a. Line up 4 holes on the Power Strip (#7) with 4 holes located
toward the right on the face of the shelf front.
b. Use Phillips screwdriver, (4) M4x10mm Machine Screws (#21)
and (4) M4 LockNuts (#20) to secure power strip.
FULLY ASSEMBLED
EXTREME TOOLS RX SERIES HUTCH
shown on
RX SERIES ROLLER CABINET
/