Page is loading ...

Weather and Prediction System
U.S. PATENT #5,509,295
Invented and Manufactured
By
1411 S. Roselle Rd. Schaumburg, IL 60193
Phone (847) 923-0002
Fax (847) 923-0004
www.AltronicsInc.com

3
Table of Contents
FEATURES 4
SYSTEM SETUP 5
GETTING STARTED 7
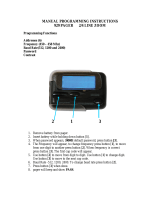
THE KEYPAD 7
THE MENU SYSTEM 8
CURRENT DATA READINGS 9
WEATHER ON HOLD 12
SETUP 10
RUN ENTRY 15
THROTTLE STOP FACTOR 15
VIEWING/DELETING RUNS 15
RUN COMPLETION 17
MAKING PREDICTIONS 17
DOWNLOADING TO A PC 18
SET CLOCK 20
BAD RUNS 20
WIND SETUP 20
PAGER SETUP 21
OPERATING/STORAGE LIMITS 23
CAUGHT IN THE RAIN 23
WARRANTY 24
TECHNICAL SUPPORT 24
ABBREVIATIONS 25
GUIDELINES FOR ACCURATE PREDICTIONS 25
APPENDIX 27

4
PerformAIRE
WEATHER CENTER
FEATURES
Temperature Readout
Relative Humidity Readout
Absolute Barometric Pressure Readout
Vapor Pressure
Grains of Water
Dew Point
Oxygen Sensor Readout (optional)
Density Altitude Readout
Oxygen Altitude Readout
Wind Speed/Gust and Direction (optional)
Remote Paging Capability (optional)
400 run data base
Up to 10 separate data bases
Sea level ET calculation
Throttle stop ratio calculation
ET to DA Ratio
ET prediction
Throttle stop prediction
One run prediction
Wind effect prediction
Run completion
Bad Run Detection
Data and time stamp in data base
Weather on Hold
Manual weather input
Automatic Last weather sample Hold
View and delete runs
Downloading Data Analysis software
(optional)
Backlit Display

5
SYSTEM SETUP
Mounting Sensors
1) Connect Pole Mount securely near top of trailer. Additional mount supplied
for holding in trailer during transportation.
2) Connect sensor housing and wind sensor to Pole as shown.
3) Mount pole-mount style wind sensor on top of post on tighten retaining ring.
4) Insert Sensor Pole in mount and turn so mark on wind sensor is pointing
toward finish line of track then tighten.
5) Plug in 4-pin wind sensor cable to sensor housing and plug in 8-pin sensor
housing cable from console.
6) SENSOR POLE SHOULD NOT BE LEFT UP WHILE TRAVELING!
There are only four connectors on the console unit.
1) Connect interface cable to COM PORT (default com port 1) on
PC if purchased.
2) Connect 8-pin cable from sensor housing. See Cable Lock
below.
3) Connect antenna cable to console. (Paging option only)
Connect cable to console.

6
4) Connect supplied power cable to 12v DC Source (Trailer battery or
equivalent). It is not recommended to charge battery or have generator
running while system is in use. If generator is used, high voltage transient
suppression equipment connected in line is recommended.
Solid black wire
is
NEGATIVE; Black with white stripe wire is POSITIVE. *IMPORTANT*
Fuse positive power cable with a 5amp quick blow fuse. Power
down system before disconnecting power to avoid data loss. Do not
lengthen power wires. If you have a 110AC power outlet, an adapter is
available to connect to system: Part# ALT-PWC-POWER-ADPT
MOUNTING ANTENNA
Mount antenna for paging option as high up as possible on top edge of trailer. Do not
mount above top of trailer. Mount to trailer, not to a post or other fixture. Antenna can
be thru hole mounted in top of trailer or attached to trailer with angle bracket supplied.
Follow instruction supplied with antenna for installation. **NOTE** Rod length of
antenna does not need to be altered. To mount on post Part # PWC-ANTENNA-GPA is
needed!
Cable Lock Installation
Step 1: Assemble Parts as shown
below
Step 2: Slide Cable Lock over cable.
Then snap cable into sensor housing.
Step 3: Slide Cable Lock over the
cable and tighten thumbscrew #1 to
fasten to Sensor Housing Body.
Step 4: Tighten thumbscrew #2
snugly to provide strain relief. Please
do not over tighten.
*Note: To remove cable, both thumbscrews need to be loosened and lock needs to be
slid back on cable before cable is detached from connector.

7
GETTING STARTED
Press “MENU” key to turn unit on. Unit will automatically turn off after
2 minutes if no keys have been pressed.
GREETING MESSAGE
The PerformAIRE
By ALTRONICS
O2 EQUIPPED
VERSION 2.*
"O2 EQUIPPED" will only appear if the unit was purchased with an
oxygen sensor.
DATA BASE #1
ET MODE Selected
Multiple Run Prediction
Wind Prediction Enabled
Second greeting message above will show the following info about the
“Setup” of the unit: Data base, prediction mode, prediction type, and
wind effect.
KEYPAD FUNCTIONS
MENU/ON key - Turns unit ON and allows the unit to leave any current
menu and return to the MAIN menu.
SCROLL key - used to view runs that have been stored in the database.
CLEAR/OFF key – Turns unit OFF when pressed from MAIN menu and
allows runs to be deleted from the database and allows the user to reenter
a value if the wrong key was pressed.
ENTER/HOLD key - must be pressed after keying in a value to confirm
the value is correct. When pressed in SAMPLE AIR mode the air
sample is held in memory and can be used for data entry later on.

8
MENUS
MAIN MENU - When unit is turned on the MAIN menu automatically is
displayed after the greeting message. The user can make one of the nine
following choices at this point:
SAMPLE AIR = 1 (Current Data)
SET UP = 2
RUN ENTRY = 3
PREDICT = 4
Hit the “MENU” key again and see:
DOWNLOAD =5
SET CLOCK =6
BAD RUNS =7
WIND SETUP =8
Hit the “MENU” key again and see:
PAGER SETUP =9
Refer to Appendix for MENU chart

9
SAMPLE AIR
By pressing "1" (SAMPLE AIR) from the MAIN menu the unit displays
all the sampled air parameters and the PREDICTION in the following
format:
DATE TIME
TEMP HUMIDITY
PRESSURE OXYGEN (if equipped)
ALTITUDE PREDICTION (ET or TS)
After 2 seconds the following is displayed:
DATE TIME
WIND SPEED WIND GUST WIND DIRECTION
DEW POINT or GOW VAPOR PRESSURE
CF PREDICTION (ET or TS)
Wind information will only be shown if WIND is Enabled (See WIND SETUP) and
Wind Sensors are installed.
WIND DIRECTION:
H-HEAD T-TAIL C-CROSS CT-CROSS TAIL CH-CROSS HEAD
Pressing the “ENTER” key while viewing current data will HOLD the
data to be used for entering runs. To view the “Held” data you can press
the HOLD key when you are at the main menu.
The third and fourth line on the display will alternate from showing
Pressure(“) and Oxygen(%) to Dew Point(°F) and Vapor Pressure(“) and
Density Altitude(DA) to Horsepower Correction Factor (CF). Dew Point
can be replaced to show Grains of Water (GOW). See SETUP.
NOTE: Barometric Pressure
The Pressure reading is “Absolute”, which means it will NOT agree with
the weather channel or local forecast. This is due to the fact that the
local forecast is gives a corrected pressure reading that is compensated
back down to sea level. If you were to stand at your local airport and dig
a hole down to sea level the PerformAIRE pressure reading would then
agree with the local airport reading!
The PREDICTION will be shown only after two runs in ET mode and
three runs in TS mode have been stored in the selected database. If less
runs have been stored "***" will appear in the place of the
PREDICTION value.

10
SET UP
By pressing "2" from the MAIN menu the unit enters SET UP. Set up
allows for configuring any one of the 10 data bases or selecting weather
variables to be displayed. Each data Base hold 40 runs.
The first menu appears...
Setup Data Base =1
Setup Weather =2
Setup Weather:
Pressing “2” displays the following menu and prompts the user to select
“1” or “2” to display Grains of Water(GOW) or Dew Point(Dp F) when
sampling the air.
Shows Grains =1
Show Dew Point =2
Setup Data Base:
Pressing “1” displays the following screen and prompts the user to select
one of the 10 available data bases.
Select Data Base
Yes = 1 No = 2
Pressing “1” displays:
DATA BASE #1
Yes=1 Next =SCROLL
Use the SCROLL key to change databases and then press “1” to select
displayed database.
After selecting a database you will be asked if you want to clear all the
runs out of it:
CLEAR RUNS?
Yes = CLEAR No = ANY KEY
You will now be asked if you want to rename it. Note: You can use the
default name if you wish “Data Base #1”.
To enter a new name use the “SCROLL” key to change the letter. When
the letter is correct select Yes by pressing “1” and you will go on to the

11
next letter. When all the letters have been selected press the “ENTER”
key to save the name.
After selecting a data base the following is displayed:
ET MODE = 1
TS MODE = 2
Press 1 OR 2
By pressing "1" sets the unit to the ET MODE. This means all runs
added to the data base will be stored in the ET section and the
PREDICTION will be an ET computed from the stored runs and the
present ALTITUDE.
By pressing "2" sets the unit to the TS MODE (Throttle Stop Mode).
This means all runs added to the data base will be stored in the TS
section and the PREDICTION will be a TS or timer setting computed
from the stored runs and the present ALTITUDE.
After pressing "2" another menu is displayed as follows:
TS MODE SELECTED
Index = 9.90
CHANGE?
YES = 1 NO = 2
If the user presses "1" the following will be displayed:
ENTER INDEX
Now the user can enter an index, such as 8.90, then he must press the
ENTER key.
Select Method
For Prediction
Multiple Runs =1
One Run =2
Multiple Runs:
When the multiple run prediction method is selected, predictions are then
calculated from the runs stored in the data base.
Predict with
DA=1 OA=2

12
ADR=3 VP=4
Now you must choose which weather variable to reference your
prediction against. The standard is to use DA or OA (if the unit is
oxygen sensor equipped), but you can select ADR or VP if you wish.
One Run:
When One Run prediction method is selected you must set your base run
and performance ratios.
Set Base Run=1
Set Pred Value=2
View Values=3
Done =ENTER
Set Base Run:
Your base run data should be taken from a “good run” or your last “good
run”. You can update this data as you wish.
Enter Base Run
DA=
ET=
Timer= (if in TS mode)
Temperature= (if fuel type=Alcohol)
Humidity= (if fuel type=Alcohol)
Set Pred Values:
Set Pred Values allows you to select your gas type and your DA to ET
and TS to ET ratios.
Select
Gas=1 Alcohol=2
Now you will be prompted to choose between preset ratios or allowed to
enter custom ratios.
Preset Ratios=1
Custom Ratios=2
Custom Ratios:
Enter DA Ratio
Enter how many foot of Altitude it takes to move you vehicle 0.01sec in
ET. (Ex: 150 means it takes 150’DA to make ET change 0.01sec)

13
Enter TS Ratio
Enter ratio that it takes to move ET of vehicle 0.01 sec. (EX: 2 means it
is a 2:1 ratio or takes two 0.02 to move car 0.01 in ET)
View Values:
Allows you to view your base values and ratios.
Predict with
DA=1 OA=2
ADR=3 VP=4
Now you must choose which weather variable to reference your
prediction against. DA is the standard.
Wind Prediction:
If you have chosen Multiple Run Prediction you will be prompted to
select to use wind correction in the ET or TS predictions:
Predict w/Wind?
PRESS 1=Y 2=N
If you enable wind correction you will be prompted to select a vehicle
type:
Select Car Type
Dragster=1
Door =2
Roadster=3
Next you can adjust the wind effect.
Adjust Effect?
Press 1=Y 2=N
Wind factors have been programmed to correct prediction for wind based
on speed and direction of wind. You can further adjust the amount of
correction by selecting to Adjust Effect:
Enter Value
Default (5)
(1-10)=
Selecting <5 means you are lessening and >5 increasing the wind
correction.
The information in this box is only relevant if your unit is OXYGEN SENSOR
EQUIPPED.

14
After pressing the ENTER key (from above) the following will be displayed:
PREDICT WITH
DENSITY ALT = 1
OXYGEN ALT = 2
PRESS 1 or 2
If your unit has the optional oxygen sensor you can choose to predict your ET
or TS value with density altitude or oxygen altitude.
The unit will compute and store the density altitude and oxygen altitude after
every sample. This means that when you add a run to your database, the unit
will automatically store both altitudes.
This enables you switch between predicting with either altitude and seeing how
your stored runs compared with each.

15
RUN ENTRY
By pressing "3" (RUN ENTRY) from the MAIN menu the unit displays
the following:
VIEW/DELETE RUNS = 1
ADD RUNS = 2
TSR = 3
Or
RATIO/SLET = 3
“TSR” (throttle stop ratio) is only displayed if the unit in TS MODE and
more then two runs have already been stored. Pressing "3" displays the
throttle stop ratio.
“RATIO/SLET” is displayed only if the unit is in ET MODE and more
then two runs have already been stored. Pressing 3 displays your SEA
LEVEL ET and your ALT/ET ratio. Your ALT/ET ratio tells the
amount of change in ET there is for every 100’ of altitude change.
By pressing "1" you can view or delete runs you have already stored.
Use the SCROLL key to view runs. If you want to delete a run you have
scrolled to press the CLEAR key. By pressing the ENTER key when
viewing a stored run it will show the Temperature, Humidity, and
Pressure values stored for that run.
By pressing "2" the following ADD RUNS menu will be displayed:
Store with->
CURRENT = 1
HELD = 2
MANUAL = 3
You can store a run by using the current weather conditions by selecting
1, by using the “held” data that you saved by earlier by selecting 2, or by
entering your own values by selecting 3.
After selecting 1 or 2 the following will be displayed:

16
Enter Run Info->
DA=1000 (Example)
1000’ ET=
ET=
TS=
The DA or OA will already be loaded. You should enter a 1000’ ET, a
final ET, and TS. The 1000’ ET is optional and is used for run
completing. You do not have to enter every run with a 1000’ time in
order to use run completing. The TS will only be entered if the unit is in
TS MODE.
To use run completing press the ENTER key when prompted for the
final ET.
If manual entry is desired you must select number 3. After selecting 3
the following is displayed.
ENTER AS
Altitude =1
Temp, Hum, Press =2
Press 1or 2
If 1 is selected you will have to key in the DA or OA value. If 2 is
selected you will have to enter the temperature, humidity, pressure, and
oxygen values. Then the DA or OA will be calculated.
****HINT****
The easiest way to enter a run is by starting from the main menu and
pressing the keys 3, 2, 1, and ENTER. Now all you have to do is type in
your ET’s and the run is stored.

17
RUN COMPLETION
In order use the run completion program effectively at least one previous
run must be entered into a database with a 1000’ ET. To use run
completion all you need to do is enter the 1000’ et of the run you want to
complete and then when it asks you to enter your final ET= simply press
the enter key without any value. You will then see a Run Completing!
message appear followed by ET=10.203 (example) your completed ET.
This run will then be saved automatically and the main menu will be
brought back, unless you are in TS mode, in which case, you will then be
prompted to enter your TS.
1/8 Mile Tracks
Keep 1/8 mile and 1/4 mile runs in separate databases. You may want to
name the database appropriately.
If you run 1/8 mile and want to be able to use run completion you must
enter in a 330’ time when the unit prompts you to enter the 1000’ time.
In regards to entering your ET for an 1/8 mile track simply enter in the
1/8 mile time.
PREDICT
Depending on the mode the unit is in (ET MODE or TS MODE) by
selecting “4” you can input any altitude and the corresponding ET or TS
prediction will be displayed. You need to have two or three runs
respectively in the database before you will see the prediction.
Wind Correction:
If wind correction has been enabled you will be asked to enter the wind
speed and direction for each run entered.
Enter Wind Speed
MPH=
Enter Wind Dir
Head=1 Tail=2
CH=3 Ct=4 Cross=5

18
DOWNLOAD
By pressing “5” you will begin downloading into a personal computer if
you have purchased that option.
To install software:
Place DISK 1 in drive a:\ and run SETUP. Follow the instructions on the
screen to finish installation.
1) COMPORT button - To download PerformAIRE connect
supplied cable to unit and to serial port on back of computer.
You can use serial port 1 or 2. You must make sure that you
select a port that is not being used by another device such as a
modem or you will get an error. (Cannot setup port, in use by
another device).
2) DOWNLOAD button - Follow instructions on the screen to
complete the download.
3) Once downloading is complete a data base info screen will pop
up showing runs and various statistical parameters regarding your
data. Some parameters may not be enabled depending on the
setup of your PerformAIRE and the options your unit has. If you
want to graph the database you just downloaded, you first need to
reselect the database.
4) SELECT DATA BASE button – Allows you to load any
previously downloaded database. A sample database is included
(sample.dat).
5) GRAPH DATA BASE button – This feature generates a graph
the plots out your runs in reference to your prediction line. Each
run is show in Red or Blue depending on the mode your
PerformAIRE is in and Bad Runs are shown in yellow. Bad
Runs are runs that do fit well with your other runs. You can use
your mouse to select any run and the data values for that run will
be shown in ET and Altitude value boxes.
A) ZOOM button – instructs you on how to use the zoom
6) Parameter definitions:
Entries: Number of runs in database.
Mode: Shows if database is set to Throttle stop or
ET prediction.
Sea Level ET DA: ET car will run at 0’ density altitude.

19
Sea Level ET OA: ET car will run at 0’ oxygen altitude.
(Optional)
Alt Ratio DA: Time in seconds ET will change with a
100’ change in density altitude.
Alt Ratio OA: Time in seconds ET will change with a
100’ change in oxygen altitude. (Optional)
TS Ratio DA: Time in seconds Throttle Stop will need to
change in order to change ET of car
0.01sec in density altitude.
TS Ratio OA: Time in seconds Throttle Stop will need to
change in order to change ET of car
0.01sec in oxygen altitude. (Optional)

20
SET CLOCK
By pressing "6" from the MAIN menu the unit will prompt you to enter
the DATE and TIME.
BAD RUNS
By pressing “7’ from the MAIN menu the unit will display any runs that
do not “fit” with the rest of the data. These runs will not be removed;
you will have to clear them out of the database yourself.
Example:
Run #1: Run #2 Run #3
DA = 1000 DA = 2000 DA = 1800
ET = 10.10 ET = 10.20 ET = 10.21
With these 3 runs in a database BAD RUNS would display:
Run
3
does not fit.
The reason Run #3 does not fit is because the run should have been
faster then Run #2 since it is 200’DA less in altitude.
It is now necessary for Run #3 to be removed from the database. To do
this you must use the View/Delete option in the Run Entry Menu and
Clear out Run #3.
There may be times when multiple runs are shown that not to fit. When
this occurs it is often useful to use the downloading software to help
determine what is going wrong.
WIND SETUP
By pressing “8” you will the following will be displayed.
ENABLE =1
DISABLE =2
Press 1 or 2
ENABLE allows the wind information to be displayed on CURRENT DATA if sensors
are installed.
DISABLE removes wind information.

21
PAGER SETUP
By pressing “9” you will the following will be displayed.
Enable Pagers = 1
XMIT TIME = 2
XMIT DATABASES = 3
Selecting “1” displays:
HOW MANY?_
Enter the number of pagers that are being used with the system.
Enter CAPCODE#1=
0996151
Enter the 7-digit pager capcode found on back of pager.
Select Baud Rate
1=1200 2=2400
1200
Select 1 or 2
Select the baud rate from back of pager. Do this for each pager you are
using.
Selecting “2” displays:
Enter Time (min)=
_
Enter time interval between pages. Minimum time is 2 minutes.
Selecting “3” displays:
Multipage Y=1,N=2
Enter Yes if you want to transmit the prediction for multiple databases.
Enter No if you only want to transmit the prediction for the database
selected during SETUP.
If you selected Yes for Multipage the following is displayed:
Page this DB?
DATA BASE # (shows name of data base)
Yes=1 Next=SCROLL
Done=ENTER
For every data base that you want to send predictions for press “1”
otherwise press “SCROLL” to go to the next Database or press
“ENTER” if you are done selecting databases.
/