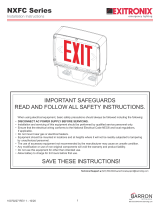
CHICAGO ESW-CH-LED-C User manual

Type
User manual

CHICAGO ESW-CH-LED-C offers reliable emergency lighting solutions for various indoor commercial and public spaces. With its energy-efficient LED technology, it provides bright and consistent illumination during power outages. Its dual voltage compatibility (120V/277V) and versatile mounting options (surface, ceiling, or side-end) ensure easy installation in different locations.

CHICAGO ESW-CH-LED-C offers reliable emergency lighting solutions for various indoor commercial and public spaces. With its energy-efficient LED technology, it provides bright and consistent illumination during power outages. Its dual voltage compatibility (120V/277V) and versatile mounting options (surface, ceiling, or side-end) ensure easy installation in different locations.

INSTALLATION,
O
MAINTENANCE IN
BATTERY BACKUP LED
IMPORTANT
READ AND FOLLOW ALL
WARNING: RISK OF ELECTRIC SHOCK – NEVER CON
N
EQUIPMENT IS ENERGIZED.
WARNING: FAILURE TO FOLLOW THESE INSTRUCTIO
N
SERIOUS INJURY OR SIGNIFICANT PROPERTY DAMA
G
and instructions carefully before installing or maintaining th
i
all installation and maintenance situations.
WARNING: RISK OF FIRE – Lamps are hot. Keep combu
s
manufacture’s warnings, recommendations and restrictions
are correctly installed.
A
ll service shall be performed by qualified service perso
n
accordance withtheapplicableinstallationcodes by a p
and the hazards involved.
This product must be installed in accordance with the a
p
Before wiring to power supply, turn off electricity at fuse
o
Disconnect A.C. power and unplug battery before servic
i
Consult your local building code for approved wiring and
May be used outdoors under cover (20°C - 50°C)
Do not let power supply cord touch hot surfaces.
Do not mount near gas or electric heater.
Equipment should be mounted in locations and at heigh
t
unauthorized personnel.
The use of accessory equipment not recommended by t
h
Do not use this equipment for other than intended use.
The AC volta
g
e ratin
g
of this e
q
ui
p
ment is s
p
ecified on t
h
g g q p p
voltage.
SAVE THESE I
N
AND DELIVER TO OWN
E
O
PERATION AND
STRUCTIONS FOR
EXIT AND UNIT COMBO
SAFEGUARDS
SAFETY INSTRUCTIONS
ECT TO, DISCONNECT FROM, OR SERVICE WHILE
N
S AND WARNINGS MAY RESULT IN DEATH,
G
E – For your protection, read and follow these warnings
i
s equipment. These instructions do not attempt to cover
s
tible material away from hot parts. Observe lamp
on lamp operation and maintenance. Make sure lamps
n
nel. This product must be installed and maintained in
ersonfamiliar withtheconstructionoperation of the product
p
plicable installation codes and ordinances.
o
r circuit breaker.
i
ng.
installation.
t
s where it will not readily be subjected to tampering by
h
e manufacturer may cause an unsafe condition.
h
e
p
roduct label. Do not connect e
q
ui
p
ment to an
y
other
ypqp
N
STRUCTIONS
E
R AFTER INSTALLATION
SURFACE MOUNT INSTALLATIONS
1. Remove retainer screw from right side of the sign. Re
m
4.
A
and for 277V, use red/orange and white wires. WARNI
(provided) or other approved methods.
5. Push wire connections into the J-box.
6. Mount sign equipment securely in place on the wall. T
w
at the top of the unit housing in addition to the j-box m
o
7. Carefully replace the glass into the sign frame channe
l
8. Connect battery in unit by connecting the Red (+) lead
terminal on the battery and the Black (-) lead from PC
CAUTION: Observe polarity. Failure to connect the ba
t
unsafe condition. NOTE: Emergency lights will NOT c
o
9. Replace and secure the front cover.
11.Adjust and focus the lighting heads as required.
CEILING OR LEFT-SIDE END MOUNT
Note: Cannot be right-side end mounted
GENERAL:
1. Remove retainer screw from right side of the sign. Re
m
3. Remove both 7/8” DIA KO mounting hole located on the
will be located on top of the frame. For left-side wall m
o
side of the frame.
4. Thread 7/8” nuts (2 required, provided by others) onto
7/8” pipe nipples (2 required, provided by others). Slide
pipe nipples through canopy holes.
5. Place screws (provided) in holes on the canopy.
6. Route wires throu
g
h knockouts in Unit frame
(
ceilin
g m
g(g
metal mounting plate.
7.
A
dhering to National, State and Local codes, make wi
r
and for 277V, use red/orange and white wires. WARN
I
(provided) or other approved methods.
8. Push wire connections into the J-box. Secure mountin
g
9. Secure the canopy to the steel mounting plate with sc
r
second nut (provided by others) onto each of the pipe
into place. Once canopy is locked into position there
w
11.Carefully replace the glass into the sign frame channe
l
12. Connect battery in unit by connecting the Red (+) lead
on the battery and the Black (-) lead from PC board a
s
Observe polarity. Failure to connect the battery prope
r
condition. NOTE: Emer
g
enc
y
li
g
hts will NOT come O
N
g y g
13. Replace and secure the front cover.
14. Energize the sign fixture with AC supply. The charge i
n
15.Adjust and focus the lighting heads as required.
This sign may be shipped with an extra face plate and Red lens to make the sign double face. Replace the back
plate with the extra face plate and lens at the start of the installation process, if the application calls for a double
face sign.
m
ove side panel and mounting canopy, set aside.
ing connection. For 120V, use black and white wires
NG: Properly insulate the unused leads with wire nuts
w
o additional “Key Hole” mounting holes are located
o
unting holes. These two additional mounting slot holes
l
and replace end panel and retainer screw.
from the PC board assembly to the positive (+)
board assembly to the negative (-) battery terminal.
t
tery properly will result in equipment failure and an
o
me ON at this time.
m
ove side panel and mounting canopy, set aside.
frame. For ceiling mount, knock out mounting holes
o
unt, knock out mounting holes will be located on the
m
ount
)
or in EXIT frame
(
side mount
), p
i
p
e nuts and
) ( ), p p
r
ing connection. For 120V, use black and white wires
I
NG: Properly insulate the unused leads with wire nuts
g
plate to J-box (hardware not included).
r
ews installed in step 5.
nipples on the inside of the housing and lock the canopy
w
ill not be any side-to-side movement on the canopy.
l
and replace end panel and retainer screw.
from the PC board assembly to the positive (+) terminal
s
sembly to the negative (-) battery terminal. CAUTION:
r
ly will result in equipment failure and an unsafe
N
at this time.
n
dicator lights will illuminate.
must be used. Additionalchainsupport may be required by localcodes.
wires through 7/8” DIA KO bushing.
10.Energize the sign fixture with AC supply. The charge indicator lights will illuminate
10. Place pipe nipples through the mounting holes of the frame until the canopy is touching the frame. Thread a
dhering to National, State and Local codes, make wir
2. Remove retainer screw from the front cover of the unit. Remove the front cover and set aside.
3. Remove 7/8” DIA KO mounting hole located at the top portion of back plate. Use bushings provided to protect
wires from metal edge. Install mounting pan and cable tie to back plate. Secure wires using cable tie. Feed
2. Remove retainer screw from the front cover of the unit. Remove the front cover and set aside.
RED
BLACK
BATTERY
BLACK
BLACK
CHARGER
BOARD
Indicator LEDTEST
SWITCH
YELLOW(+)
BLUE(-)
YELLOW(+)
BLUE(-)
YELLOW(+)
BLUE(-) LED
LAMP
LED
LAMP
To Remote Lamp Head
-
+
RED
RED
277 VOLT
120 VOLT
COMM
BLACK
BLACK
WHITE
RED
277 VOLT
120 VOLT
COMM
BLACK
WHITE
Transformer
Transformer
EXIT Light Bar
OPERATION:
EXIT – LED lamps will stay on in AC mode and remain on
switch.
LAMP HEADS – To test the equipment, depress the TES
T
the emergency lightswill illuminate. CAUTION: Thisequip
transfer switch which will automatically disconnect the em
e
discharged to the end of its useful output.
A
fter test, the automatic charger will return into action, ch
a
charged state. NOTE: Allow the battery to charge for a mi
n
failure before conducting a 90 minute test.
TESTING
TESTING
NFPA 101 (Life Safety Code) requires that all emergency
for a minimum of 30 seconds and tested annually for a full
be kept for examination by the authority having jurisdictio
n
TROUBLE SHOOTING:
Does not operate in emergency mode and:
If the charger indicator light is OFF Check that the circui
t
If the charger indicator light is ON
Check that the battery
Emergency lights are dim – Implies battery might not be f
u
then re-test.
MAINTENANCE:
CAUTION: Always turn OFF AC power to the equipment
b
a qualified service technician. Only manufacturer SUPPLI
E
BATTERY: The battery supplied with the equipment requir
periodically (see TESTING section) and replaced when it
n
complete duration of a 30 second or 90 minute test. It has
ambient temperature of 72°F.
LED LAMP BOARD: When relamping, only use LED light
result in transformer damage or unsafe conditions.
OTHER: Clean lenses and replace lamp as, and when, re
q
Wiring Diagram
NOTE: Unused input leads must be properly
insulated with wire nuts or other approved
methods
READ AND FOLLOW ALL SAFETY INSTRUCTIONS
IMPORTANT SAFEGUARDS: When using electrical equipment, alway
s
methods
.
in the Emergency mode. To peform test, press test
T
switch. The charge (LED) indicator will turn OFF and
pment is furnished with a sophisticatedsolidstate
e
rgency lights from the battery if the battery has been
a
rging the battery and trying to maintain it at a fully
n
imum of 24 hours after installation or after a power
lighting equipment be functionally tested every 30 days
90 minute duration. Written records of the testing are to
n
.
t
breaker for AC supply is ON.
is properly connected.
u
lly charged. Allow battery to recharge for 24 hours and
b
efore servicing. Servicing should be performed only by
E
D or APPROVED replacement parts must be used.
res ZERO maintenance. However it should be tested
n
o longer operates the connected fixtures for the
a life expectancy of 5-7 years when used in a normal
sources specified. Using other LED light source may
q
uired.
s
adhere to basic safety precautions including the following:
  • Page 1 1
  • Page 2 2
  • Page 3 3

CHICAGO ESW-CH-LED-C User manual

Type
User manual

CHICAGO ESW-CH-LED-C offers reliable emergency lighting solutions for various indoor commercial and public spaces. With its energy-efficient LED technology, it provides bright and consistent illumination during power outages. Its dual voltage compatibility (120V/277V) and versatile mounting options (surface, ceiling, or side-end) ensure easy installation in different locations.

Ask a question and I''ll find the answer in the document

Finding information in a document is now easier with AI