Page is loading ...

Oldtimer XXL-59
Building instructions - Oldtimer XXL-59 1
Building Instructions
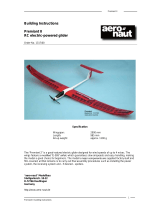
Oldtimer XXL-59 RC model aircraft
Order No. 1310/00
Specification:
Wingspan: approx. 1.480 mm
Length: approx. 1.090 mm
Wing area: approx. 16.7 sq. dm
All-up weight: approx. 420 g
Wing loading: approx. 24 g/sq. dm
Weight, electric glider: approx. 420 g
Wing loading: 34-39 g/sq. dm
RC functions: Elevator
Rudder
Throttle
The “Oldtimer XXL-59” is based on the legendary Wakefield models widely flown in the years 1959 to 1960. Assembling
the aircraft takes only a few hours, but in any case you will find construction a pleasurable experience which reflects and
repays your manual skills. The fuselage is fitted with removable hatches for the power system, RC system components
and flight battery.

Oldtimer XXL-59
Building instructions - Oldtimer XXL-59 2
Parts List
No. Part Quantity
1. Machine-cut sheets containing parts 1 - 13 15
2. Balsa strip, 3 x 3 x 1000 mm 4
3. Balsa strip, 3 x 3 x 500 mm 4
4. Spruce strip, 2 x 5 x 500 mm, wing K19, K20 6
5. Spruce strip, 2 x 3 x 500 mm, tailplane V07 1
6. Balsa T.E. strip, sanded, left and right 2
7. Balsa sheet, 1.2 x 80 x 630 mm 1
8. Aluminium tube, 5 / 4 Ø x150 mm 1
9. CFRP rod, 4 Ø x 112 mm 1
10. Steel pin, 2 Ø x 35 mm 1
11. Plastic horn 2
12. Bag S1 – pushrod connectors 2
13. Bag S1 – washer, 2.1 Ø 2
14. Bag S1 – M2 locknut 2
15. Bag S1 – socket-head grubscrew, M3 x 3 2
16. Pre-formed piano wire pushrod, 0.8 Ø x 750 mm, one Z-bend 2
17. Snake sleeve, 2 / 1 Ø x 1000 mm 2
18. Metal hatch latch with spring-loaded pin 1
19. Self-tapping screw, 2.2 Ø x 6.5 mm 4
20. Plastic captive nut, M3 1
21. Plastic screw, M3 1
22. Plastic hinge, 15 mm 2
23. Beech block, 12 x 12 x 15 mm, channelled 1
24. GRP latch retainer 1
25. Bag S2, jig consisting of four plywood parts 1
26. Plywood spar web, 1 x 9 x 23, No. 26 8
27. Plywood, 1 x 20 / 15 x 50 mm, tailplane mount, No. 27 1
28. Spruce strip, 3 x 3 x 50, front tailplane stop-piece 1
Tools required
• Sharp knife
• Sanding block and abrasive paper (grits: 100, 180 and 240)
• Fine-blade hacksaw (for metal)
• Modelling pins and weights
• Flat building board, at least 120 x 30 cm
• Clear plastic film for covering the plan
• Paper masking tape
Materials required to complete the model
(not included in the kit)
• Wood-glue (PVA)
• Thin / thick cyano-acrylate adhesive
• 5-minute epoxy
• Covering tissue or film
• Clear and coloured paint
• RC system
• Electric power system
The fuselage
• Remove the fuselage formers T01 to T08 from the machine-cut sheets,
and write the part numbers on them using a soft pencil.
• Repeat the procedure with the central fuselage plate T09. The whole
fuselage structure is based on this part.
• The fuselage side frames are assembled from parts T12 and T12a.
• Glue full-length 3 x 3 mm balsa strips to the inside of the fuselage side
frames T12 top and bottom; keep the strips exactly flush with the
outside edge of the side frames. If you are unsure, fit the fuselage
formers ‘dry’ (no glue) to check the fits.
• Glue the formers T04 and T05 to the central fuselage plate T09: take
care not to mix up the front and rear ends of this part; the drawings
clearly show the correct orientation.
• The central fuselage plate can now be glued to one side frame T12
together with the former T06.
• Sand the outside of this assembly flat, so that it can rest flat on the building board. Lay the assembly on the building
board, and pin it down so that it cannot shift.

Oldtimer XXL-59
Building instructions - Oldtimer XXL-59 3
• Now glue the second fuselage side frame to the formers T04, T05 and T06, and to the central fuselage plate T09.
Place weights on the side frame to press the parts together. When the glue has set hard, the result will be a rigid
centre section which acts as the basis for the remainder of the fuselage construction.
Tip: if you sand over the joints carefully while the glue is still damp, the sanding dust combines with the adhesive to form
very strong fillets.
• Draw a centreline on the building board: this acts as reference point for all the formers.
• Hold the fuselage upright, place it on the centreline and weight it down carefully; check that it lies absolutely flat.
• Glue the formers T03, T02 and T01 in place, followed by the formers T07 and T08.
• Assemble the top fuselage sheeting from parts T15 and T16. Allow the joint to set hard, then glue this part to the
fuselage.
• Glue short pieces of 3 x 3 mm balsa strip in the corner joints between the firewall T01, the fuselage sides and the top
sheeting. For the moment, glue the bottom strip to the former only; it will reinforce the bottom joint at a later stage.
• Invert the fuselage and fix it to the building board again using pins and /
or weights.
• Assemble the bottom fuselage sheeting from parts T17 and T18, allow
the glue to set hard, then glue it to the structure.
• Carefully sand all four faces of the fuselage until they are completely
flat, then round off the corners of the fuselage slightly. Caution: the
fuselage sides project at the top in the area of the tailplane mount;
these projecting parts must not be sanded off, as they later form the
support for the tailplane.
• The tailplane mount consists of a balsa in-fill piece, which can be cut
from a piece of scrap material from the machine-cut sheets, and the
plywood part No. 27. The rear edge of the plate should end flush with
the rear edge of the projecting fuselage sides.
• The tailskid is a sandwich consisting of a central plywood core (S16),
with balsa parts (S17, S18, S19 and S20) glued on both sides.
• Assemble the tailskid as shown in the drawing, and glue the joints.
• The skid should be sanded to final profile before it is glued to the underside of the fuselage. Take care to install it
exactly at right-angles to the fuselage centreline.
• The detachable hatch on the underside of the fuselage consists of the hatch cover T22, the front tongue (parts T23
and T24) and the latch retainer No. 24 (machined GRP part).
• Assemble the hatch cover as shown in the drawing: the front edge of
the doubler T23 should end flush with the front edge of the hatch cover.
You will find a slot in the fuselage former T04 to accept the tongue T24.
• The hatch cover is held in place by a spring-loaded metal latch. Drill a 5
mm Ø hole for the latch and glue it in place by applying 5-minute epoxy
on the inside of the fuselage.
• Drill a 3 mm Ø hole in the GRP part to accept the latch pin. Take your
time over measuring the dimensions for this stage, to ensure that the
parts fit accurately.
• The hatch covers on the top of the fuselage are assembled as shown in
the drawing. Each one features a locating tongue at one end and a
retaining screw at the other.
• The final stage on the fuselage itself is the installation of the white snake outer sleeves for the rudder and elevator
linkages: cut small slots in the fuselage just forward of the rudder and elevator. Fit the snake outers, and glue them
in place at both ends and at two or three points between the extremes.

Oldtimer XXL-59
Building instructions - Oldtimer XXL-59 4
The fin and rudder
• The fin and rudder are assembled sandwich-style, with the plywood
parts S10 and S09 forming the core.
• Assemble the fin and rudder from the plywood parts stated above, the
balsa parts S07 and S08 and the ribs S01 to S06. Start by fitting all the
parts together ‘dry’ (no glue), then apply thin cyano to the joints when
you are confident that the parts are aligned correctly.
• Glue the balsa doublers (S11, S12, S13 and S15) to the core using
thick cyano.
• Carefully sand the components. Use a sanding block to chamfer the
trailing edge of the fin and the leading edge of the rudder at around 10°
on both sides of centre, so that the panel can deflect to both sides.
• You will find pre-cut slots in the fuselage for the fin tabs. The fin can now be glued to the top of the fuselage; it must
be exactly vertical. Check that the front fin strake runs along the fuselage centreline.
• The rudder is attached to the fin using two hinges; the slots for the hinges are pre-cut. Don’t glue the hinges in place
until the model has been covered and painted.
The tailplane and elevator
• The outer frame of the tailplane is assembled from the leading edge V06, the tips V09 and the trailing edge V08. The
elevator is not separated from the tailplane until the structure is complete.
• Pin down the tailplane trailing edge on a flat building board. Note that the leading edge is not fitted until the ribs have
been installed.
• Separate the ribs V01, V02 and V03: start with the two smallest ribs (V03), and immediately fit them in the tailplane
frame.
• The remaining ribs can now be separated from the sheet.
Cut the main tailplane spar V07 (2 x 3 mm spruce strip)
to exact length, so that it fits between the two outermost
ribs (V03), then thread all the ribs onto the spar.
• When fitting the ribs on the spar please note that the left
and right outer ribs are smaller, and do not feature a
notch on the underside.
• Distribute the ribs along the spar, so that they are evenly
spaced.
• Place the spar / rib assembly in the tailplane frame, and
press the ribs into the notches in the leading edge from
the top, starting at one end. Don’t use force here,
otherwise you might break one or other of the ribs.
• Once all the ribs are in their notches, continue by inserting them in the notches in the trailing edge. You may find it
necessary to shorten individual ribs if the machine cutter has not made the notches in the trailing edge deep enough.
Tip: laying a thick strip of wood or a steel ruler against the leading edge and fixing it in place will ensure that the leading
edge stays perfectly straight.
• Now fix the whole assembly to the building board, taking care to keep it
exactly flat. Glue the left and right elevator tip-ribs in the wide slots, as
far outboard as possible.
• The ribs can now be glued to the leading edge, trailing edge and main
spar.
Tip: a good method of gluing the parts is to apply a little thinned wood glue
to each joint using a small paintbrush or toothpick. The thinned glue
penetrates the joints very well, and produces a strong, rigid assembly.
• Allow these glued joints to dry out thoroughly, to avoid the danger of the
whole tailplane warping subsequently.
• Remove the tailplane from the building board and carefully press the elevator spar V05 into the notches in the
underside of the ribs. Ensure that the spar is fitted as far forward as possible, and is not twisted along its length; glue
it in place using thin cyano. At the same time check that the tailplane is not warped or curved. If you are not
confident of this, pin or weight the tailplane to the building board again while you glue the joints.
• Repeat the procedure with the spar V04, but be sparing with the adhesive, otherwise the two spars will become
stuck together. Bear in mind that you have to separate the spars V04 and V05 again later.
• The final step is to install the half-ribs V01b, which form the elevator tips.
• Carefully sand the tailplane overall, taking care not to alter the airfoil.
• Glue the in-fill panels V10 and V13 in the central rib bay.

Oldtimer XXL-59
Building instructions - Oldtimer XXL-59 5
• Sand the bottom in-fill panel to form a perfectly flat support surface between the leading edge V06 and the trailing
edge V05, i.e. not following the undercambered airfoil. In contrast, the in-fill panel in the top surface should be
sanded to follow the camber of the airfoil.
• Glue the gussets V12 and the elevator in-fill piece V11 in place.
• Give the whole tailplane a final overall sanding, then separate the elevator from the panel using a thin knife-blade.
• Sand the leading edge of the elevator at an angle, so that it can be
attached using a tape hinge on the top surface. Note that the hinge
should not be fitted until the model has been covered and painted.
• To attach the tailplane to the tail end of the fuselage, drill a 3 mm Ø hole
exactly in the centre of the tailplane from above, located 3 mm aft of the
main spar.
• Mark the position of the hole on the fuselage.
• Glue the plastic captive M3 nut to the inside of the fuselage, exactly in
line with the hole. The tailplane can now be fixed in place using the 3
mm plastic screw supplied.
The wing
• The wing jig must be assembled using white glue before the wing can
be built. Check that the parts fit together snugly; the cutter leaves
slightly rounded corners, and it may be necessary to trim them ‘square’.
The wing pylon
• Glue the plywood part T10 between the balsa components T11 and T12.
Check that the pre-drilled holes are aligned accurately with each other.
• Press the two cruciform reinforcements T13 into place, and glue them
with thin cyano.
• Sand the surfaces perfectly flat, including the top surface of the pylon
itself.
• Fit the aluminium tube through the front hole and check that it is exactly
horizontal and at right-angles to the centreline. Adjust the hole with a
small round file if necessary.
• It is important to roughen (sand) the centre of the tube thoroughly over a
distance of 25 mm before gluing it in the pylon using 5-minute epoxy.
The assembly must be placed in the building jig to align the parts.
• Now slip the plywood ribs T14 on the tube on both sides, and glue them
to the sides of the wing pylon. Once again, check that the rear holes for
the incidence peg line up accurately.
• Cut off the excess aluminium tube on both sides before sanding the
surface of the plywood ribs flat and flush. Place the remaining
aluminium tube to one side, as it is needed later when the wing is built.
• Sand the top face of the wing pylon flush with the plywood ribs, then
sand the whole pylon to a slightly streamlined shape as shown. Take
care not to round off the ribs, as the root ribs of the wing panels must
line up accurately with these parts.
• Insert the rear incidence peg No. 10, leaving it projecting by an equal
length of both sides; a small drop of cyano will hold it in place.
Caution: don’t glue the pylon to the fuselage at this stage; place it on one
side for the moment. The reason is that it can only be aligned correctly with
the help of the completed wing panels.
Inboard wing panels
• We recommend that you build the left and right wings at the same time, starting with the long inboard panels.
• The first step is to cover the building board with clear plastic film.
• Pin down the trailing edge K15 on the building board, packing up the extreme front edge (under the notches) with
strips of 1 mm thick wood or card. These packing pieces should be under the plastic film, otherwise they will become
stuck to the wing.
• Write the part number on each rib before separating them from the machine-cut sheets.
• Start with the ribs K05: insert all of them in the trailing edge and the notched leading edge K18. Take care to leave
space left and right for the ribs K02, K03, K04, K06 and K07.
• Once all the K05 ribs are inserted, weight the assembly down on the building board, and set the ribs at right-angles
to the leading and trailing edges.
Tip: small pieces of clean steel from the scrap box of your friendly local metal-working shop are very useful here.

Oldtimer XXL-59
Building instructions - Oldtimer XXL-59 6
• Once everything is aligned properly and weighted down, the ribs can be glued to the leading and trailing edges with
a single drop of cyano at each joint.
• Glue the thick root rib K02 and the pre-drilled ribs K03 and K04 to the structure: these are 2 mm lower than the
remaining ribs in order to allow for the sheeting. When fitting these ribs ensure that they are exactly central in the
notches in the trailing edge, i.e. they should not rest on the building board.
• Glue the thick tip-rib K07 and the rib K06 in place; these are also lower than the other ribs, and must be centred in
the notches in the trailing edge as previously described.
• Glue the balsa strip K22 to the leading edge as a doubler, butting up against the ribs as shown.
• The upper main spar K20 is fitted next: the square internal edges must be rounded off slightly so that they fit in the
machine-cut notches. Glue the spar to the ribs with a drop of white glue or thick cyano at each joint.
• Sheet panels are added to the wings in the bays at the dihedral joints:
cut three 15 mm strips of 1 mm balsa sheet, cut them to the correct
length and glue them to ribs K07 and K06 between the leading and
trailing edges and the main spar.
• Cut three strips 55 mm wide for the root sheeting panels, which are
glued to the ribs K02, K03 and K04. Glue these panels between the
leading and trailing edges and the main spar.
• Allow the glue to set hard before removing the wing panels from the
building board.
• Invert the wing and lay it down on the building board, resting on the
upper main spar. Pack up the trailing edge by about 10 mm, and weight
the whole panel down in this position.
• The lower main spar can now be glued in place after rounding off the
internal edges as previously described.
• The next step is to install the wing joiner tubes, but first the 15 mm
sheeting strips should be fitted at the outboard dihedral joint on the
underside: they are glued to the ribs K06 and K07.
• The aluminium tubes can now be cut to length and the surfaces sanded
to provide a ‘key’ for the adhesive before they are glued in the root ribs.
• Slip the carbon fibre rod through the wing pylon, and fit both inboard
wing panels onto it. Check that the root ribs rest snugly against the
pylon. If they do not, file out the aluminium tube holes to correct the fit.
• Once you are confident that everything fits properly, glue the aluminium
tubes in the wing roots using 5-minute epoxy. Leave each tube
projecting by about three millimetres at the root rib.
• Allow the epoxy to cure before gluing the spar webs, No. 26, to both
sides of the top and bottom spars in order to enclose the wing joiner
tubes.
• The inboard wing panels are completed by gluing the bottom sheeting
panels and the root facing rib K01 to the structure.
• Now sand the inboard wing panels lightly overall, and place them to one
side.
Outboard wing panels
• Glue the leading edge K17 to the tip block K19 and the trailing edge K16 to form the initial assembly.
• Push the ribs K06 to K14 into the notches ‘dry’ (no glue). Note that the ribs K06 and K07 must again be centred in
the notches in the trailing edge to allow for the top and bottom sheeting.
• Lay the assembly over the building board, align all the parts carefully,
then glue the ribs to the leading and trailing edges using thin cyano.
• Glue the top main spar K19 to the structure. As mentioned earlier, note
that the internal edges of the spar should be rounded off slightly to
allow for the rounded edges of the machine-cut notches in the ribs.
• The leading edge doubler K21 can now be fitted.
• The top sheeting of the two ribs K06 and K07 again consists of 15 mm
wide strips of 1 mm balsa sheet.
• Once everything is dry, remove the wing panels from the building board,
invert them, glue the bottom spar K19 in place, and attach the sheeting.
• Sand the outboard wing panels smooth overall.
Joining the wings
• The first step is to saw off the excess strip material flush with the facing
ribs.
• Now use a sanding block to bevel the mating ribs of the inboard and

Oldtimer XXL-59
Building instructions - Oldtimer XXL-59 7
outboard wing panels at an angle of nine degrees from perpendicular. Check the fit repeatedly, to avoid sanding
away too much material.
• Glue the inboard and outboard panels together with 5-minute epoxy, using the jig which you previously employed
when assembling the wing pylon.
• Allow the joints to harden fully before very carefully sanding the joint areas smooth and flush.
Remaining work
• The wing pylon can now be glued to the top of the fuselage: the first
step is to check that the tabs are a snug fit in the slots, and that the
pylon rests squarely on the fuselage without wobbling.
• Plug the wing panels into the pylon on both sides, and sight along the
fuselage from the nose to check whether the wing and pylon are
horizontal relative to the building board. You can easily check this by
packing up both wings at the same point using CD cases or similar.
• When you are satisfied, glue the pylon to the fuselage using 5-minute
epoxy. Position it accurately as previously, then leave the glue to set
hard.
• Any gaps between the pylon and the top of the fuselage can be filled
later with epoxy or white glue.
• This completes the model’s bare airframe. Give the whole model a final rub-down with fine (240-grit) abrasive paper,
and check that all surfaces are smooth and true. At this stage it is a good idea to examine the model carefully for
inadequate glued joints, and excess blobs of glue which can be scraped away.
• Now that you have built your own model, you can be justifiably proud of your modelling skills and workmanship.
Covering
• We recommend that you cover the airframe with a lightweight iron-on film such as ‘Ora-Light’, or the old classic
tissue paper. Under no circumstances use iron-on fabric, as this material is too heavy and shrinks too strongly, i.e. it
would cause serious warps in the delicate structure of the “Oldtimer XXL-59”.
• When applying the covering material be sure to follow the instructions supplied by the manufacturer.
Installing the RC system and power train
• Use a little 5-minute epoxy to glue the plastic horns in the rudder and elevator, exactly in line with the snake sleeves
where they exit the fuselage. Connect the pre-formed end of the steel pushrods to the horns.
• Mount swivel pushrod connectors on the output arms of the two servos before screwing them to the servo plate. Set
the servos to centre from the transmitter, hold the control surfaces at centre, then slip the pushrods through the
connector barrels and tighten the clamping screws.
• The electric motor is simply screwed to the inside of the firewall at the extreme nose of the fuselage. Mark the motor
mounting holes on the firewall to suit the motor you intend to use. Ventilation holes are not necessary with such low
power levels; they would only weaken the firewall unnecessarily.
• The central hole for the motor shaft should be a few millimetres larger than the diameter of the shaft itself.
• The speed controller can be attached to the bottom of the fuselage with a small patch of hook-and-loop tape; keep
the connecting leads as short as possible. Don’t wrap the controller in foam, as this would prevent cooling air
reaching it.
• The flight battery is located directly below the wing, and is fitted and removed through the hatch on the underside of
the fuselage. Secure it with hook-and-loop tape.
Settings
• Set the control surface travels as follows:
Elevator: 10 mm up, 10 mm down
Rudder: 15 mm left, 15 mm right
• The model should balance at a point 72 mm aft of the wing root leading edge. Support the model on two fingertips on
both sides of the wing pylon at this point: the fuselage nose should now be inclined slightly down. If necessary,
correct the Centre of Gravity by re-positioning the flight battery or adding a small amount of lead ballast to nose or
tail.
• Carry out a range-check before the first flight - with and without the motor running.
Safety notes, potential hazards
• Model flying is a fascinating hobby. However, model aircraft have the potential to annoy and even injure people, so
we strongly recommend that you observe a few basic rules in order to avoid these hazards.
• In Germany and many other countries you are only permitted to fly model aircraft using a radio control system oper-

Oldtimer XXL-59
Building instructions - Oldtimer XXL-59 8
ating on 35 MHz or 2.4 GHz.
• Fly your model only at a site where your activity will not annoy or endanger anyone. Ideally this will be an approved
model club flying site.
• It is never permissible to fly a model directly towards or over spectators. If you wish to fly aerobatic manoeuvres,
keep the model well away from other people.
• If any part of your radio control system requires repair at any time, leave such work to a professional. In any case,
any modifications you make yourself will invalidate your RC system’s approval certificate.
• Do not switch your transmitter on until and unless you have ensured that your system will not cause interference to
any other radio control system in the vicinity, e.g. through a ‘channel clash’ (two systems on the same frequency).
• If at all possible, join a model flying club, as its members will be willing and able to answer all your queries and help
with any problems you encounter.
Please note: if damage is caused due to your failure to observe these instructions, the guarantee is invalidated.
We accept no liability for consequential damage which results from such activity. The building instructions,
which cover the construction and operation of the model, must be observed with the greatest care. These
instructions also contain notes regarding the safe operation of the model. This model is by no means a child’s
plaything.
Recommended power system
Electric motor, approx. 15 - 50 Watt, with 2S LiPo battery (e.g. 1000 mAh), propeller up to 9” diameter.
Typical system:
Race 400 7.2V motor Order No. 7000/40
Folding propeller, 6” x 3” Order No. 7238/05
Spinner, 38 mm Ø Order No. 7254/13
Propeller adapter Order No. 7124/07
All of us in the aero-naut Modellbau team wish you many hours of pleasure with your “Oldtimer XXL-59”!
aero-naut Modellbau GmbH & Co KG, Stuttgarter Strasse 18-22, 72766 Reutlingen, www.aero-naut.de
/