TRACK 1000 Battery replacement manual
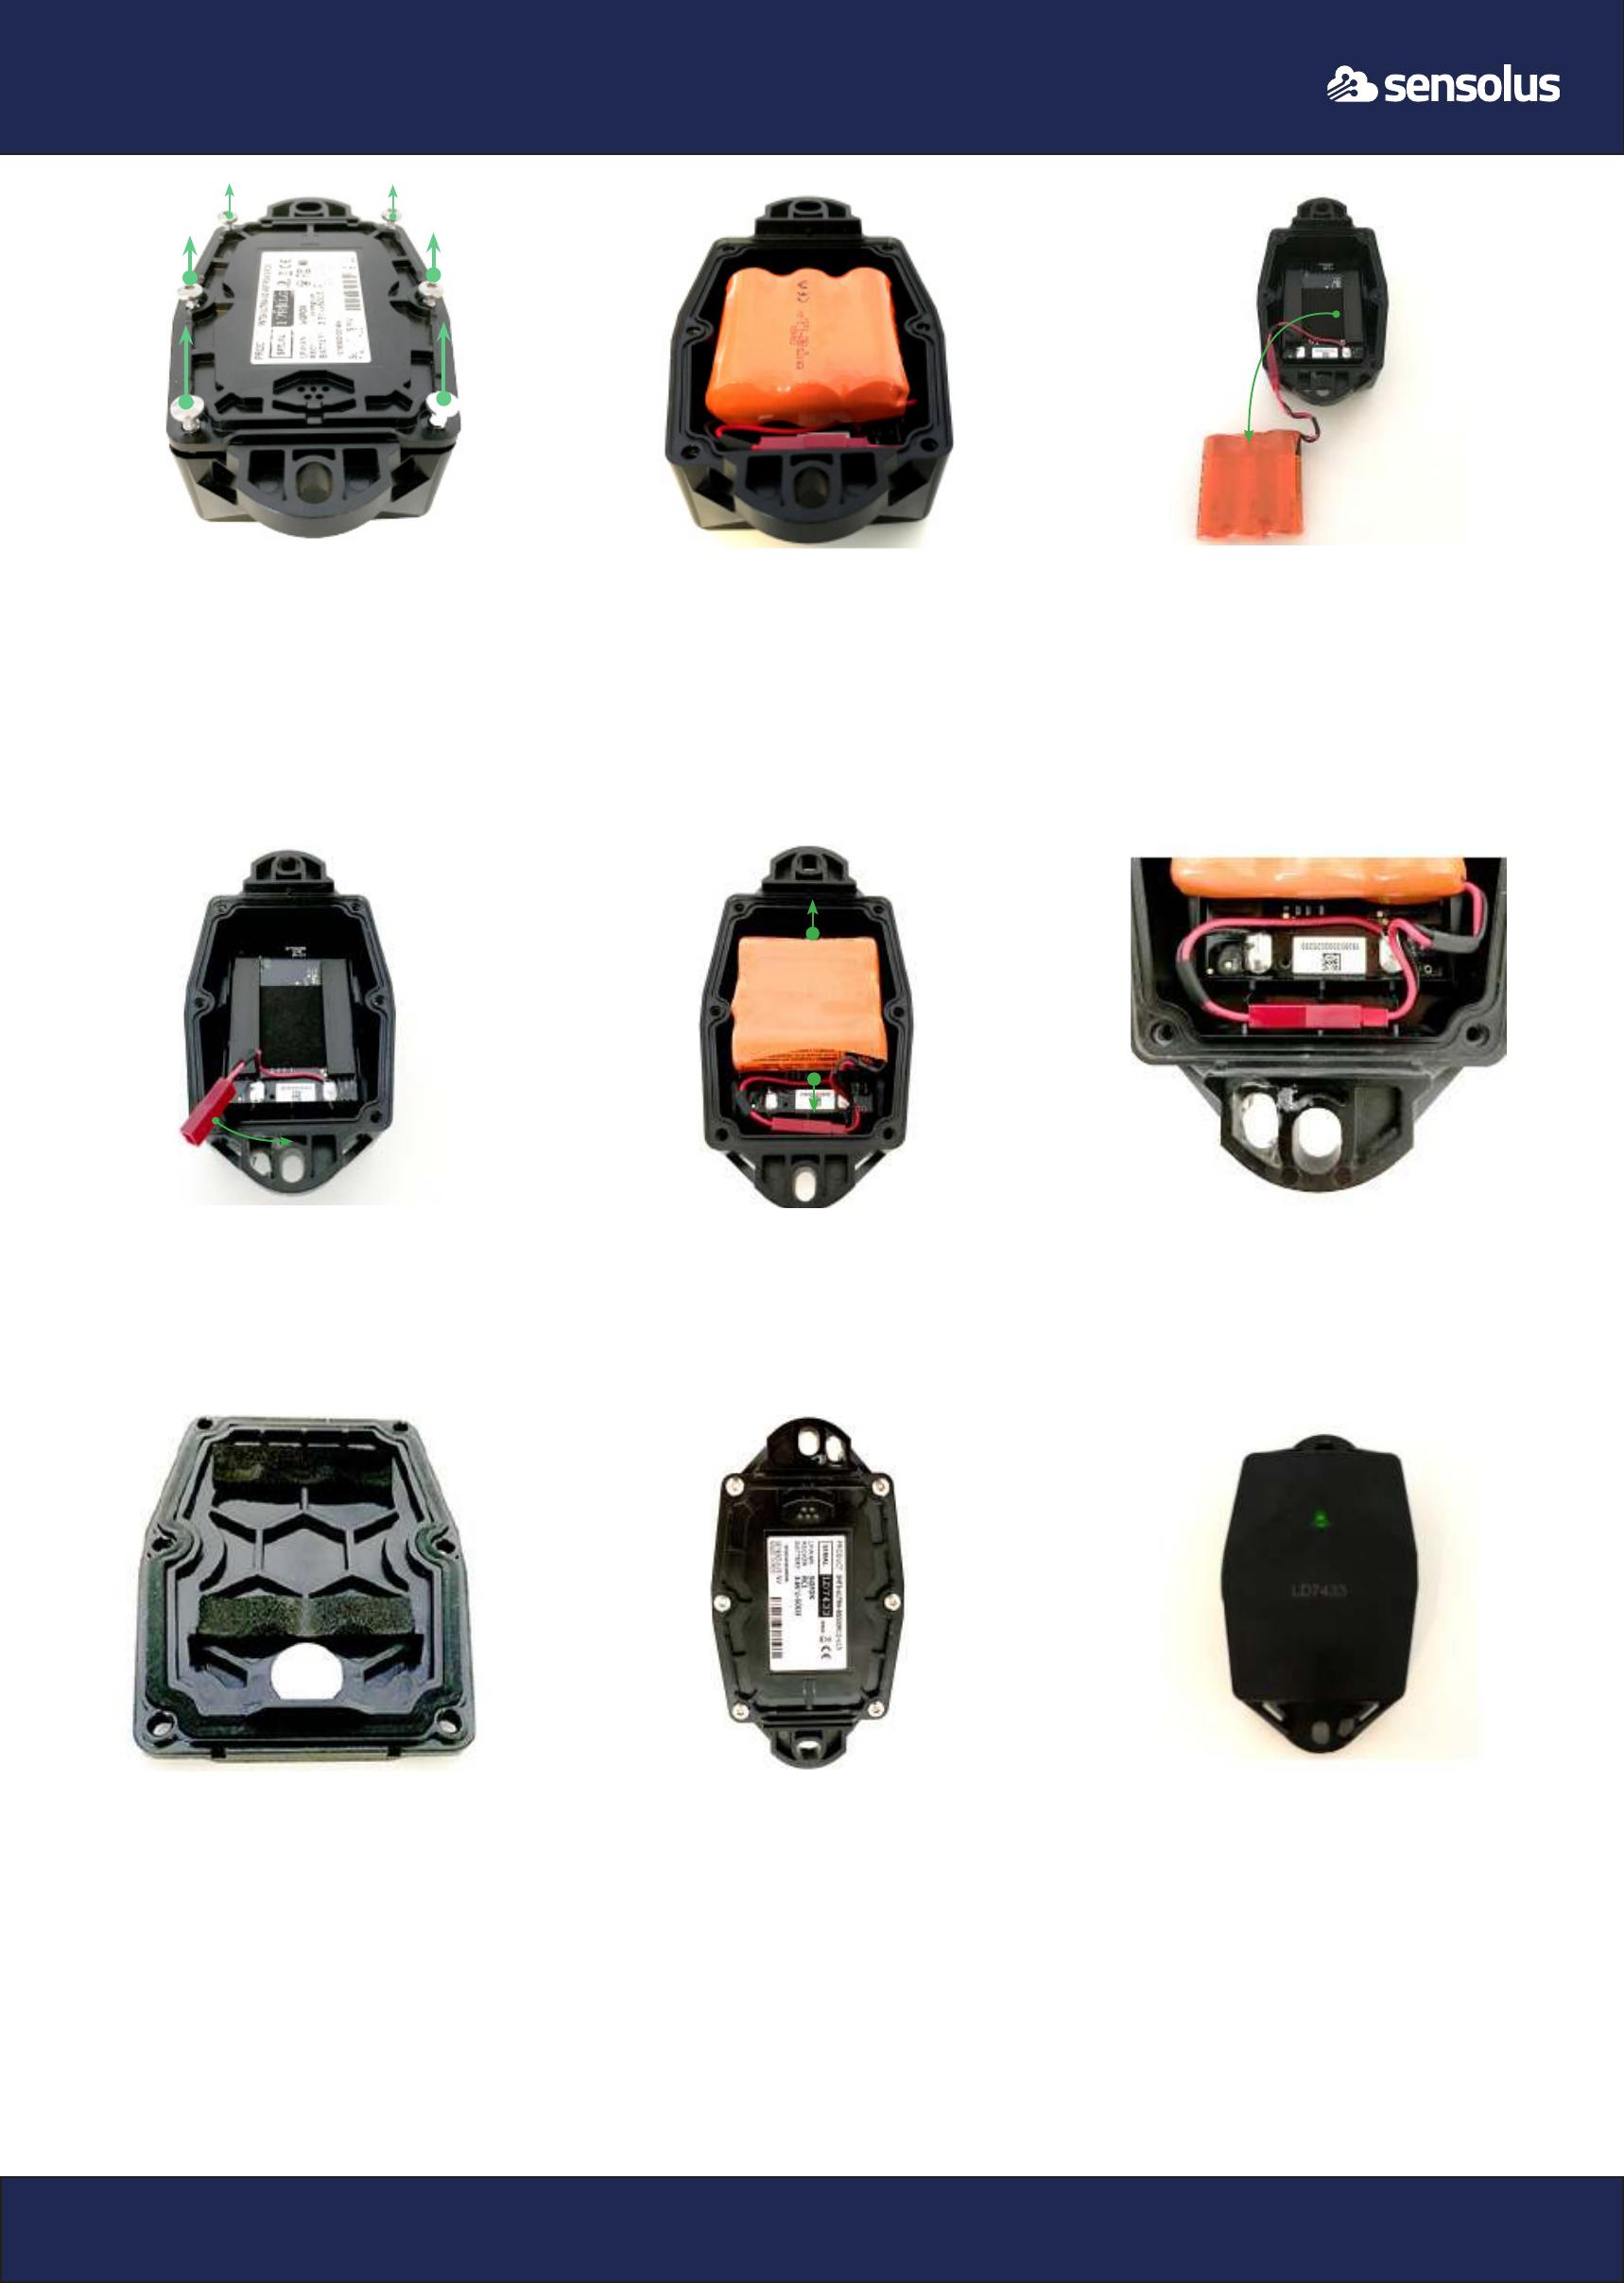
Step 1
• Make sure that the serial number and logo are facing
the right way up.
• Then turn the tracker face down.
• Unscrew the 6 screws.
Tip: If using a power drill, use power seng 7, on low.
(Note: not all power drills have the same sengs!)
Step 2
• Remove the back plate and the 6 screws.
Step 3
• Remove the baeries - pull them out of the
connector.
Tip: place a nger on the sponge to hold it in place
Step 4
Place the chip so the connector is towards the holder.
Step 5
Insert new baeries. Posion the new baeries and make
sure the baeries are in the center (on top of the sponge)
- not too low or too high.
Step 7
Make sure that the seal is completely at/intact on the
back of the tracker.
Step 8
Close the case again by ghtening the 6 screws in the
corresponding holes. Be careful not to break the casing
when using a power drill.
Step 9
The green light on the front of the tracker will rapidly
ash green. From this moment, your asset tracker will
start sending acvity (movement) and GPS locaon.
This informaon will be visible in the Sensolus Plaorm
if you nd yourself in an area with Sigfox communicaon
network coverage.
Step 6
Make sure the connector is inside the holder and that the
cable is tucked to the le-hand side.