Basco 3400-56SOR Installation guide

Type
Installation guide
Semi-
Framless
Bypass
Tub &
Shower
Door
CLCH05A
the CLASSIC BYPASS
BECAUSE THE SHOWER IS EVERYTHING
www.BascoShowerDoor.com | 800.45.BASCO
QCI5019
Lysol
Although safety tempered glass is very resistant to breakage, the
glass can still break if unequal pressure is placed on it during
installation. Use caution. In addition, the sharp corners of the
panels can damage tile and floor surfaces, so it is best to handle
the glass panels carefully and protect the edges.
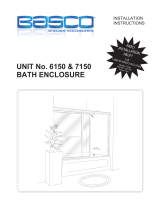
Two primary materials are used to manufacture your new enclosure: tempered glass and
anodized aluminum. To assure a long lasting finish on the enclosure, wipe it down with a towel after each use.
Never use a scouring agent to clean the aluminum.
To install your bath enclosure, you will need the following:
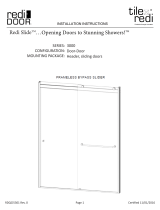
QCI5019 Rev 2 Page 2 Certified 01/10/2020
**If installing on a fiberglass unit you may need to
snip outside corner to match corners on wall jambs
and tub tracks to match radius on fiberglass unit**
J. 2 Towel Bar Trim Rings
S. 1 Nylon Bottom Guide
T. 2 #6 x 3/8” Pan Head Screws
U. 4 Stainless Steel Bumper Inserts
v
U
QCI5019 Rev 2 Page 3 Certified 01/10/2020
Y
Y. 3 Anti-Jump Inserts (1 Shown) SC4340-35
Z. 3 Anti-Jump Screws (1 Shown) SCR11
Certified 12/13/06
)
3/16”
3/16”
QCI5019 Rev 2 Page 4 Certified 01/10/2020
QCI5019 Rev 2 Page 5 Certified 01/10/2020
Measure the wall-to-wall opening at the top of the wall
jambs [B] and cut the header [F] 1/16” short of this
dimension. Check the header for fit.
5
If not already, slide the anti-jump inserts to the center of the header.
NOTE: Header shown
and cut away for clarity
7
Slide anti-jumps
into position:
1) at left wall jamb
2) at right wall jamb
3) centered in
opening
Insert 1 SCR11 screw into the pre-drilled hole of each insert. The screws will just press against the header. DO NOT use power
tools to insert these screws. DO NOT drill the header for these holes.
PRO TIP!
If the rollers contact the
ant-jump during normal
opperation, back the screw
out of the insert 1/4 of a
turn at a time until less
contact is made.
If the rollers are able to
jump from the track slowly
tighten the screw 1/4 of a
turn at a time until the
roller is unable to jump
from the track.
QCI5019 Rev 2 Page 6 Certified 01/10/2020
QCI5019 Rev 2 Page 7 Certified 01/10/2020
10
QCI5019 Rev 2 Page 8 Certified 01/10/2020
Please Note: Panels will need to be very close to the
center of the opening in order to be installed.
If there is ever reason to remove the panel, the panel
will again need to be centered in the opening.
QCI-5019 Rev 2 Page 9
14
15
  • Page 1 1
  • Page 2 2
  • Page 3 3
  • Page 4 4
  • Page 5 5
  • Page 6 6
  • Page 7 7
  • Page 8 8
  • Page 9 9

Basco 3400-56SOR Installation guide

Type
Installation guide

Ask a question and I''ll find the answer in the document

Finding information in a document is now easier with AI