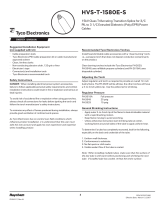
Cold Shrink 5110-OS Series Oil Stop
Kits for use with Single Conductor PILC
Cables and 200 Amp Cable Accessories
Instruction Sheet
15 kV and 25 kV
Kit Contents:
1 Cold Shrink Sealing Tube (large diameter)
1 Oil Stop Cold Shrink Tube (small diameter)
1 Roll Scotch
®
130C High Voltage Rubber Electrical Tape
1 Roll Scotch
®
13 Semi-conducting Tape
1 Roll White Restricting Tape
2 Strips Sealing Mastic
(black with white release liners, bagged)
1 Constant Force Spring
1 High Amp Ground Braid with bleed wire
2 Instruction Sheets (one for 200 amp accessories and one for
600 amp accessories)
3M
™
Cold Shrink
Oil Stop Kits
5110-OS 5111-OS 5112-OS
For use on Single Conductor Paper Insulated
Lead Cable rated 15 and 25/28 kV
78-8124-5509-1-B
Single Conductor PILC Cable
Minimum Insulation Conductor Size Range
Kit Diameter Maximum Lead
Number (Over Paper) Diameter 15 kV 25/28 kV
5110-OS .58" (14,7 mm) 1.10" (27,9 mm) #4 - 3/0 AWG --
5111-OS .72" (18,3 mm) 1.30" (33,0 mm) 4/0 AWG - 300 kcmil #2 - 1/0 AWG
5112-OS .92" (23,4 mm) 1.60" (40,6 mm) 350 -600 kcmil 2/0 AWG - 300 kcmil
Kit Selection Chart

A. Prepare PILC Cable
1. Locate cable into final assembled position and select elbow accessory for installation. Allow sufficient
clearance for installing and removing elbow accessory.
2. Clean cable end for 36” (915 mm). Clean cable jacket if cable is jacketed. Clean the lead if unjacketed using
solvent approved for use on power cables.
3. Remove cable jacket from cable end per dimension shown in Cable Preparation Table. If cable does not have
a jacket, place a tape marker around the lead sheath at the specified dimension as reference for measuring.
4. Scrape the lead clean around it’s circumference a distance of 5” (120 mm) from cable jacket end or tape
marker.
5. Remove lead from cable end per Cable Preparation Table. Do not intentionally bell the end of the lead.
Peen down any sharp protruding corner at end of lead.
6. Per Cable Preparation Table, bind the “H” foil or semi-con paper insulation shield layer at the remove semi-
con layer dimension with two wraps of vinyl tape. Remove semi-con shield layer from cable end to the vinyl
tape binding. Do not remove vinyl tape binding.
Note: If black carbon deposits can be seen on the surface of the exposed cable insulation, remove the top layer(s) of
paper insulation to the vinyl tape binding.
2
78-8124-5509-1-B
Jacket
Lead
Semi-con Insulation Shield
Remove Cable Lead
Remove Cable Jacket
Figure 1
Oil/Paper Insulation
Vinyl Tape (2 wraps)
Semi-con Insulation Shield
Remove Cable Semi-con
Figure 2

B. Install Lug
1. Bind the paper insulation with two wraps of vinyl tape at the remove paper insulation dimension per Cable
Preparation Table. Remove paper insulation from cable end. Do not remove vinyl tape binding.
2. Crimp lug or connector for use with elbow onto cable conductor leaving a minimum of 1/2” (13 mm)
uncrimped. This will be part of the oil stop seal.
Note: In all cases, follow connector manufacturer’s recommendation for crimping.
78-8124-5509-1-B
3
Figure 4
Conductor
Vinyl Tape
(2 wraps)
Oil/Paper Insulation
Remove
Paper
Insulation
Semi-con Insulation Shield
Figure 3
Elbow Style Standard Repair Replacement
Elastimold 165/166 LR 167/168 ELR 167/168 RLR
273/274 LR 273/274 ELR 273/274 RLR
Cooper LE215 -- --
LE 225
3M 5810 -- --
5811
Remove Cable 13 1/4" 14" 14 1/4"
Jacket (335 mm) (355 mm) (360 mm)
Remove Cable 9" 9 3/4" 10"
Lead (230 mm) (250 mm) (255 mm)
Remove Cable 6 1/2" 6 3/4" 7 1/2"
Semi-Con Layer (165 mm) (170 mm) (190 mm)
Remove Paper 2 3/8" 2 3/8" 1 5/8"
From Cable End (60 mm) (60 mm) (40 mm)
Cable Preparation Table

4
78-8124-5509-1-B
C. Install Oil Stop
1. Build a smooth taper using Scotch
®
130C tape for a distance of 1 1/2” (40 mm) from end of lead onto cable
semi-con layer. Start the tape application on the cable semi-con layer at the end of the lead. Fill the step at
the edge of the lead by highly stretching the tape during application. Overlap the last two layers 3/4”
(20 mm) onto lead.
2. Apply a vinyl tape marker band around lead at a point 3/4” (20 mm) from 130C rubber tape on lead.
3. Slide the small diameter cold shrink tube onto the cable, with the loose core ribbon end extending toward
cable end. Slowly, unwind the core ribbon counter-clockwise allowing the rubber to shrink to the cable. As
the rubber contacts the cable, locate the leading edge of the tube next to the applied vinyl tape band on lead.
Release your grip on the assembly once the tube has made secure contact with the lead. Unwind all of the
core ribbon and remove the vinyl tape band.
130C Rubber Tape
Figure 5
130C Rubber Tape
Vinyl Tape Band
Figure 6
Lead Sheath
Cold Shrink Tube
Lead Sheath
Vinyl Tape Band
Figure 7

78-8124-5509-1-B
5
4. The oil barrier tube should overlap 1/2” (13 mm) onto connector. Any excess overlap should be cut off and
discarded.
5. Fill in the depression formed between the oil/paper cable insulation and the end of the connector with
Scotch( 130C tape. Make a cord out of a piece of the tape and drive the rubber tube in the area of the
depression tight to the cable conductor. Finish the tape application by applying two half-lapped layers 1/2”
(13 mm) onto cable insulation and 1/2” (13 mm) onto oil barrier tube over connector.
6. Apply 4 half-lapped layers of white restricting tape (white tape with smooth surface) over the oil barrier tube
and applied Scotch 130C tape. Start and end the tape on the exposed lead next to the end of the oil barrier
tube, 2” (50 mm) from the end of the cable jacket. Apply tape with constant tension to avoid wrinkling.
Thinwall Cold
Shrink Tube
Figure 8
1/2"
(13 mm)
1/2"
(13 mm)
130C Rubber Tape
Figure 9
Figure 10

6
78-8124-5509-1-B
D. Install Ground Braid
1. Select one of two mastic sealing strips. Remove the white release liners and using light tension, wrap the
strip around the cable jacket 1/2” (13 mm) from jacket end.
2. Place the ground strap on the cable with the bleed wire on the outside and braid tail (long end) and bleed
wire extending away from cable end. Locate the solder blocked section of braid and press it into the applied
mastic. Apply second mastic strip over ground braid solder block and previously wrapped mastic.
Temporarily, bind ends of braid tail and bleed wire to the cable jacket. Wrap the ground braid leg around the
exposed lead sheath and at the point where the braid would over lap, cutoff and discard excess.
3. Secure ground braid to cable lead sheath using a constant force spring. Start the spring on the braid folded
section and wrap the spring over the braid. Pull the spring coil around the cable allowing the spring to
unwrap and rewrap around the ground braid and itself.
4. For the elbow being installed, place a marker tape around the white restricting tape at the reestablish
semi-con shield layer dimension per the following table, measuring from the end of the cable connector.
Trim
Ground Braid Leg
Cable Lead
Ground Braid
Cable Jacket
Solder Block
1st Mastic Strip
Vinyl Tape
Cable
Lead
1/2"
(13 mm)
Trim
Ground Braid Leg
Cable Lead
Ground Braid
2nd Mastic Strip
Vinyl Tape
Cable
Lead
Constant Force
Spring
Figure 11
Figure 12

78-8124-5509-1-B
7
5. Apply Scotch
®
13 Semi-conducting Tape. Stretch the tape during application. Start the tape on the cable
jacket over mastic seal and constant force spring and extend the application to the tape marker band applied
in the previous step and then back to the starting location on the cable jacket. Break tape by stretching, being
careful to secure end with firm pressure. Remove marker tape band applied around the white restricting tape.
Stop
Start
Figure 13
Figure 14
Reestablish Insulation Shield Layer
Elbow Style Standard Repair Replacement
Elastimold
165/166 LR 167/168 ELR 167/168 RLR
273/274 LR 273/274 ELR 273/274 RLR
Cooper
LE215
LE 225
3M
5810
5811
Reestablish Semi-con 6 7/8" 10 3/4" 17 1/2"
Shield Layer From: (175 mm) (275 mm) (445 mm)
6. Slide the cold shrink sealing tube onto the prepared cable with the loose core ribbon end going on the cable
first, away from cable end.

8
78-8124-5509-1-B
7. Install elbow following elbow manufacturer’s instruction.
8. Position cold shrink tube (previously slid onto cable) over the small end of the 200 Amp elbow. Remove the
tube’s inner support core by lightly pulling while unwinding the loose core ribbon end in a counter-clockwise
direction. As the core is unwound, butt end of rubber against elbow’s main body.
9. Attach the14 AWG ground lead (from ground braid assembly) to the elbow-grounding eye. Connect ground
braid to system ground.

78-8124-5509-1-B
9

3M and Scotch are trademarks of 3M.
IMPORTANT NOTICE
All statements, technical information and recommendations related to the Seller’s products are based on information believed to be reliable,
but the accuracy or completeness thereof is not guaranteed. Before utilizing the product, the user should determine the suitability of the
product for its intended use. The user assumes all risks and liability whatsoever in connection with such use.
Any statements or recommendations of the Seller which are not contained in the Seller’s current publications shall have no force or effect
unless contained in an agreement signed by an authorized officer of the Seller. The statements contained herein are made in lieu of all
warranties, expressed or implied, including but not limited to the implied warranties of merchantability and fitness for a particular purpose
which warranties are hereby expressly disclaimed.
SELLER SHALL NOT BE LIABLE TO THE USER OR ANY OTHER PERSON UNDER ANY LEGAL THEORY, INCLUDING BUT NOT
LIMITED TO NEGLIGENCE OR STRICT LIABILITY, FOR ANY INJURY OR FOR ANY DIRECT, INDIRECT, INCIDENTAL, SPECIAL OR
CONSEQUENTIAL DAMAGES SUSTAINED OR INCURRED BY REASON OF THE USE OF ANY OF THE SELLER’S PRODUCTS.
Electrical Products Division
6801 River Place Blvd.
Austin, TX 78726-9000
800/245-3573 Printed on 50% recycled paper Litho in USA
www.3M.com/elpd with 10% post-consumer ©3M 1999 78-8124-5509-1-B
/