Page is loading ...

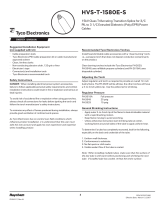
Cold Shrink 5110-OS Series Oil Stop
Kits for use with Single Conductor PILC
Cables and 600 Amp Cable Accessories
Instruction Sheet
15 kV and 25 kV
Kit Contents:
1 Cold Shrink Sealing Tube (large diameter)
1 Oil Stop Cold Shrink Tube (small diameter)
1 Roll Scotch
®
130C High Voltage Rubber Electrical Tape
1 Roll Scotch
®
13 Semi-conducting Tape
1 Roll White Restricting Tape (2 Rolls for 5113-OS)
2 Strips Sealing Mastic
(black with white release liners, bagged)
1 Constant Force Spring
1 High Amp Ground Braid with bleed wire
2 Instruction Sheets in kits 5110-OS, 5111-OS and 5112-OS
1 Instruction Sheet in 5113-OS kit
3M Cold Shrink Oil
Stop Kits
5110-OS 5111-OS
5112-OS 5113-OS
78-8124-5510-9-D
Single Conductor PILC Cable
Minimum Insulation Conductor Size Range
Kit Diameter Maximum Lead
Number (Over Paper) Diameter 15 kV 25/28 kV
5110-OS .58" (14,7 mm) 1.10" (27,9 mm) #4 - 3/0 AWG --
5111-OS .72" (18,3 mm) 1.30" (33,0 mm 4/0 AWG - 300 kcmil #2 - 1/0 AWG
5112-OS .92" (23,4 mm) 1.60" (40,6 mm) 350 -600 kcmil 2/0 AWG - 300 kcmil
5113-OS 1.10" (27,9 mm) 2.00" (50,8 mm) 750-1000 kcmil 350-800 kcmil
Kit Selection Chart

2
78-8124-5510-9-D
A. Prepare PILC Cable
1. Locate cable into final assembled position and allow sufficient clearance for installing 600 amp accessory.
2. Clean cable end for 36" (914 mm). Clean cable jacket if cable is jacketed. Clean the lead if unjacketed using
solvent approved for use on power cables.
3. If cable is jacketed, remove 18" (460 mm) of jacket, measuring from cable end. If cable is not jacketed, place
a tape marker 18" (460 mm) from cable end.
4. Scrape the lead clean around it’s circumference a distance of 6" (145 mm) from cable jacket end or tape marker.
5. Remove the lead 13" (330 mm). Do not intentionally bell the end of the lead. Peen down any sharp
protruding corner at end of lead.
Oil/Paper Insulation
Vinyl Tape (2 wraps)
Semi-con Insulation Shield
11" (280 mm)
Figure 2
Conductor
Vinyl Tape
(2 wraps)
Oil/Paper Insulation
4 1/2"
(120 mm)
Semi-con Insulation Shield
Figure 3
6. Bind the "H" foil or semi-con insulation shield layer with two wraps of vinyl tape at a point 11" (280 mm)
from cable end. Remove semi-con shield layer from cable end to the vinyl tape binding. Do not remove
vinyl tape binding.
Note: If black carbon deposits can be seen on the surface of the exposed cable insulation, remove the top
layer(s) of paper insulation to the vinyl tape binding.
7. Bind the oil/paper cable insulation at a point 4 1/2" (120 mm) from cable end with two wraps of vinyl tape.
Remove 4 1/2" (120 mm) of paper insulation from cable end. Do not remove vinyl tape binding.
Jacket
Lead
Semi-con Insulation Shield
13" (330 mm)
18" (460 mm)
Figure 1

78-8124-5510-9-D
3
Scotch‰ 23 Tape
Lead Sheath
3/4"
(20 mm)
Vinyl Tape Band
Figure 5
Figure 4
130C Tape
Lead Sheath
3/4"
(20 mm)
1 1/2"
(40 mm)
Figure 4
Lead Sheath
Cold Shrink Tube
Lead Sheath
Vinyl Tape Band
Figure 6
B. Install Oil Stop
1. Build a smooth taper using Scotch
®
130C tape for a distance of 1 1/2" (40 mm) from end of lead onto cable
semi-con layer. Start the tape application on the cable semi-con layer at the end of the lead. Fill the step at
the edge of the lead by highly stretching the tape during application. Overlap the last two layers 3/4"
(20 mm) onto lead.
3. Slide the small diameter cold shrink tube onto the cable, with the loose core ribbon end extending toward
cable end. Slowly, unwind the core ribbon counter-clockwise allowing the rubber to shrink to the cable. As
the rubber contacts the cable, locate the leading edge of the tube next to the applied vinyl tape band on lead.
Release your grip on the assembly once the tube has made secure contact with the lead. Unwind all of the
core ribbon and remove the vinyl tape band.
Note: If desired, For disconnectable splices (only) on 500 kcmil cable and smaller, slide the receptacle
housing on to the cable and park behind the installed oil stop tube.
2. Apply a vinyl tape marker band around lead at a point 3/4" (20 mm) from 130C rubber tape on lead.
4. Slide the large diameter cold shrink tube onto the cable with the loose core ribbon end going on the cable
first, away from the cable end.

4
78-8124-5510-9-D
C. Apply 13 Tape
1. Place a marker band on lead 3/4" (20 mm) from edge of white restricting tape. Place another marker 9 1/2"
(? mm) measuring from conductor end.
2. Apply Scotch
®
13 tape between marker tape bands. Stretch the tape during application. Start at lead end
marker, taping to other marker, and then back to the starting location on lead. Break tape by stretching,
being careful to secure end with firm pressure. Remove tape markers.
Figure 7
White Restricting tape
3/4"
(20 mm)
Cold Shrink Tube
Scotch
®
130C Tape
Marker Tape
1/2"
(13 mm)
1/2"
(13 mm)
5. The oil barrier tube should overlap 1/2" (13 mm) onto cable conductor. Any excess overlap should be
cut off and discarded.
6. Place a marker tape band on the lead 3/4" (20 mm) from edge of the installed Cold Shrink oil stop
tube. Apply 4 half-lapped layers of white restricting tape over tube from the marker tape to 1/2"
(13 mm) from end of insulation as shown in Figure 7. The tape does not stretch, but should be applied
with constant tension, to avoid wrinkling and restrict the oil. Remove marker tape.
Note: When going up ramps or over uneven surfaces, the thumb can be used to smooth out the tape as it is
applied. The tape should be applied as wrinkle free as possible.
(205 mm)
Figure 7
Marker Tape
White Restricting Tape
Marker Tape
3/4"
(20 mm)
9 1/2"
Figure 8
13 Tape
Marker Tape Marker Tape
Stop
Start
Figure 9

D. Install Adapter
1. Select appropriate size adapter. Clean and lubricate the surface of the white restricting tape and the inside
surface of adapter with silicone grease provided with adapter.
3. Carefully slide adapter onto cable until it is 1-2" (25-50 mm) away from the exposed conductor.
E. Install Lug
1. Select appropriate size lug and crimp onto cable conductor, leaving a minimum of 1/2" (13 mm) uncrimped
at lug end. This will be part of the oil stop seal.
Note: In all cases, follow connector manufactures recommended crimping information.
F. Seal Lug/Cable End
1. Fill the depression between the cable insulation and connector with highly stretched layers of Scotch
®
130C
tape to the level of the cable insulation. Again make a smooth ramp transition from cable insulation to lug.
Finish with two highly stretched layers of 130C tape 1/2" (13 mm) onto the end of the tube and 1/2"
(13 mm) onto the lug.
78-8124-5510-9-D
5
Figure 12
Figure 9
Adapter
Silicone Lubricant
1–2"
(25–51 mm)
Figure 10
Figure 10
Lug
1/2"
(13 mm)
Figure 11

6
78-8124-5510-9-D
G. Position Adapter
1. Apply silicone lubricant to the surface of the exposed white restricting tape. Slide adapter into position so
that the distance from adapter to cable end (lug) is 6 3/4" (170 mm) ± 1/4" (5 mm).
2. Lock adapter in place by applying 13 tape at the small end of adapter. Stretch tape when applying. Start the
tape 1" (25 mm) from adapter on the previously applied 13 tape. Wrap the tape toward the adapter, filling the
step at the adapter end. Complete tape application by applying several wraps of the tape over the small end
of the adapter.
H. Install Ground Braid
1. Lay the ground braid with solder block and bleed wire positioned on the cable as shown. Hold the braid in this
position by applying a temporary wrap of vinyl tape over the braid end that extends along the cable jacket.
Adapter
6 3/4"
(171 mm)
±1/4" (6 mm)
1"
(25 mm)
Lug
13 Tape
1"
(25 mm)
Additional 13 Tape
Figure 14
Ground Braid
Solder Block
Temporary Wrap Of Vinyl Tape
Figure 15
Figure 10
Lug
1/2"
(13 mm)
White Restricting Tape
Figure 13
2. Apply 4 half-lapped layers of white restricting tape over the 130C tape. Overlap the previously applied white
restricting tape a minimum of 1/2" (13 mm) and extend beyond the 130C tape on the lug.

2. Wrap the braid end around the exposed cable lead, between the Scotch
®
13 tape and the cable jacket or
marker tape for one full wrap. Trim off and discard excess braid.
3. Position end of constant force spring over wrapped braid end so spring will unwind in the same direction as
the braid. Hold braid and spring in place and pull (to unwind) the spring around the braid and itself. Cinch
(tighten) the applied spring in its final position. Remove temporary wrap of vinyl tape.
4. Remove liner from one strip of black mastic and wrap the strip around the cable jacket, under the ground
braid solder block. Do not stretch the mastic when applying. Press the solder block section into the mastic.
5. Using second mastic strip, wrap a layer over the solder block and previously applied mastic layer.
78-8124-5510-9-D
7
e 16
1
st
Layer Of Mastic
Solder Block
2
nd
Layer Of Mastic
Figure 18
Ground Braid
Solder Block
Temporary Wrap Of Vinyl Tape
Trim Braid
Figure 16
e 15
Constant Force Spring
Remove Vinyl Tape
Figure 17

8
78-8124-5510-9-D
6. Over wrap mastic, edge of cable jacket and constant force spring with tightly applied wraps of vinyl tape.
I. Install Cold Shrink Sealing Tube
1. Position cold shrink tube (previously slid onto cable) over the small end of cable adapter. Remove the tube’s
inner supporting core by lightly pulling while unwinding the loose core ribbon end counter-clockwise. As
core is unwound, butt end of rubber tube against cable adapter’s main body.
Butt End Of Cold Shrink
Tube Against Cable Adapter
Counter-Clockwise
Figure 20
e 17
Vinyl Tape
Mastic Strip
Figure 19

78-8124-5510-9-D
9
e 19
130C
Rubber Tape
2 1/2"
(64 mm)
Figure 21
J. Install Front Stop
Note: This step is required for disconnectable splice. It is not required for 600 Amp elbow.
1. Lock the insulation adapter in position by applying multiple wraps of 130C tape over the crimped section of the
connector to the insulation adapter. Stretch the tape when applying. Taper the tape application from the
connector to the adapter for a distance of 2 1/2" (60 mm). Do not exceed the diameter of the insulation adapter.
K. Install 600 Amp Cable Accessory
1. Prepare all cables and install accessories per accessory manufacturer’s instructions.
2. Attach 14 AWG ground lead (from ground braid assembly) to the 600 amp device grounding eye. Connect
ground braid to system ground.

IMPORTANT NOTICE
Before using this product, you must evaluate it and determine if it is suitable for your intended application. You assume all risks and
liability associated with such use.
Warranty; Limited Remedy; Limited Liability. This product will be free from defects in material and manufacture as of the date of
purchase. 3M MAKES NO OTHER WARRANTIES INCLUDING, BUT NOT LIMITED TO, ANY IMPLIED WARRANTY OF
MERCHANTABILITY OR FITNESS FOR A PARTICULAR PURPOSE. If this product is defective within the warranty period stated above,
your exclusive remedy shall be, at 3M’s option, to replace or repair the 3M product or refund the purchase price of the 3M product. Except
where prohibited by law, 3M will not be liable for any loss or damage arising from this 3M product, whether direct, indirect,
special, incidental or consequential regardless of the legal theory asserted.
Electrical Products Division
6801 River Place Blvd.
Austin, TX 78726-9000
800/245-3573 Printed on 50% recycled paper Litho in USA
www.3M.com/elpd with 10% post-consumer ©3M 1999
78-8124-5510-9-D
3M and Scotch
®
are trademarks of 3M.
/