Page is loading ...

STAR ADVENTURER GTi
USER’S MANUAL
SAGTi Manual Rev7b.indd 1SAGTi Manual Rev7b.indd 1 9/22/2021 1:19:08 PM9/22/2021 1:19:08 PM

SAGTi Manual Rev7b.indd 2SAGTi Manual Rev7b.indd 2 9/22/2021 1:19:08 PM9/22/2021 1:19:08 PM

SKY-WATCHER® STAR ADVENTURER GTi
Foreword
As technology changes in the world, so does the way we do things. Here at Sky-Watcher® we recognize the changes and implement the new technologies into
our products to improve the experience you have. Our products serve a purpose, and we intend to continue to create new and exciting ways to help you reach the
stars and beyond. You’ll be amazed with what is out there!
About the Mount
The Star Adventurer GTi is a portable, lightweight, and practical tracking mount that has the ability to both track the apparent movement of the stars as well as
find celestial and deep space objects. The mount utilizes the SynScan GoTo system to find and track various astronomical objects.
The Star Adventurer GTi is equipped with a V-style mounting saddle and supports upto 11 pound payload capacity and is designed to work with AA batteries or
12v power supply. The Star Adventurer GTi also has Wi-Fi connectivity to truly go wireless allowing for a safe environment, avoid trip hazards, and potential snag
issues associated with wires. The mount itself also supports full computer connectivity as well as autoguiding via ST-4 connection.
For Your Safety
To prevent damage to your Sky-Watcher product or injury to yourself or to others, read the following safety precautions entirely before using this equipment. Keep
these safety instructions available to all users of the product.
By default, all mounts are shipped with the clutches unlocked to avoid any damage to the internal components during transit.
To prevent possible injury, pay special attention to all warnings before using this Sky-Watcher product. We also suggest reading through this guide
before attempting to use or assemble the mount.
WARNING
• Do not look at the Sun through the polar scope. Viewing the Sun or other strong light sources through the polar scope could cause
permanent eye damage.
• Do not use electronic equipment in the presence of flammable gas, as this could result in explosion or fire.
• Keep out of reach of children. Failure to do so could result in injury. Moreover, note that small parts constitute a choking hazard.
Consult a physician immediately when a child swallows any part of this equipment.
• Do not disassemble. Touching the product’s internal parts could result in injury and/or void the warranty. In the event of malfunction,
remove the batteries and contact a Sky-Watcher authorized service center.
Notice
• Sky-Watcher reserves the right to change the specification of the hardware and software described in this manual at any time and
without prior notice.
• Sky-Watcher cannot be held liable for any damage resulting from inappropriate use of this product.
Page 3
SAGTi Manual Rev7b.indd 3SAGTi Manual Rev7b.indd 3 9/22/2021 1:19:08 PM9/22/2021 1:19:08 PM

SAGTi Manual Rev7b.indd 4SAGTi Manual Rev7b.indd 4 9/22/2021 1:19:08 PM9/22/2021 1:19:08 PM

Step 1
Ensure that all parts are at hand:
1. Tripod Mount Head column lock
2. Counterweight (2.5kg - 5.5 pounds)
3. Counterweight collar
4. Counterweight shaft
5. Counterweight safety screw
6. Tripod spreader base
7. Azimuth screws
8. Dovetail locking screw
9. Polar scope cap
10. Mount head
Step 2
Start by opening the tripod
and setting the desired height
and attaching the spreader
base. For stability purposes, we
suggest extending the tripod
legs out to their fullest length.
Step 3
Attach the mount to the tripod
and fasten via the central bolt
located underneath the top
tripod base.
Step 4
Make sure that the mount head
is secured to the tripod. The
mount head should not rotate
on the base of the tripod.
NOTE: Before moving on, check to ensure that the mount head is firmly attached and that the system does not wiggle or rock back and forth.
To ensure that the system is correctly attached, lift the mount head up to make sure that it does not come apart from the tripod.
SETTING UP THE STAR ADVENTURER GTi
1
2
3
4
5
6
7
8
9
10
Page 5
Step 5
Based on your location, roughly
set the altitude by turning the
knob below the counterweight
borehole to raise or lower the
mount head.
Attach the counterweight
collar to the shaft, and then
attach the shaft to the mount.
Depending on your altitude, you
can set the shaft for either high
or low altitudes.
SAGTi Manual Rev7b.indd 5SAGTi Manual Rev7b.indd 5 9/22/2021 1:19:09 PM9/22/2021 1:19:09 PM

Step 6
Orient the tripod and mount to
face “True North/South”.
(Magnetic north/south is a few
degrees off from the celestial
poles. Use a reference app to
ensure that the mount is facing
the correct direction.)
Step 7
Slide the counterweight onto
the counterweight shaft at its
lowest position.
Make sure that the clutches
on the mount head are
disengaged.
Make sure that counterweight
safety screw is attached to the
end of the counterweight shaft.
Step 8
Disengage the clutch lock
(black ring with thumb spokes)
and orient the saddle to face
left to right with the dovetail
locking screw facing away
from you.
Step 9
Attach the telescope/camera
to the mount via the dovetail
clamp. Roughly balance the
telescope/camera so it does
not fall left or right.
Tighten the hand knob to hold
down the telescope/camera.
Ensure that the telescope/
camera is attached firmly
before letting go.
NOTE: Never attach your telescope/camera to the mount before adding the counterweight.
It is important not to exceed the total weight payload of the mount. Doing so will result in damage to the equipment. Do not add any additional counterweight to
the shaft as this will overload the mount.
By orienting the saddle left to right (sideways), this prevents the attached device from sliding out if the clamp is not securely fastened.
The mount is capable of
handling both low and high
latitudes. Ensure that the
correct counterweight bore
hole is used.
The reference images will
help identify where the
counterweight shaft should
be position. When setting for
lower altitudes, remove the
counterweight shaft cap on the
front of the mount (Fig. 1a).
Counterweight
shaft cap
Fig. 1a
Page 6
SAGTi Manual Rev7b.indd 6SAGTi Manual Rev7b.indd 6 9/22/2021 1:19:11 PM9/22/2021 1:19:11 PM

BALANCING THE STAR ADVENTURER GTi
The optical system needs to be balanced for both Right Ascension and
Declination, (RA+DEC) in order for the mount to function as intended. This
is achieved by moving the optical system within the saddle as well as the
counterweight along the shaft. Before you begin, make sure that everything
is fastened securely to the mount, and that the mount is secured to the tripod
and does not present any tipping hazards from uneven ground or loose soil.
Step 1
Set the counterweight to the
bottom of the shaft.
Slide the optical system left or
right to ensure that the system
is balanced by loosening the
dovetail locking screw.
The optical system should not
fall to either side and remain
stationary. Make necessary
adjustments until balanced,
remember to tighten dovetail
lock screw when completed.
Step 2
Disengage the RA clutch and
orient the optical system so it
too is parallel to the ground.
If the optical system pitches
forward or backwards, the DEC
is not balanced and will need to
be adjusted.
Once you have corrected any
balance issues on DEC, you
may proceed with sliding the
counterweight along the shaft.
Step 3
Flip the mount over to the
other side by rotating counter-
clockwise. Check to make sure
that both RA and DEC axis are
balanced. Adjust if required.
Remember, when adjusting
the optical system, always
return the mount to its upright
position, with the saddle
oriented left to right before
attempting to move the optical
system to avoid any mishaps.
Remember to always install the counterweight before you begin.
Once balancing is completed, the mount should be able to be placed in any
position, with the clutches disengaged, and not have the system move or fall
in any direction.
All accessories must be attached when balancing the optical systems. If
you are using a refractor telescope, set the focus to be as close to focus as
possible. A general rule is to extend the focuser out to 3/4 its length.
On camera lenses that extend out, set it to the 2/3 of the focal length. This
will ensure that if the length of optical system changes from focusing or
zooming, the Star Adventurer GTi will not be overly unbalanced.
Always have a hold on the system with your hand in case of the system
swingings during any part of the balancing phase.
TIPS: When the counterweight shaft is parallel to the ground and the optical
system pitches forward, too much weight is located at the front. The same
applies if it pitches backwards, meaning there is too much weight in the
back. Move the optical system accordingly to ensure that it does not move
when oriented in this position. You will need to return the mount to its upright
position before doing so to avoid any mishaps.
Once you are done with balancing the system, return the mount to its
upright position, ensuring that the optical system is back in it’s left to right
orientation (Fig. 2a).
The DEC clutch is located at the top of the mount under the saddle. Rotating
counterclockwise will loosen the clutch (Fig. 2b).
The RA clutch is located on the side of the mount on the right hand side
when standing behind the mount (Fig. 2b).
Fig. 2a
Fig. 2b
DEC clutch
RA clutch
Page 7
SAGTi Manual Rev7b.indd 7SAGTi Manual Rev7b.indd 7 9/22/2021 1:19:12 PM9/22/2021 1:19:12 PM

When doing long exposure photography of the night sky, stars are often
referenced as moving across the sky. They appear to circle around the
celestial poles of the Earth (Fig. 3a). In order to counteract this apparent
movement, the Star Adventurer GTi can be set to compensate for this
movement, by rotating the camera in the direction opposite to that of the
Earth. The result is, the celestial objects appearing in the field of view of your
camera do not move allowing for a picture with a long exposure time to be
possible (Fig. 3b). In order to achieve this, a polar alignment (PA) of the Star
Adventurer GTi is required.
The Star Adventurer GTi comes equipped with a polar scope located along
the polar axis of the mount and is embedded into the system. To view through
the polar scope, remove the protective cover from the back of the mount by
pinching down the tabs on the side of the casing (Fig. 3c). The polar scope
also has an illumination reticle for ease of use.
For observing in the Northern Hemisphere: find Polaris (the brightest star
near the North Celestial Pole) in the polar scope by adjusting the angle of
the equatorial wedge. Use the SynScan Pro App to find the corresponding
orientation of Polaris in the polar scope by simply entering the date,
time, longitude and latitude of your observing location. The polar scope
utility can be found under “Utility” and then “Advanced”. Move Polaris to
that corresponding position in the polar scope by using the fine-tuning
movements of the equatorial wedge (Fig. 3d). If you cannot acquire the
application tool to find the orientation of Polaris, refer to the “The Orientation
of Polaris in Polar Scope” in the following portion.
For observing in the Southern Hemisphere: locate in the polar scope the
four dim stars (around Magnitude 5 to 6) which form the pattern “Octans”
(see drawing in the polar scope as Fig. 3e). Align the orientation of the
“Octans” drawing to the four stars. Then move the four stars to the four small
circles of the “Octans” drawing by using the horizontal adjustment knob to
fine-tune the equatorial wedge or by moving the tilt-head of your tripod.
POLAR ALIGNING THE STAR ADVENTURER GTi
Fig. 3a Fig. 3b
Fig. 3c
2020
2028
2032
2024
2016
2012
3
39
0
6
NCP
SCP
2020
2028
2032
2024
2016
2012
3
39
0
6
NCP
SCP
Fig. 3d - Northern Hemisphere Fig. 3e - Southern Hemisphere
Octans - Star asterism located
in the southern hemisphere
Polaris - Star located in the
northern hemisphere
Polar scope
cover
Page 8
SAGTi Manual Rev7b.indd 8SAGTi Manual Rev7b.indd 8 9/22/2021 1:19:13 PM9/22/2021 1:19:13 PM

Step 1
Make sure that the mount is
level with the ground. A small
bubble level is located above
the altitude control knob on the
side (Fig. 4a). Remove the polar
cover on the front of the mount.
Before starting the polar
alignment, ensure that the
mount is oriented towards True
North/South. This is generally
a few degrees off from the
Magnetic North/South.
Step 2
Adjust the altitude of your
mount according to your
location.
You will need to know the
latitude and longitude of your
current location in order to
determine the altitude of where
to adjust your mount.
The number you need to find
is the North/South number
(latitude). Assuming you are
in the northern hemisphere,
your location is indicated with
a number followed by the
letter N.
The first grouping of numbers
would indicate where to set
the altitude of the mount.
Example, if you are in Los
Angeles, California, your
latitude would be 34°N. On the
Star Adventurer GTi, there is an
indication marker with a scale
(Fig. 4b).
Southern hemisphere users
can also set the altitude in
the same manner. A negative
number is assumed as positive
on the scale. Example, if you
are in Sydney, Australia, your
latitude would be -34°S. Set
the altitude to 34°.
Rotate the altitude control knob
which is found on the front of
the mount (Fig. 4a).
Altitude control
knob
Fig. 4a
Fig. 4b
Step 3
Set the “hour angle” of the
mount so “0” is pointed
straight up. To do so, rotate the
mount on the RA axis. Make
sure that the DEC axis is in the
left to right position.
Within the SynScan Pro app,
select “Advanced” and then
“polar scope”.
If using a smart device, the app
will automatically calculate and
insert your time and location,
if not, you will be prompted to
insert for location.
When the location is acquired
by your device, the polar reticle
will display the location of
where Polaris needs be (Octans
if in southern hemisphere).
This is shown as a circle within
the reticles out three circles.
Adjusting the altitude and
azimuth screws, careful place
Polaris into the correct location.
Southern hemisphere users will
need to rotate the RA axis for
the Octans to be positioned in
the correct orientation before
aligning the four stars on the
reticle of the polar scope.
Once you have determined the
locations of the required star(s),
use the altitude knob to make
adjustments in the up/down
axis on the polar scope.
Using the azimuth control
knobs (Fig. 4c), adjust the
mounts left/right axis to move
the star(s) into the correct
positions on the polar scope.
When finished, move the mount
to the home position (Fig. 4d).
NOTE: The Star Adventurer GTi
is equipped with an illuminated
reticle which is activated via
the SynScan App on a smart
device (refer to the SynScan
app manual). Remember to
turn OFF the illuminator when
completed to conserve power.
Bubble level
Azimuth
control knob
Fig. 4c
Polar cover
Altitude scale
indicator
Fig. 4d
Azimuth
control knob
Page 9
Telescope pointing North
SAGTi Manual Rev7b.indd 9SAGTi Manual Rev7b.indd 9 9/22/2021 1:19:14 PM9/22/2021 1:19:14 PM

POWERING THE STAR ADVENTURER GTi
The Star Adventurer GTi can be powered using eight AA batteries or via a 12V
DC power adapter (sold separately).
If powering the mount via AA batteries, place them into the mount by
removing the side covers (Fig 5b). To access the battery compartment,
unscrew the thumb screw located on the back of the mount above the polar
scope (Fig 5a).
Make sure that the batteries are oriented in the correct direction where the
springs are in contact with the negative side of the batteries. Check the
battery holder for indication marks if you are unsure.
Do not mix old and new batteries together or from different brands.
Sky-Watcher recommends the use of AA batteries. Similarly, never use
batteries that are damaged or mix full and partially rechargeable batteries.
This may result in damage to the electrical components of the mount.
Always remove batteries from the compartment when the mount is being
stored for extended periods of time.
The Star Adventurer GTi can also be powered using a 12V DC source. You
can utilize an AC/DC power transformer if you want to plug into a wall outlet.
Make sure that the power supply used has an output of 12V at 2 amps and
2.1mm center pin positive - 5.5mm length.
You can also connect the Star Adventurer GTi to a battery pack using a DC
cigarette connector to a 2.1mm center pin positive - 5.5mm length. Ensure
that the battery pack provides a 12 volt current. Sky-Watcher does not
recommend connecting the mount directly to a car battery without an inline
fuse with a maximum rate of 5 amps. Doing so may damage the electronic
components inside the mount.
WARNING: Do not connect to a 24/48 volt power source. Never connect the
mount to a gas generator either via AC or DC. Gas generators (not including
inverter generators) are considered unsafe for electronic devices. This is due
to the constant fluctuating voltage supplied by a generator.
If you are unsure about any power source, Sky-Watcher suggests using AA
batteries in place.
AA batteries typically last approximately 36 hours when tracking. Constant
slewing of the mount will reduce time. Larger capacity batteries will yield
longer times.
Battery
compartment
thumb screw
Fig. 5a
Fig. 5b
Page 10
SAGTi Manual Rev7b.indd 10SAGTi Manual Rev7b.indd 10 9/22/2021 1:19:14 PM9/22/2021 1:19:14 PM

CONNECTING TO THE STAR ADVENTURER GTi
The Star Adventurer GTi features built in Wi-Fi and can connect in several
ways. The following shows the different methods:
• Wi-Fi via smart device
• Wi-Fi via computer
• USB via computer (cable sold separately)
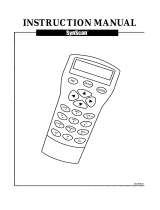
• SynScan hand controller (sold separately)
If you are using a smart device (Android or iOS), you need to download and
install the SynScan Pro app. This can be found on the Apple Store or the
Google Play Store. The app is free to download and is a requirement for
connecting via Wi-Fi.
If connecting via a computer, the SynScan Pro app can be downloaded
directly from our website:
http://www.skywatcher.com/download/software/synscan-app/
If connecting via the SynScan hand controller, you will need to purchase a
hand controller from your preferred vendor.
Wi-Fi via Smart Device
Download the app and install it to your smart device.
Power ON the mount via the switch located on the Star Adventurer GTi.
Locate the Wi-Fi settings on your smart device. You will need to connect to
the Wi-Fi signal that the Star Adventurer GTi is broadcasting.
The Wi-Fi name will have the following format:
SynScan_****
Once selected, your smart device will be tethered to the mount.
Open the SynScan Pro app and select “Connect”.
Your device will display the SynScan device within range. Tap the device and
the app will connect.
Wi-Fi via Computer
Download the SynScan app and save it to a location where you can find it.
Power ON the mount via the switch located on the Star Adventurer GTi.
Connect to the Wi-Fi network that the mount is broadcasting.
The Wi-Fi name will have the following format:
SynScan_****
Once selected, your smart device will be tethered to the mount.
Open the SynScan Pro app and select “Connect”.
Your device will display the SynScan device within range. Click the device
and the app will connect.
USB via Computer
Download the SynScan app and save it to a location where you can find it.
Plug the mount in via USB (Fig. 6a). Make sure that the device is turned OFF
before plugging the USB connection in.
Power ON the mount via the switch located on the Star Adventurer GTi.
Open the SynScan Pro app and select “Connect”.
Click the device and the app will connect.
Connecting via SynScan Hand Controller
Plug the RJ45 cable into the bottom of the hand controller port, and then
connect to the mount (Fig. 6a).
Power ON the mount via the switch located on the Star Adventurer GTi.
You will be prompted by the hand controller on the screen to initiate the
mount. (Refer to SynScan hand controller manual for more information).
http://www.skywatcher.com/download/manual/synscan-hand-control-
and-synscan-app/
NOTE: If you are using an existing Wi-Fi connection for the internet on a
smart device, you will lose connection and your device will switch to cellular
connection. You may also be required to set your device to remain connected
regardless of connection to the internet. Please refer to your users manual on
your specific device.
A detailed manual on the SynScan app can be downloaded from the
Sky-Watcher support page:
http://www.skywatcher.com/download/manual/
ST-4 Autoguide
port (RJ12)
Hand controller
port (RJ45)
USB Type B
connector
Fig. 6a
Page 11
SAGTi Manual Rev7b.indd 11SAGTi Manual Rev7b.indd 11 9/22/2021 1:19:14 PM9/22/2021 1:19:14 PM

GUIDING WITH THE STAR ADVENTURER GTi
Guiding is used on telescope mounts to remove any stray movements
caused by misalignment on the polar axis as well as some level of worm
gear movement that is not constant with a sidereal rate. To combat this,
we employ the use of guiding to allow the user to do longer exposures
without the need of manually adjusting the mount. The Star Adventurer GTi is
equipped with an ST-4 port for on-camera guiding as well as direct over USB.
A guide scope and guide camera are required in order to do autoguiding (sold
separately by your local telescope dealer).
Before we begin, make sure that you have the appropriate guiding software
installed on your device.
Follow these steps in order to set up autoguiding for the mount.
Step 1
Start by installing the latest version of ASCOM.
https://ascom-standards.org/
Download the SynScan Pro app for Windows and the ASCOM drivers for the
Star Adventurer GTi.
All software can be found at the following website:
http://www.skywatcher.com/download/software/
Next, install the ASCOM drivers (PC).
ASCOM Driver for SynScan Pro app Version.
ASCOM Driver for SynScan hand controller.
(Version numbers will change as and when new updates become available).
http://www.skywatcher.com/download/software/ascom-driver/
Install the SynScan Pro app (PC).
http://www.skywatcher.com/download/software/synscan-app/
Step 2
Connect your guide camera to your PC (refer to user manuals for connection
on specific camera).
Connect the mount via USB to your PC using a USB 2.0 cable.
If you a have an ST-4 port on the camera, connect the ST-4 cable to the
camera and mount. ST-4 uses a 6P6C RJ12 data cable (sold separately).
Connect the power to the mount and turn the Star Adventurer GTi on.
Step 3
Launch the SynScan Pro app.
Click on settings and then CONNECT SETTINGS.
Select SERIAL and choose the appropriate port (COM).
Click BACK and then CONNECT.
SynScan Pro will now be connected to your mount and is ready for use.
ST-4 Autoguide
port (RJ12)
USB Type B
connector
Fig. 7a
To find out which COM port the Star Adventurer GTi is using, open up DEVICE
MANAGER in Windows found in the CONTROL PANEL. Look for Prolific USB-
to-Serial Comm Port (Fig. 7b). If you have a yellow circular exclamation mark
shows up next to the serial port, download and install the
Prolific USB-to-Serial Device Driver.
Step 4
Open your guiding software and follow the instructions from your program
on connecting to the mount. When selecting the mount type, make
sure “SynScan App Driver” is selected. This will allow ASCOM direct
communication to the SynScan Pro app.
For more information on the SynScan Pro app and ASCOM connection, refer
to the SynScan Pro manual for more information:
http://www.skywatcher.com/download/manual/synscan-hand-control-
and-synscan-app/
Fig. 7b
Page 12
SAGTi Manual Rev7b.indd 12SAGTi Manual Rev7b.indd 12 9/22/2021 1:19:15 PM9/22/2021 1:19:15 PM

Page 13
SNAP PORT AND CAMERA REMOTE
The Star Adventurer GTi is equipped with the ability to control most cameras
that have a remote trigger port.
To connect to the SNAP port, you will need to purchase a shuttle release
cable (sold separately). Connect the 2.5mm jack into port marked on fig. 8a.
Connect the other end of the cable to your cameras remote trigger port. Each
camera will differ in the type of connectors that it utilizes. In some cases, an
adapter from USB to 2.5mm shutter release convert is also required.
With the SynScan Pro app, you will have the option of camera control. Please
refer to the SynScan Pro app manual for more details.
https://www.skywatcher.com/download/manual/synscan-hand-
control-and-synscan-app/
Please note that not all cameras may support this feature.
SNAP port
remote trigger
Fig. 8a
CARE AND MAINTENANCE
While your Star Adventurer GTi requires little to no maintenance, there are a
few things to remember that will ensure the longevity of your product.
CARE AND CLEANING
Occasionally, dust and/or moisture may build up on the mount. Special care
should be taken when cleaning any instrument so as not to damage the
components. We recommend wiping the mount down with a dry lint free
cloth. For more stubborn dirt, a damp cloth can also be used.
Do not jam anything or insert any cleaning devices into any of the electronics
ports on the Star Adventurer GTi. This may result in damage to the pins and/
or connectors.
BATTERY COMPARTMENT
Never leave batteries stored inside of the battery compartments for extended
periods of time. Doing so may result in batteries leaking causing corrosion.
If you plan on not using the Star Adventurer GTi for extended periods of
time, remove the batteries and store inside its original box or any protective
packing to prevent dust, dirt and moisture damage to the unit.
Do not force batteries into the compartment tray. Doing so may result in
damage to the compartment causing the mount to not power up. Always
ensure that batteries are installed correctly by referencing the polarity
position of each battery before turning on the unit. Do not install batteries of
the wrong sizes.
GENERAL OPERATION
Always disengage the RA & DEC clutches before moving the mount manually.
Never exceed the rated payload capacity stated. Failure will result in extreme
stress to the motors causing damage.
Always cover the polar scope borehole with the provided polar cover when
not doing a polar alignment. The borehole exposes this interior of the mount
and small objects may fall in if care is not taken. Never insert any object
down the polar scope borehole.
The Star Adventurer GTi contains no user serviceable parts. If you have any
issues, please contact Technical Support.
SAGTi Manual Rev7b.indd 13SAGTi Manual Rev7b.indd 13 9/22/2021 1:19:15 PM9/22/2021 1:19:15 PM

Page 14
Step 2
Screw the extension column
onto the tripod and lock in
place using the hand screw
located under the tripod head.
OPTIONAL COLUMN EXTENSION
Column extension kit is sold seperatelyand can be purchased from your local dealer.
The Star Adventurer GTi can be equipped with an optional column extension that raises the height of the
mount head. This is normally required for longer telescopes to clear the tripod legs.
The column extension has been designed to be complete disassembled for transportation. We advise then
transporting the mount to detach the column extension and store it seperately from the mount head and
tripod. To prevent loss and damage of the thumb screws, do not leave them on the column extension.
Parts list:
1. Star Adventurer GTi mount head
2. Column lock
3. Column extension
4. Thumb screws
Step 3
Stand the tripod upright and
place the mount head with the
column lock into the column
extension and tighten the
thumb screws to hold the
mount head in place.
Step 1
Attach the mount column lock
onto the bottom of the mount
head and tighten the bolt.
1
2
3
4
Note
Do not transport the Star Adventurer GTi full assembled. While the column lock
can be left on the mount head during transportation, damage can occur if the
entire mount and tripod are not disassembled.
Ensure that the tripod is fully extended while using the column extension.
SAGTi Manual Rev7b.indd 14SAGTi Manual Rev7b.indd 14 9/22/2021 1:19:16 PM9/22/2021 1:19:16 PM

WARRANTY & CUSTOMER SUPPORT
Warranty information differs from region to region. Contact your local dealer for the warranty in your region.
Warranty shall be void and of no force of effect in the event a covered product has been modified in design or function, or subjected to abuse, misuse,
mishandling or unauthorized repair. Further, product malfunction or deterioration due to normal wear is not covered by this warranty. Sky-Watcher is not
responsible for any user modifications to any products.
Sky-Watcher reserves the right to modify or discontinue, without prior notice to you, any model or style telescope.
For technical and customer support, you will need to contact your regional support team. Please refer to the Sky-Watcher website and check under
“Global Distributer” for your specific region.
http://www.skywatcher.com/where-to-buy/
Tracking mode Astrophotography: EQ mode
Max. payload 5kg (11 pounds)
Wheel gear Copper - Diameter 15.8mm
Worm gear Aluminum alloy - Diameter 92mm
Motor drive Miniature DC servo motor
Built-in accessory Illuminated polar scope
Polar scope Approximately 8.5° field of view
Working voltage 8x AA Battery: DC 9V ~ 12.6V
External power supply: DC 12V
Duration of operation Over 10 hours continuous tracking with Lithium Ion AA batteries at 20°C.
(Battery life varies depending on load and battery quality/type)
Operational temperature -10°C ~ 50°C
Dimensions 227mm x 227mm x 125mm - Mount Head
Weight 2.6kg (5.7 pounds)
Dovetail type Standard Vixen dovetail mount (V Style)
STAR ADVENTURER GTi SPECIFICATION
Page 15
SAGTi Manual Rev7b.indd 15SAGTi Manual Rev7b.indd 15 9/22/2021 1:19:16 PM9/22/2021 1:19:16 PM

www.skywatcher.com
©2021 Sky-Watcher. All rights reserved. Specifications subject to change without notice. 55-21001.
SAGTi Manual Rev7b.indd 16SAGTi Manual Rev7b.indd 16 9/22/2021 1:19:16 PM9/22/2021 1:19:16 PM
/