Page is loading ...

INSTALLATION INSTRUCTIONS: DOUBLE 30QT WASTE CONTAINER WITH BLUM SOFT-CLOSE
12400 Earl Jones Way
Louisville, KY 40299
rev-a-shelf.com
Customer Service: 800-626-1126
4WC DOUBLE 30QT WASTE CONTAINER WITH BLUM
®
SOFT-CLOSE
TOOLS REQUIRED:
15 MIN
ESTIMATED ASSEMBLY TIME:
CARE AND MAINTENANCE:
Clean with a damp cloth and
wipe parts dry.
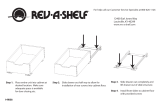
STEP 1
To assemble the slides, attach
the cross bar into the feet as
shown in Fig 1.1.
Attach the left and right slides
respectively to the top of
the feet. You will hear/feel
a “Snap” when connected
completely. See Fig 1.2.
Once slides are assembled, set
them to the side.
For video instruction visit:
rev-a-shelf.com/videos
#2
3
32
I-4WC-24DM2-SC-0217
FIGURE 1.1 FIGURE 1.2
Remove the slide triggers from
their wrapping.
Turn your waste container
chassis over and locate the pre-
drilled holes on the front lip of
the box. Refer to Figure 2.1
for help locating.
Using the provided screws,
attach the left and right sided
triggers (See Figure 2.2) and
set the waste container chassis
to the side.
NOTE:
Release triggers are side
sensitive and are marked
with an “L” & “R” for Left
and Right.
STEP 2
Place template into cabinet
and position front edge to
where the back of your door
will be when closed.
Inset door = set back the
thickness of your door
Overlay door = place at the
front edge of cabinet
Using an awl or pencil, mark
through the bold dotted screw
locations onto your cabinet
oor. Remove template when
done. Using your 3/32” drill
bit, pre-drill your cabinet oor
in all 8 locations being sure to
NOT drill through the cabinet
oor completely.
Lay your assembled slide set
over the top of the marked
holes. Using the 8 screws
provided, attach the slides to
the cabinet oor through the
grey slide feet holes.
Place your 4WC wood box with
attached triggers on top of the
slides and push back until you
hear the “Click” sound.
STEP 3
Customer Service: 800-626-1126 | rev-a-shelf.com
Pre-drilled holes
Slide triggers
Edge of paper to
back of door
Center line of
cabinet opening
Fold here to t Cabinet
1) Place template into cabinet and position front edge to where the back of
your door will be
a. Inset door = set back the thickness of your door
b. Overlay = place at the front edge of cabinet
2) Using an awl or pencil, mark through the bold dotted screw locations onto
your cabinet oor. Remove template when done
3) Lay your assembled slide set over the top of the marked holes and using the
provided 8 screws, attach the slides to the cabinet oor through the grey
slide feet holes
4) Place your Waste Container chassis with attached triggers on top of the
slides and push back until you hear the “click” sound. You are now ready to
insert the waste receptacles into the chassis.
12400 Earl Jones Way
Louisville, KY 40299
rev-a-shelf.com
Customer Service: 800-626-1126
DOUBLE 30QT WASTE CONTAINER W/ BLUM SOFT-CLOSE TEMPLATE
T-4WCBM2430SC-TRI-0116
#2
#2
3
32
BY DATE
DRAWN
DRAWING NO. SCALE
MATERIAL
FINISH
PART NO. SHEET OF
This drawing is the property of Rev-A-Shelf (RAS) and is disclosed
in confidence to the extent its subject matter is original to RAS. Any
vendor receiving this drawing from RAS shall hold and use this drawing
for the sole benefit of RAS and shall not disclose it to, or use or
reproduce it for any third party, or perform any act adverse to the interest
of RAS with respect to this drawing without the express written permission
of RAS. Vendors shall not revise any physical, dimensional or
performance characteristic unless authorized by Rev-A-Shelf Engineering.
TOLERANCES
MAT. DEC. ANGLES
(WOOD) .XX .03 [.8mm] 1/2
(OTHER) .XX .02 [.5mm]
(ALL) .XXX .005 [.13 mm]
FRACTIONS 1/32 [.8 mm]
SIZE
B
INCH
[MM]
AMERICAN
PROJECTION
1 2
CUSTOMER DRAWING
20.97
[532,64]
19.62
[498,3]
9.82
[249,3]
5.00
[127]
23.00
[584,3]
21.63
[549,3]
20.25
[514,4]
21.87
[555,6]
REV. DATE BY DESCRIPTION OF CHANGE
DOUBLE 30 QUART WASTE
CONTAINER BLUM SOFT CLOSE
BKT
7/30/15
0.100
4WCSC-2430DM-2
4WCSC-2430DM-2
Note: The ideal distance between
bracket screws should
be 21-5/8”, allowing for
maximum adjustability.
23“
21-5/8“
21-1/4“
9-13/16“
5“
FIGURE 2.1 FIGURE 2.2

Quite los gatillos del deslizante de su
empaque. Voltee el chasis del contenedor de
basura y ubique los oricios pre taladrados
en la lengüeta frontal de la caja. Reérase
a la gura 2.1 para ayudarse a localizarlos.
Utilizando los tornillos que se proveen, sujete
los gatillos de los deslizantes izquierdo y
derecho (vea la gura 2.2) y ponga a un lado
el chasis del contenedor de basura.
NOTA: Al soltar los gatillos, éstos tienen
un lado sensible y están marcados con una
“L” y una “R” para los lados izquierdo (L)
y derecho (R).
Retirez les gâchettes des coulisses de leurs
emballages. Retournez le châssis de la
poubelle et trouvez les trous pré-percés sur
le rebord avant de la boîte. Reportez-vous à
l’Illustration 2.1 pour vous aider à les trouver.
Avec les vis fournies, xez les gâchettes
des côtés gauche et droit (voir l’Illustration
2.2) et xez le châssis de la poubelle sur
le côté. REMARQUE: Les gâchettes de
déclenchement sont spéciques pour chaque
côté et sont marquées d’un “L” et “R” pour
Gauche (L) et Droite (R).
PASO 2/ÉTAPE 2
Coloque la plantilla dentro del gabinete y
posicione la orilla frontal en donde la parte
posterior de la puerta estará cuando esté
cerrada.
Recuadro de Puerta = Coloque la plantilla
hacia la parte posterior del grueso de su
puerta.
Puerta Sobrepuesta = Coloque a la orilla
frontal del gabinete
Utilizando una lezna o un lápiz, marque a
través de las ubicaciones de los tornillos
punteados al piso del gabinete. Quite la
plantilla cuando termine. Utilizando una
broca de taladro de 3/32”, pre taladre
el piso del gabinete en todas las ocho
ubicaciones, asegurándose de NO taladrear
completamente a través del piso del
gabinete. Ponga el deslizante ensamblado
sobre la parte superior de los oricios
marcados. Utilizando los ocho tornillos que
se proveen, sujete los deslizantes al piso del
gabinete a través de los pies del deslizante
gris. Coloque la caja de madera 4WC con
los gatillos adjuntos en la parte superior de
los deslizantes y empuje hasta que escuche
un click.
Placer le modèle dans l’armoire et positionnez
le bord avant à l’endroit où l’arrière de votre
porte sera lorsqu’elle est fermée.
Porte Encastrée = Placez le modèle en retrait
de l’équivalent l’épaisseur de votre porte
Porte avec Appliqué = Placez au bord avant
de l’armoire
Avec un poinçon ou un crayon, marquez à
travers les emplacements des vis en pointillés
gras sur le plancher de votre armoire. Retirez
le modèle lorsque vous avez terminé. Avec
votre foret de 3/32”, pré-percez le plancher
de votre armoire dans les 8 endroits en vous
assurant de NE PAS percer complètement
à travers le plancher de l’armoire. Posez
votre ensemble de coulisses monté sur les
trous marqués. Avec les 8 vis fournies, xez
les coulisses sur le plancher de l’armoire
à travers les trous des pieds de la coulisse
gris. Placez votre boîte en bois 4WC avec les
gâchettes attachées au-dessus des coulisses
et repoussez jusqu’à ce que vous entendiez
un “Clic”.
PASO 2/ÉTAPE 2
Customer Service: 800-626-1126 | rev-a-shelf.com
Pre taladre oricios
Trous pré-percés
Gatillos Deslizantes
Gâchettes de la coulisse
Edge of paper to
back of door
Center line of
cabinet opening
Fold here to t Cabinet
1) Place template into cabinet and position front edge to where the back of
your door will be
a. Inset door = set back the thickness of your door
b. Overlay = place at the front edge of cabinet
2) Using an awl or pencil, mark through the bold dotted screw locations onto
your cabinet oor. Remove template when done
3) Lay your assembled slide set over the top of the marked holes and using the
provided 8 screws, attach the slides to the cabinet oor through the grey
slide feet holes
4) Place your Waste Container chassis with attached triggers on top of the
slides and push back until you hear the “click” sound. You are now ready to
insert the waste receptacles into the chassis.
12400 Earl Jones Way
Louisville, KY 40299
rev-a-shelf.com
Customer Service: 800-626-1126
DOUBLE 30QT WASTE CONTAINER W/ BLUM SOFT-CLOSE TEMPLATE
T-4WCBM2430SC-TRI-0116
#2
#2
3
32
BY DATE
DRAWN
DRAWING NO. SCALE
MATERIAL
FINISH
PART NO. SHEET OF
This drawing is the property of Rev-A-Shelf (RAS) and is disclosed
in confidence to the extent its subject matter is original to RAS. Any
vendor receiving this drawing from RAS shall hold and use this drawing
for the sole benefit of RAS and shall not disclose it to, or use or
reproduce it for any third party, or perform any act adverse to the interest
of RAS with respect to this drawing without the express written permission
of RAS. Vendors shall not revise any physical, dimensional or
performance characteristic unless authorized by Rev-A-Shelf Engineering.
TOLERANCES
MAT. DEC. ANGLES
(WOOD) .XX .03 [.8mm] 1/2
(OTHER) .XX .02 [.5mm]
(ALL) .XXX .005 [.13 mm]
FRACTIONS 1/32 [.8 mm]
SIZE
B
INCH
[MM]
AMERICAN
PROJECTION
1 2
CUSTOMER DRAWING
20.97
[532,64]
19.62
[498,3]
9.82
[249,3]
5.00
[127]
23.00
[584,3]
21.63
[549,3]
20.25
[514,4]
21.87
[555,6]
REV. DATE BY DESCRIPTION OF CHANGE
DOUBLE 30 QUART WASTE
CONTAINER BLUM SOFT CLOSE
BKT
7/30/15
0.100
4WCSC-2430DM-2
4WCSC-2430DM-2
NOTA: La distancia ideal entre los
tornillos de soporte debe ser
de 21-5/8”, lo que permite una
ajustabilidad máxima.
23“
21-5/8“
21-1/4“
INSTRUCCIONES DE INSTALACIÓN: CONTENEDOR DE BASURA DOBLE DE 30QT, SERIE 4WC CON BLUM® CON CIERRE SUAVE
INSTRUCTIONS D’INSTALLATION: POUBELLES 4WC DOUBLES DE 30QT (28.4L) AVEC BLUM® AVEC FERMETURE EN DOUCEUR
12400 Earl Jones Way
Louisville, KY 40299
rev-a-shelf.com
Customer Service: 800-626-1126
CONTENEDOR DE BASURA DOBLE DE 30QT, SERIE 4WC CON BLUM
®
CON CIERRE SUAVE
POUBELLES 4WC DOUBLES DE 30QT (28.4L) AVEC BLUM
®
AVEC FERMETURE EN DOUCEUR
INSTRUCCIONES DE INSTALACIÓN/INSTRUCTIONS D’INSTALLATION
HERRAMIENTAS REQUERIDAS
OUTILS REQUIS
15 MIN
TIEMPO ESTIMADO DE ENSAMBLE
TEMPS D’ASSEMBLAGE ESTIMÉ
Limpie con un paño húmedo y
seque las partes.
Nettoyez les pièces avec un
chiffon humide et séchez-les
complètement.
CUIDADO Y MANTENIMIENTO
ENTRETIEN
PASO 1/ÉTAPE 1
Para ensamblar los deslizantes,
sujete la barra de cruz dentro de los
pies como se muestra en la gura
1.1. Sujete los deslizantes izquierdo
y derecho respectivamente en la
parte superior de los pies. Usted
escuchará/sentirá un click cuando
se conecten completamente (ver
la gura 1.2). Una vez que los
deslizantes estén ensamblados,
póngalos a un lado.
Pour assembler les coulisses, xez
la barre transversale dans les pieds
comme indiqué sur l’Illustration 1.1.
Fixez les coulisses gauche et droite
respectivement sur le dessus des
pieds. Vous entendrez/sentirez un
“déclic” lorsqu’elles sont connectées
complètement (voir l’Illustration 1.2).
Quand les coulisses sont assemblées,
placez-les sur le côté.
Visita para instrucciones de video:
Visitez pour des instructions vidéo:
www.rev-a-shelf.com/videos
#2
3
32
I-4WC-24DM2-SC-0217
FIGURA 1.1
L’ILLUSTRATION 1.1
FIGURA 2.1
L’ILLUSTRATION 2.1
FIGURA 1.2
L’ILLUSTRATION 1.2
FIGURA 2.2
L’ILLUSTRATION 2.2
REMARQUE: La distance idéale entre les vis
du support doit être de 54.9cm
(21-5/8”), pour permettre un
maximum de réglage.
/


