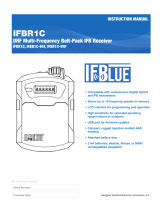
IFB Receiver
Rio Rancho, NM 5
The optional battery charger kit provides a USB terminat-
ing plug (standard and microUSB) on the charger. The
LED glows red during charging and turns green when the
battery is fully charged.
Battery charger kit
P/N 40117
CAUTION: Use only Lectrosonics
batterychargers; P/N 40117 (as shown) or
CHSIFBRIB.
IFBR1B Functions
Frequency Selection
Press the FREQ button to select receiver frequency.
Frequency is shown in MHz. The UP and DOWN ar-
row buttons adjust the frequency in 25 0r 100 kHz steps
(VHF: 125 kHz steps). Simultaneous press of FREQ + UP
or FREQ + DOWN adjusts the frequency in 1 MHz steps.
NOTE: Holding down the UP or DOWN arrow
button, as opposed to a quick press, will scroll
through the frequency steps at an accelerated
pace.
Preset Selection
Press the PRESET button to select preset frequencies
for future use. Presets are displayed as:
P on the left and the current preset number (1-10) on the
right OR
If the current preset slot is empty, an E also appears on
the right. Use the UP and DOWN arrow buttons to navi-
gate among any programmed presets, tuning the receiver
to each.
NOTE: If the preset number is blinking, the
receiver IS NOT currently tuned to that preset.
There are two options available for setting presets:
Choosing the preset slot rst:
1. Press PRESET to display the preset menu.
2. Use PRESET + UP and PRESET + DOWN to
choose the desired slot. When navigating among
the preset slots in this way, all slots are accessible,
even the empty ones, and the receiver’s tuning is
not aected.
3. If the desired preset slot is occupied, you can
reprogram by pressing PRESET + DOWN to clear
the slot.
4. Press FREQ to display the frequency, then use the
UP and DOWN arrow buttons adjust the frequency
in 25 kHz steps.
5. Press PRESET again to return to the presets
menu. You should see an E next to the blinking
preset number.
6. Press and hold PRESET + UP to program the
preset. The E will disappear and the preset number
will stop blinking, indicating that this slot has now
been programmed with the current frequency.
Choosing the frequency rst:
1. Press FREQ to display the frequency, then use the
UP and DOWN arrow buttons adjust the frequency
in 25 kHz steps.
2. Press PRESET to display the preset menu.
3. Use PRESET + UP and PRESET + DOWN to
choose the desired slot. When navigating among
the preset slots in this way, all slots are accessible,
even the empty ones, and the receiver’s tuning is
not aected.
4. If the desired preset slot is occupied, you can
reprogram by pressing PRESET + DOWN to clear
the slot.
5. Press and hold PRESET + UP to program the
preset. The E will disappear and the preset number
will stop blinking, indicating that this slot has now
been programmed with the current frequency.
Clear a Preset Selection
1. Press PRESET to display the preset menu.
2. Press either UP or DOWN arrow buttons (tun-
ing as you scroll) or PRESET + UP and PRESET
+ DOWN (selecting the preset without tuning) to
select the preset number you wish to clear.
NOTE: If there is an E next to the preset number,
the slot is already clear.
3. Press and hold PRESET + DOWN to clear the
slot. The E will appear and the preset number will
blink, indicating the slot is now empty.


