Page is loading ...

97– 06 TJ FRONT TRACK BAR BRACKET
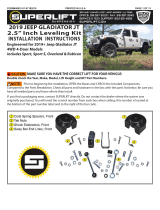
INSTALLATION INSTRUCTIONS
1. Remove the track rod from the frame using a 18mm wrench.
2. Install the track rod bracket as shown in the stock track rod mount and secure in the mount using the sup-
plied 1/2” lock nut. Make sure the bracket is flat against the frame. Snug but do not fully tighten at this time.
Photo 1.
3. Using the bracket as a guide, mark and drill the two side holes through the inner and outer frame as shown
in Photo 2 using a 17/32” drill bit. Make sure to keep the drill level when drilling.
92106300
Thank you for choosing Rough Country for your Jeep off road needs.
Please read all the instructions before beginning the installation.
PRODUCT USE INFORMATION
We will be happy to answer any questions regarding our products by calling us @ 800-222-7023. Rough Country
will not be responsible for any product that is altered. This kit designed for use with a 4” kit. Use with any
other kit WILL require an adjustable track rod. This kit will not work on a non lifted vehicle.
KIT CONTENTS
1-TRACK ROD BRACKET
1-POLY BAG CONTAINING
2-1/2” X 3 3/4” BOLT
3-1/2” NUT
5-1/2 WASHER
2-SLEEVES
1-Pitman Arm
TOOLS NEEDED
17/32 DRILL BIT
29/32” DRILL BIT
DRILL MOTOR
18MM SOCKET
19MM SOCKET
PHOTO 1 PHOTO 2
PLACE BRACKET ON FRAME AND ON MOUNT DRILL FRAME USING A 17/32” DRILL BIT

POST INSTALLATION
1. Check all fasteners for proper torque. Check to ensure there is adequate clearance between all rotating,
mobile, fixed and heated members. Check steering for interference and proper working order.
2. Re torque all fasteners after 500 miles. Visually inspect components and re torque fasteners during routine
vehicle service.
4. Remove the bracket and enlarge the outside holes using a 29/32” bit. . See Photo 3.
5. Install the supplied crush sleeves as shown in Photo 4 and reinstall the bracket.
6. Secure to the frame using the supplied 1/2” x 3 3/4” bolts, washers and nuts & 1/2” x 1 3/4” bolts, washers &
nuts. Tighten the 1/2” x 1 3/4” bolts to 65ft/lbs with a 19mm socket and the 1/2” x 2 3 1/2’ bolts using a
19mm wrench /socket to 80ft/lbs. See Photo 5.
7. Install the track rod in the new frame mount with the factory hardware. See Photo 6.
8. Bend the cotter pin to secure the tie rod nut in
mount. See Photo 7.
9. Remove the cotter pin and nut from the drag link at
the pitman arm. Retain the nut to be reused.
Separate the drag link ball stud from the pitman
arm with a puller tool. Do not use a pickle fork.
10. Mark the position of the original pitman arm.
Remove the nut and washer from the steering gear
box. Align and install new pitman arm on the
steering gear shaft. Install the washer and nut.
Tighten to 185 ft. lbs
PHOTO 3 PHOTO 4
PHOTO 5 PHOTO 6
PHOTO 7
ENLARGE OUTSIDE HOLES USING A 29/32” BIT INSERT SLEEVES IN FRAME
SECURE WITH SUPPLIED 1/2” X 3 1/2” BOLTS INSTALL BAR AND INSTALL COTTER PIN
BEND COTTER PIN TO SECURE
/