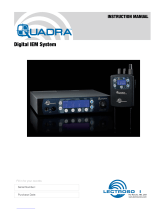
Digital Plug-On Transmitter
Rio Rancho, NM 3
Consumer Alert for US Users - FCC Order DA 10-92
Most users do not need a license to operate this wireless microphone system. Nevertheless, operating this microphone system
without a license is subject to certain restrictions: the system may not cause harmful interference; it must operate at a low power
level (not in excess of 50 milliwatts); and it has no protection from interference received from any other device. Purchasers should
also be aware that the FCC is currently evaluating use of wireless microphone systems, and these rules are subject to change.
For more information, call the FCC at 1-888- CALL-FCC (TTY: 1-888-TELL-FCC) or visit the FCC’s wireless microphone website at
www.fcc.gov/cgb/wirelessmicrophones. To operate wireless microphone systems at power greater than 50mW, you must qualify
as a Part 74 user and be licensed. If you qualify and wish to apply for a license go to: http://www.fcc.gov/Forms/Form601/601.
html
Table of Contents
General Technical Description .......................................... 4
Low Frequency Roll-Off .................................................... 4
Input Limiter ...................................................................... 4
Control Panel .................................................................... 4
Alternate Recording Function .......................................... 4
Encryption ......................................................................... 4
Features ................................................................................ 5
LCD Screen ....................................................................... 5
Power LED ........................................................................ 5
Key LED ............................................................................. 5
Modulation LEDs .............................................................. 5
MENU/SEL Button ............................................................ 5
BACK Button ............................................................. 5
UP/DOWN Arrow Buttons................................................. 5
Main/Home Screen Menu Shortcuts ................................ 5
Audio Input Jack ............................................................... 5
Antenna ............................................................................. 5
IR (infrared) Port ................................................................ 5
Battery Installation .............................................................. 6
Attaching/Removing a Microphone ................................... 6
Operating Instructions ........................................................ 7
Powering On in Operating Mode ...................................... 7
Powering On in Standby Mode ........................................ 7
Powering Off ..................................................................... 7
Transmitter Operating Instructions .................................. 7
Recorder Operating Instructions ....................................... 8
Formatting SD Card .......................................................... 8
IMPORTANT ....................................................................... 9
iXML HEADER SUPPORT ................................................. 9
Compatibility withmicroSDHC memory cards .................. 9
DPR Menu ............................................................................ 10
Main Window ...................................................................... 12
Main Window Indicators ................................................... 12
Turning Control Panel LEDs ON/OFF ............................... 12
Helpful Features on Receivers ......................................... 12
Input Menu ........................................................................... 12
Adjusting the Input Gain ................................................... 12
Selecting the Low Frequency Roll-off .............................. 13
Selecting Audio Polarity (Phase) ...................................... 13
Selecting Phantom Power Supply ................................... 13
Xmit Menu ............................................................................ 13
Selecting Frequency ......................................................... 14
Setting Transmitter Output Power ................................... 14
Turning Rf Output On ........................................................ 14
SDCard Menu ....................................................................... 14
Record or Stop ................................................................. 14
Setting Scene and Take Number...................................... 14
Formatting microSDHC Memory Card ............................. 14
Recorded File Naming ..................................................... 14
microSDHC Memory Card Info ......................................... 15
Load Tuning Group ........................................................... 15
Save Tuning Group ........................................................... 15
TCode Menu ......................................................................... 15
TC Jam (jam timecode) ..................................................... 15
Setting Frame Rate ........................................................... 15
Use Clock .......................................................................... 15
Key Menu ............................................................................. 15
KeyType ............................................................................. 15
SendKey ............................................................................ 15
Setup Menu .......................................................................... 16
Setting Auto On ................................................................. 16
Enabling Remote Function ............................................... 16
Setting Battery Type ......................................................... 16
Setting Battery Timer ........................................................ 16
Setting Date and Time (Clock) ......................................... 16
Locking/Unlocking Settings ............................................. 16
Backlit Settings ................................................................. 17
Turn LEDs On/Off .............................................................. 17
Restoring Default Settings ............................................... 17
About .................................................................................... 17
LectroRM .............................................................................. 18
Accessories ......................................................................... 19
21750 Barrel Adapter ........................................................ 19
MCA-M30 Barrel Adapter ................................................. 19
PHTRAN3 .......................................................................... 19
MCA5X .............................................................................. 19
MCA-TPOWER .................................................................. 19
Specications and Features ............................................... 20
Transmitter ........................................................................ 20
Firmware Update ................................................................. 21
Recovery Process ............................................................... 22
Service and Repair .............................................................. 23
Returning Units for Repair ................................................ 23