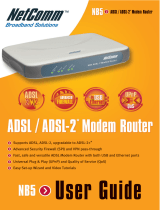
Allied Telesis AT-AR236E Quick Install Manual

Type
Quick Install Manual

Allied Telesis AT-AR236E is a versatile ADSL bridge/router that allows you to establish a high-speed broadband internet connection via your existing telephone line while simultaneously enabling phone calls. Equipped with both USB and Ethernet ports, it offers flexible connectivity options for your computer or notebook irrespective of the port availability. The AT-AR236E ensures a stable and reliable internet connection by supporting the ADSL2/2+ standard and featuring front panel indicators for visual monitoring of the device's status.

Allied Telesis AT-AR236E is a versatile ADSL bridge/router that allows you to establish a high-speed broadband internet connection via your existing telephone line while simultaneously enabling phone calls. Equipped with both USB and Ethernet ports, it offers flexible connectivity options for your computer or notebook irrespective of the port availability. The AT-AR236E ensures a stable and reliable internet connection by supporting the ADSL2/2+ standard and featuring front panel indicators for visual monitoring of the device's status.

Quick Install Guide
AT-AR236E, ADSL Bridge/Router
Quick Install Guide
Version 1.0
Quick Install Guide Page 1 of 27
Quick Install Guide
Quick Install Guide Page 2 of 27
Table of Contents
Preliminary Pages Page
Table of Contents...................................................................................................................2
Chapter 1 – Introduction......................................................................................................5
1.1 Minimum Requirements...................................................................5
1.2 AT-AR236E Package.......................................................................6
1.3 AT-AR236E Overview.....................................................................7
1.3.1 Front Indicators ................................................................................7
1.3.2 Back Panel........................................................................................8
1.4 Typical AT-AR236E Connection.....................................................9
Chapter 2 – Connecting the AT-AR236E to Your Computer/Notebook...........................10
2.1 Connecting to the Ethernet.............................................................10
2.2 Connecting to the ADSL................................................................11
2.3 Checking Your Connections...........................................................12
2.4 Connecting the USB Cable.............................................................12
2.5 Connecting the Power Adapter.......................................................13
2.6 Powering On...................................................................................13
Chapter 3 – Configuring Your Ethernet Network Card.....................................................14
3.1 Configuring Your Ethernet Network card......................................14
3.1.1 For Windows
®
98 Second Edition / Windows
®
Me.....................14
3.1.2 For Windows
®
2000 / Windows
®
XP...........................................15
Chapter 4 – Installing Your USB Driver ...........................................................................17
4.1 Installing the USB Driver for Windows
®
98 Second Edition ........17
4.2 Installing the USB Driver for Windows
®
Me.................................18
4.3 Installing the USB Driver for Windows
®
2000..............................19
4.4 Installing the USB Driver for Windows
®
XP.................................20
Chapter 5 – Configuring Your Web Browser....................................................................22
5.1 Microsoft® Internet Explorer™ (based on IE 5.5) ........................22
5.2 Netscape Navigator ........................................................................22
Chapter 6 – Setup AT-AR236E via Quick Start................................................................23
Chapter 7 – Maintenance ...................................................................................................26
7.1 Maintenance Concepts....................................................................26
7.2 Preventive Maintenance .................................................................26
Quick Install Guide
Quick Install Guide Page 3 of 27
7.3 Preventive or Scheduled Maintenance (PM) Tasks........................26
7.4 PM or Scheduled Maintenance Tasks ............................................27
7.5 PM Tools & Test Equipment..........................................................27
Quick Install Guide
Safety Messages
WARNING
Quick Install Guide Page 4 of 27
HIGH VOLTAGE
is used in the equipment. Make sure equipment is properly grounded before
opening. Failure to observe safety precaution may result in electric shock to
user.
CAUTION
Check voltages before connecting equipment to power supply and outlet.
Wrong voltage applied may result in damage to equipment.
Quick Install Guide
Quick Install Guide Page 5 of 27
Chapter 1 – Introduction
Thank you on your purchase of the AT-AR236E! This ADSL bridge/router provides you with a
high speed broadband Internet connection using your existing telephone line, and at the same
time allows you to make phone calls.
The AT-AR236E can be connected to any computer/notebook with a USB port or 10/100TX
Ethernet network card. For multi-user connection, you may connect your computers/notebooks
to both the Ethernet and USB ports simultaneously or expand the Ethernet connection of the
router with a hub/switch.
This documentation assumes that you have already installed a Ethernet network card on your
computer/notebook.
1.1 Minimum Requirements
Pentium
®
MMX 233MHz
CD-ROM drive
Ethernet network card installed with TCP/IP protocol (required if you are
connecting to the Ethernet port of the router)
USB port (required only if you are connecting to the USB port of the router)
Host Operating Systems support for USB:
- Windows® 98 Second Edition
- Windows® 2000
- Windows® Me
- Windows® XP
OS independent for Ethernet
Web browser support:
- Microsoft Internet Explorer 4.0 (or later versions)
- Netscape® Navigator 3.02 (or later versions)
Quick Install Guide
AT-AR236E Package
1.2
Figure 1-1 below shows the package contents. For any missing items, please contact your dealer
immediately.
2. Ethernet cable
1. ADSL route
r
3. USB cable
5. Power ada
p
te
r
6. Installation CD
4. Tele
p
hone cable
7. POTS s
p
litter *
Figure 1-1: AT-AR236E Package
* Depending on your country of purchase, the package may or may not come with a POTS
splitter. The POTS splitter is required if you are connecting a telephone set and the router to a
telephone wall socket simultaneously.
Quick Install Guide Page 6 of 27
Quick Install Guide
AT-AR236E Overview
1.3
1.3.1 Front Indicators
Figure 1-2 shows the front indicators of the router.
2
4
1
5
3
Figure 1-2: Front Indicators
1. PPP
Lights up when the PPP connection is established.
2. PWR
Lights up when power is supplied to the router.
3. DSL
Lights up when the DSL connection is established.
Blinks when the modem is trying to establish a connection with the DSL service provider
Flickers when data is transmitted/received via the ADSL port of the router.
4. ETH/ACT
Lights up when the Ethernet cable is properly connected from the router to your Ethernet
device.
Flickers when data is transmitted/received via the Ethernet port of the router.
5. USB
Lights up when the USB cable is properly connected from the router to your computer and the
USB device driver is successfully installed.
Flickers when data is transmitted/received via the USB port of the router.
Quick Install Guide Page 7 of 27
Quick Install Guide
1.3.2
Back Panel
Figure 1-3 shows the back panel of the AT-AR236E.
2 4
1 5
3
Figure 1-3: Back Panel
1. ADSL
ADSL/2/2+ port (RJ-11) to connect to your telephone wall socket.
2. USB
USB 1.1 port (Type B) to connect to your computer’s USB port.
3. ETHERNET
10/100TX port (RJ-45) supporting auto MDI/MDI-X (automatic cable detection for straight-
through and crossover function) to connect to your Ethernet adapter card, hub or switch.
4. RESET
To reset your router to its factory default settings. (All customised settings that you have
previously saved will be lost!) To reset the AT-AR236E, simply press the reset button for about
10 seconds.
5. DC 9V
To connect to the power adapter that comes with the AT-AR236E package.
Quick Install Guide Page 8 of 27
Quick Install Guide
Typical AT-AR236E Connection
1.4
Figure 1-4 below shows a typical single-user connection.
Ethernet or USB
Computer/notebook with
Ethernet network card or
USB port
Figure 1- 4: Single-User Connection
To connect to multiple computers/notebooks, you can expand the Ethernet connectivity via a hub
or switch. For details on how to connect to the Ethernet hub or switch, please refer to the
documentation that came with it. See Figure 1-5
Computer/notebook with
USB port
Ethernet hub/switch
Computer/notebook with
Ethernet network card
USB
Ethernet
Figure 1-5: Multi-User Connection
Page 9 of 27 Quick Install Guide
Quick Install Guide
Chapter 2 – Connecting the AT-AR236E to Your
Computer/Notebook
CAUTION
Power off your computer/notebook and/or any other connected devices before
connecting to the router!
Connecting to the Ethernet 2.1
Connect your computer/notebook to the AT-AR236E as illustrated. The following illustration
shows the connection of a single computer.
See Figure 1-6
Figure 1-6: Connecting to the Ethernet
Do not mistake a Line port for a Ethernet port. Picture A below illustrates that of a Ethernet
port, whereas Picture B shows a Line port.
B: LINE
A: ETHERNET
Quick Install Guide Page 10 of 27
Quick Install Guide
Connecting to the ADSL
2.2
Figure 1-7 shows the connection of the AT-AR236E to a telephone wall socket (ADSL).
Figure 1-7: Connecting to the ADSL
Figure 1-8 shows the connection of the AT-AR236E and a telephone set.
Figure 1-8: Connection of ADSL Router and Telephone Set
The POTS splitter (with built-in microfilter) is a device that allows you to connect both your
ADSL router and telephone set to the same telephone wall socket. The device at the same time
helps to eliminate background noise on the telephone line, ensuring the best possible phone
quality.
Quick Install Guide Page 11 of 27
Quick Install Guide
Checking Your Connections
2.3
Note…
Please check your connections before proceeding!
Ensure all connections are carefully plugged in as shown in Figure 1-9.
Figure 1-9: Checking Connections
Connecting the USB Cable 2.4
Ensure that the USB cable is plugged in as shown in Figure 1-10.
USB Port
Backview of
AT-AR236E
Backview of a
computer
USB Cable
Figure 1-10: Connecting the USB Cable
Quick Install Guide Page 12 of 27
Quick Install Guide
Connecting the Power Adapter
2.5
2.6
See Figure 1-11 for connection of the power adapter.
Figure 1-11: Connecting the Power Adapter
Powering On
a) Switch on the power outlet that is connected to your router.
b) Power on your computer(s)/notebook(s).
Quick Install Guide Page 13 of 27
Quick Install Guide
Chapter 3 – Configuring Your Ethernet Network Card
If your computer/notebook is connected to the USB port of the router, proceed to Chapter 4.
Configuring Your Ethernet Network card 3.1
Note…
Proceed with this section only if your computer/notebook is connected to the
Ethernet port of your router.
The illustrated screenshots serve only as examples. For any dissimilarities, please follow the
instructions closely as prompted on your computer screen.
3.1.1 For Windows
®
98 Second Edition / Windows
®
Me
Proceed with the steps below:
1. From your Windows Desktop, right-click on the Network Neighborhood icon. Select
Properties.
2. From the Configuration tab, select TCP/IP-> xxx (where xxx refers to the model of
your Ethernet network card that is connected to the router).
3. Click Properties as shown below in Figure 1-12
Configuration
TCP/IP
Click
Here
Figure 1-12: Network settings
Quick Install Guide Page 14 of 27
Quick Install Guide
4. Click the IP Address tab.
5. Select the option Obtain an IP address automatically and click OK to save the settings.
See Figure 1-13
IP Address
Tab
Select This
Figure 1-13: TCP/IP Properties
6. Ensure that your router is powered on.
7. Restart your system.
8. Proceed to Chapter 4.
3.1.2 For Windows
®
2000 / Windows
®
XP
Windows® 2000:
From your Windows Desktop, right-click on the icon My Network Places and select
Properties.
a.
b.
a.
b.
At the Network and Dial-up Connections window, right-click on the Local Area
Connection icon and select Properties.
Windows® XP (instructions are based on default Start menu option):
From your Windows Desktop, click Start > All Programs > Accessories >
Communications > Network Connections.
Right-click on the Local Area Connection icon that reflects the model of your
Ethernet network card that is connected to the router and click Properties.
Ensure that the field Connect using indicates the model of your Ethernet network card that is
connected to the router.
Quick Install Guide Page 15 of 27
Quick Install Guide
Note. . .
This is important especially if you have more than one Local Area Connection
icons displayed at the Network and Dial-up Connections/Network Connections
window. Ensure that you have selected the correct one.
1. Select Internet Protocol (TCP/IP) and click Properties. See Figure 1-14
Ensure
model is
correct
Select This
Figure 1-14: Local Area Connection Properties
2. Select the option Obtain an IP address automatically and click OK. See Figure 1-15
Select This
Figure 1-15: TCP/IP Properties
3. Click OK again to close.
4. Ensure that your router is powered on.
5. Restart your system.
6. Proceed to Chapter 4.
Quick Install Guide Page 16 of 27
Quick Install Guide
Chapter 4 – Installing Your USB Driver
Installing the USB Driver for Windows
®
98 Second Edition 4.1
Proceed with the steps below:
1. Power on your computer to start the Windows Operating System.
2. Insert the Installation CD into your CD-ROM drive.
3. At the prompt shown in Figure 1-16, click Next.
Figure 1-16: Add New Hardware Wizard
4. Select Search for the best driver for your device (Recommended) option and click
Next. See Figure 1-17
Select This
Figure 1-17: Add New Hardware Wizard
Quick Install Guide Page 17 of 27
Quick Install Guide
5. Select CD-ROM drives option and click Next. See Figure 1-18
Select This
Click
Next
Figure 1-18: Driver location
Note. . .
Depending on your system’s configuration, you may be prompted for your
Windows CD-ROM during the installation. At the prompt, replace the
Installation CD in your CD-ROM drive with your Windows CD-ROM and click
OK. At the Copying Files dialog box, enter the path of your Windows CD-
ROM and click OK.
6. Click Finish to complete the USB driver installation.
7. Restart your system when prompted.
8. Proceed to Chapter 5.
Installing the USB Driver for Windows
®
Me 4.2
1. Power on your computer to start the Windows Operating System.
2. Place the Installation CD into your CD-ROM drive.
3. At the following prompt, select Specify the location of the driver (Advanced) option
and click Next. See Figure 1-19
Quick Install Guide Page 18 of 27
Quick Install Guide
Click
Next
Select This
Figure 1-19: Specifying driver location
4. Check Removable Media option and click Next. See Figure 1-20
Select This
Figure 1-20: Driver location
5. Click Next again to proceed with the installation of indicated driver.
6. Click Finish to complete the USB driver installation.
7. Restart your system when prompted.
8. Proceed to Chapter 5.
Installing the USB Driver for Windows
®
2000 4.3
1. Power on your computer to start the Windows Operating System.
2. Place the Installation CD into your CD-ROM drive.
3. At the prompt shown in Figure 1-21, click Next.
Quick Install Guide Page 19 of 27
Quick Install Guide
Figure 1-21: Hardware Wizard
4. Select Search for a suitable driver for my device (recommended) option and click
Next. See Figure 1-22
Select This
Figure 1-22: Search Driver
5. Select CD-ROM drives option and click Next.
6. At the next prompt, click Next to proceed with the installation of indicated driver.
7. You may be prompted with Digital Signature Not Found dialog box during installation.
8. Click Yes to proceed with the installation.
9. Click Finish when prompted.
10. Proceed to Chapter 5.
Installing the USB Driver for Windows
®
XP 4.4
1. Power on your computer to start Windows.
2. Place the Installation CD into your CD-ROM drive.
Quick Install Guide Page 20 of 27
  • Page 1 1
  • Page 2 2
  • Page 3 3
  • Page 4 4
  • Page 5 5
  • Page 6 6
  • Page 7 7
  • Page 8 8
  • Page 9 9
  • Page 10 10
  • Page 11 11
  • Page 12 12
  • Page 13 13
  • Page 14 14
  • Page 15 15
  • Page 16 16
  • Page 17 17
  • Page 18 18
  • Page 19 19
  • Page 20 20
  • Page 21 21
  • Page 22 22
  • Page 23 23
  • Page 24 24
  • Page 25 25
  • Page 26 26
  • Page 27 27

Allied Telesis AT-AR236E Quick Install Manual

Type
Quick Install Manual

Allied Telesis AT-AR236E is a versatile ADSL bridge/router that allows you to establish a high-speed broadband internet connection via your existing telephone line while simultaneously enabling phone calls. Equipped with both USB and Ethernet ports, it offers flexible connectivity options for your computer or notebook irrespective of the port availability. The AT-AR236E ensures a stable and reliable internet connection by supporting the ADSL2/2+ standard and featuring front panel indicators for visual monitoring of the device's status.

Ask a question and I''ll find the answer in the document

Finding information in a document is now easier with AI