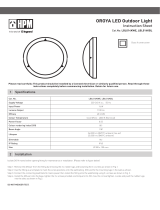
LED Oyster Light
Cat.No. LOL004KWE
Instruction Manual
1 Specifications
Cat. No. LOL004KWE
Nominal Input Voltage 230 - 240 V a.c. 50 Hz
Input Power 17 W
Power Output 15 W
Lumens Output 1500 lm
Efficacy 100 lm/W
Power Factor 0.9
CCT 4000 K
Colour Rendering Index (CRI) 80+
Beam Angle 120°
Dimmable N/A
Lifespan 35,000hrs @ 25°C (Ambient)
Size Ø 350 x 110 mm
Warranty 3 Years
1. Remove the diffuser from the fitting.
2. Use the fitting as a template to mark the screw positions onto the ceiling.
3. Remove the cord anchorage & terminal block cover (fig. 1).
4. Insert the mains wiring through the silicone grommet located near the terminal block.
5. Install the fitting onto the ceiling.
6. Connect the mains wiring to the terminal block (Neutral, Earth and Active) as marked on
the fitting. Ensure that the wires are secure and no bare wires are exposed.
7. Place the mains wiring in the cord anchorage system and secure by tightening the screws.
Ensure it clamps onto the cord sheath (fig. 2).
8. Install the terminal block cover back onto the terminal block.
9. Install the diffuser back onto the fitting.
10. DO NOT MEGGER TEST
Please read carefully: This product should be installed by a licensed electrician or similarly qualified person. Read through these
instructions completely before commencing installation. Retain for future use.
2 Installation

Warranty
Legrand warrants this product for a period of 3 years from the date of purchase.
These goods come with guarantees that cannot be excluded under the Australian
and New Zealand Consumer Laws. You are entitled to a replacement or a refund
for a major failure and for compensation for any other reasonably foreseeable loss
or damage. You are also entitled to have the goods repaired if the goods fail to be of
acceptable quality and the failure does not amount to a major failure.
See the Warranty card enclosed with this product for further details.
LE10276AB 11/2020
Product Notes
1. This product must be installed and used as per these instructions.
2. The mounting screws on this product should be tightened to a maximum torque of 0.8Nm. Over tightening may damage the product.
3. This product contains no serviceable parts and no attempt should be made to repair it. If the product is faulty it should be discarded.
4. This product is not suitable for installation in hazardous and/or corrosive areas.
5. Electrical installations periodically receive transient over-voltages. This product has been designed to minimise the effect of such
voltages on connected equipment. It may not give full protection for extreme over-voltage transients such as those resulting from a
close lightning strike.
6. This product has been designed to operate in ambient temperatures -5°C to 25°C occasionally reaching 35°C.
7. Stated lifespan is an average. Actual lifespan will vary according to individual circumstances.
8. Extended exposure to UV rays (such as exposure to direct sunlight) may cause discolouration of this product.
9. The material in this product may vary in colour from batch to batch. Colour matching from one batch to another cannot be guaranteed.
10. This product utilises intellectual property in the form of registered designs, trademarks, and/or patents. Such intellectual property
remains the property of Legrand in all cases.
11. Legrand reserves the right to modify the specification of this product at any time.
Customer Service
For all Customer Service and Technical Support
please call Monday to Friday during business hours.
Legrand Australia
1300 369 777
www.hpm.com.au
Legrand New Zealand
0800 476 009
www.hpm.co.nz
ABN: 31 000 102 661
3 Maintenance / cleaning
This product should only be cleaned with a damp cloth. Cleaning agents and solvents should not be used.
2 Installation Cont.
Tighten 2x screws to
clamp onto cord sheath
fig. 2fig. 1
Paper
Brown
Green/Yellow
Blue
L
N
/


