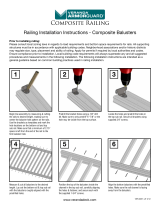
Paso 1: Mide la distancia entre los postes y corta los rieles a la
medida. Para lograr un espaciado uniforme entre los balaústres y
postes, asegúrate de cortar desde ambos extremos de los rieles.
Paso 2: Coloca el pasamanos moldeado boca abajo sobre una
superficie plana. Luego, coloca uno de los rieles de 2x4 en el canal
del pasamanos moldeado, de modo que los orificios miren hacia
arriba. Comenzando por cualquier extremo, une la parte superior de
2x4 al pasamanos moldeado con los 7 tornillos de 3 plg pasándolos
por los orificios 1, 2, 5, 8, 11, 14 y 15. Si los rieles están recortados,
pretaladra los orificios adicionales con una broca de taladro de 1/8
plg y coloca el tornillo en el próximo orificio más cercano. (Fig. 1)
Paso 3: Une el bloque de soporte en la parte inferior del riel
inferior de 2x4 con el tornillo de 4 plg. El bloque de soporte
se instala debajo del orificio 8. Si el riel no fue recortado de
forma pareja en ambos lados, busca el orificio más cercano al
centro para asegurar el bloque de soporte. Si ese orificio no fue
pretaladrado, hazlo con una broca de taladro de 1/8 plg. (Fig. 1)
Paso 4: Fija los 4 soportes del riel DeckoRail® de 2x4 a los
postes según las instrucciones incluidas.
Paso 5: Fija el riel inferior de 2x4, con los orificios hacia arriba,
usando los soportes del riel DeckoRail de 2x4. Inserta los
balaústres en los orificios pretaladrados. (Fig. 2)
Paso 6: Fija el pasamanos alineando los orificios con el balaústre
en un extremo del riel y continuando hacia el extremo contrario,
asegurándote de que todos los balaústres queden fijos entre los dos
rieles. (Fig. 2)
Este folleto sólo tiene fines ilustrativos. El uso de este producto debe estar en conformidad con todos los códigos locales de zonificación y/o construcción. El consumidor asume todos los riesgos y
responsabilidades asociados al uso de este producto. Para obtener más información de seguridad acerca de la manipulación e información de la garantía de este producto, visite UFPI.com/ptinfo.
©2013 Universal Forest Products, Inc. Todos los derechos reservados. WeatherShield es una marca registrada de Osmose Wood Preserving Company of America.
Kit de riel para escalera a juego disponible en Homedepot.com
Internet núm. 204430479
Herramientas necesarias
• Taladro destornillador eléctrico
• Sierra circular o angular con disco con puntas de carburo
• Cinta de medir
• Nivel de carpintero
• Lápiz de carpintero
• Gafas de seguridad
• Guantes
Procedimiento
Kit de baranda tratada a presión con balaústres de aluminio, de 1.83 m
INSTRUCCIONES DE INSTALACIÓN
Pasamanos
1 2 3 4 5 6 7 8 9 10 11 12 13 14 15
StrRail2_SPANISH.ai
Riel de inserción superior
•
•
1 2 3 4 5 6 7 8 9 10 11 12 13 14 15
Riel inferior
•
Bloque de soporte
•
Fig. 1
Riel inferior
Bloque de soporte
Soportes de baranda
Balaústres
Pasamanos
•
•
•
•
•
StrRail3_SPANISH.ai
Fig. 2
50415 Herbert Street, P.O. Box 129 • Granger, Indiana 46530 • 574.277.7670 • www.ufpi.com
WeatherShield es una marca registrada de Osmose Wood Preserving Company of America. ©2013 Universal Forest Products, Inc. Todos los derechos reservados. 7188_SPN_08/13


