Midmark 6271 - 6276 (Wall Mounted Units) Installation guide

Category
Holders
Type
Installation guide

Midmark 6271 - 6276 (Wall Mounted Units) offer a versatile solution for mounting keyboards and other devices in various healthcare settings. These units are designed for secure installation on walls, providing a stable and ergonomic workspace for users. The included mounting template and hardware ensure a straightforward installation process. The adjustable keyboard platform allows for customization of height and positioning to suit individual preferences.

Midmark 6271 - 6276 (Wall Mounted Units) offer a versatile solution for mounting keyboards and other devices in various healthcare settings. These units are designed for secure installation on walls, providing a stable and ergonomic workspace for users. The included mounting template and hardware ensure a straightforward installation process. The adjustable keyboard platform allows for customization of height and positioning to suit individual preferences.

6274-001 Installation Instructions
INS-6274-001 (Rev. E)
Attention!
For OSHPD Regulated Installations, please go to
www.midmark.com to download the appropriate
OSHPD Approval and Installation documents.
Mounting Template/Drilling Hole Preparation:
Toggler Bolt Installation Preparation:
Tools required:
Electric Drill with driver extension
Phillips head screwdriver/bit
1/2” Drill Bit
Punch
Parts Included:
(1) Mounting Template
(1) Wall Mount Assembly
(6) 1/4-20 Threaded Hilti Snaptoggle Heavy-Duty Toggle Bolts (2 extra)
(4) 1/4-20 x 2” Long Phillips Drive Pan Head Machine Screws
(1) Cable Management Cover
(8) Dual Lock Velcro Squares
(1) Mouse House
Place mounting template on wall (See Fig. A).
Note: Choose desired height for keyboard
bracket, ideally 41”-44” for a standing
position. 29 1/2” - 32 1/2” for a sitting
position.
a. Using punch to locate holes in wall.
b. Make sure that drill bit point is centered
with cross-pattern of hole location.
c. Install Toggler Bolts
1
2
3
Fig. A
6274-001 Installation Instructions
INS-6274-001 (Rev. E)
Installation Hardware
a.
Drill 1/2” size hole.
Hold metal channel
at alongside plastic
straps and slide
channel through
the hole. Minimum
clearance beind wall:
only 1 7/8”
Hold ends of straps
together between
thumb & forefi nger
and pull toward you
until channel rests
behind wall. Rachet
cap along straps
with other hand until
ange of cap is
ush with wall.
(1/2” Hole)
b.
c.
Place thumb between
straps at wall. Push
thumb side to side,
snapping off straps
level with fl ange
of cap.
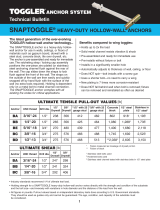
Toggler Bolt Installation Instructions:
Midmark Corporation | 60 Vista Drive | PO Box 286 | Versailles, Ohio 45380-0286 | USA | midmark.com
Caution
Properinstallationoftoggleboltsrequired
toprovidesecurewallmounting.Minimum
drywallthicknesstobe½”.
4
Mounting to Wall:
Secure with (4) 1/4-20 x 2” Long Phillips Drive
Pan Head Machine Screws.
Keyboard Attachment:
5
a. Attach (8) Velcro squares together. Peel
off fi lm from one side and adhere (4) Velcro
Squares to the underside of keyboard.
b. Peel off fi lm from the other side squares
and attached to keyboard platform (See FIG A).
Fig. A
6274-001 Installation Instructions
INS-6274-001 (Rev. E)
Midmark Corporation | 60 Vista Drive | PO Box 286 | Versailles, Ohio 45380-0286 | USA | midmark.com
  • Page 1 1
  • Page 2 2
  • Page 3 3

Midmark 6271 - 6276 (Wall Mounted Units) Installation guide

Category
Holders
Type
Installation guide

Midmark 6271 - 6276 (Wall Mounted Units) offer a versatile solution for mounting keyboards and other devices in various healthcare settings. These units are designed for secure installation on walls, providing a stable and ergonomic workspace for users. The included mounting template and hardware ensure a straightforward installation process. The adjustable keyboard platform allows for customization of height and positioning to suit individual preferences.

Ask a question and I''ll find the answer in the document

Finding information in a document is now easier with AI