Midmark 6204, 6205 (Non-Powered) Installation guide

Category
Flat panel accessories
Type
Installation guide

This manual is also suitable for

62XX-501-30
9A481001
Installation Instructions
INS-9A481001 (Rev.B)
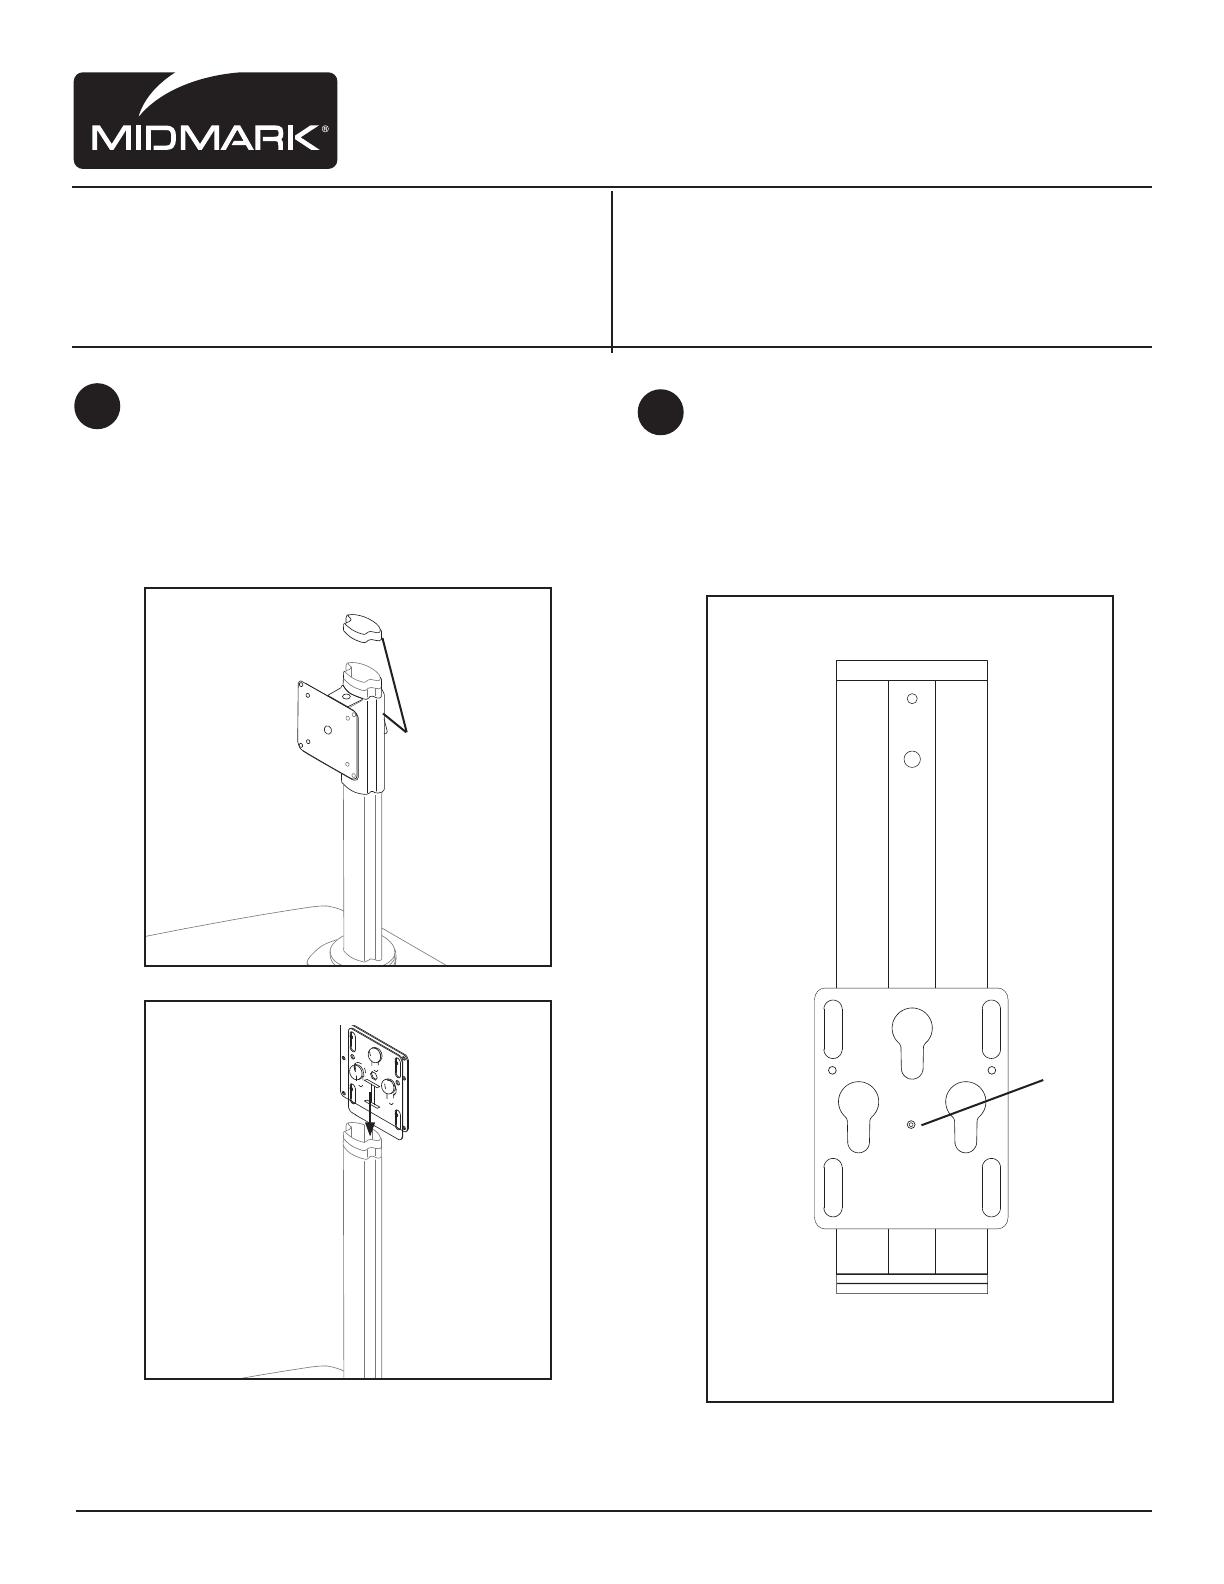
To install mounting plate onto the Flat
Screen Monitor Arm, remove screw from
behind top cap. Remove cap and slide
off collar (see Fig. A.)
Slide mounting plate onto arm channel.
Slide collar back on and refasten cap with
screw (see Fig B).
1
Fig. A
Fig. B
Tools required:
Phillips head screwdriver
3/32 Allen Wrench
Parts Included:
(1) Vesa Mounting Bracket
(1) Mounting Plate
(2) #8-32 x 3/8” Long Phillips Drive Pan Head Machine Screws
Midmark Corporation | 60 Vista Drive | PO Box 286 | Versailles, Ohio 45380-0286 | USA | midmark.com
If the Mounting Plate (Fig. E) needs
to be adjusted up or down, use
a 3/32 allen wrench to loosen set
screw. Find position and tighten
with allen wrench.
Fig. C
2
Tools required:
Phillips head screwdriver
3/32 Allen Wrench
Parts Included:
(1) Vesa Mounting Bracket
(1) Mounting Plate
(2) #8-32 x 3/8” Long Phillips Drive Pan Head Machine Scres
Midmark Corporation | 60 Vista Drive | PO Box 286 | Versailles, Ohio 45380-0286 | USA | midmark.com
Attach Vesa Bracket (Fig. C) securely to
Technology Component. Using four screws
(not included).
To ensure brackets are secure, tighten
included (2) two screws to fasten plate to
vesa mounting bracket (Fig. D)
3
Fig. C
Fig. D
62XX-501-30
9A481001
Installation Instructions
INS-9A481001 (Rev.B)
  • Page 1 1
  • Page 2 2

Midmark 6204, 6205 (Non-Powered) Installation guide

Category
Flat panel accessories
Type
Installation guide
This manual is also suitable for

Ask a question and I''ll find the answer in the document

Finding information in a document is now easier with AI