Asus Z87-DELUXE User manual

Type
User manual
Tips and tricks to LGA1150 CPU installation
The installation of the LGA1150 CPUs may seem easy as it looks, however it stands a
risk of bending the CPU socket pins when not done properly, resulting in malfunction
of the CPU integrated functionalities such as the basic CPU functions, CPU integrated
memory controller, as well as the CPU native PCI Express lane connections.
The guideline below outlines the Do’s and Don’ts to help you through this process.
It is highly recommended to read through it carefully before beginning with the CPU
installation process.
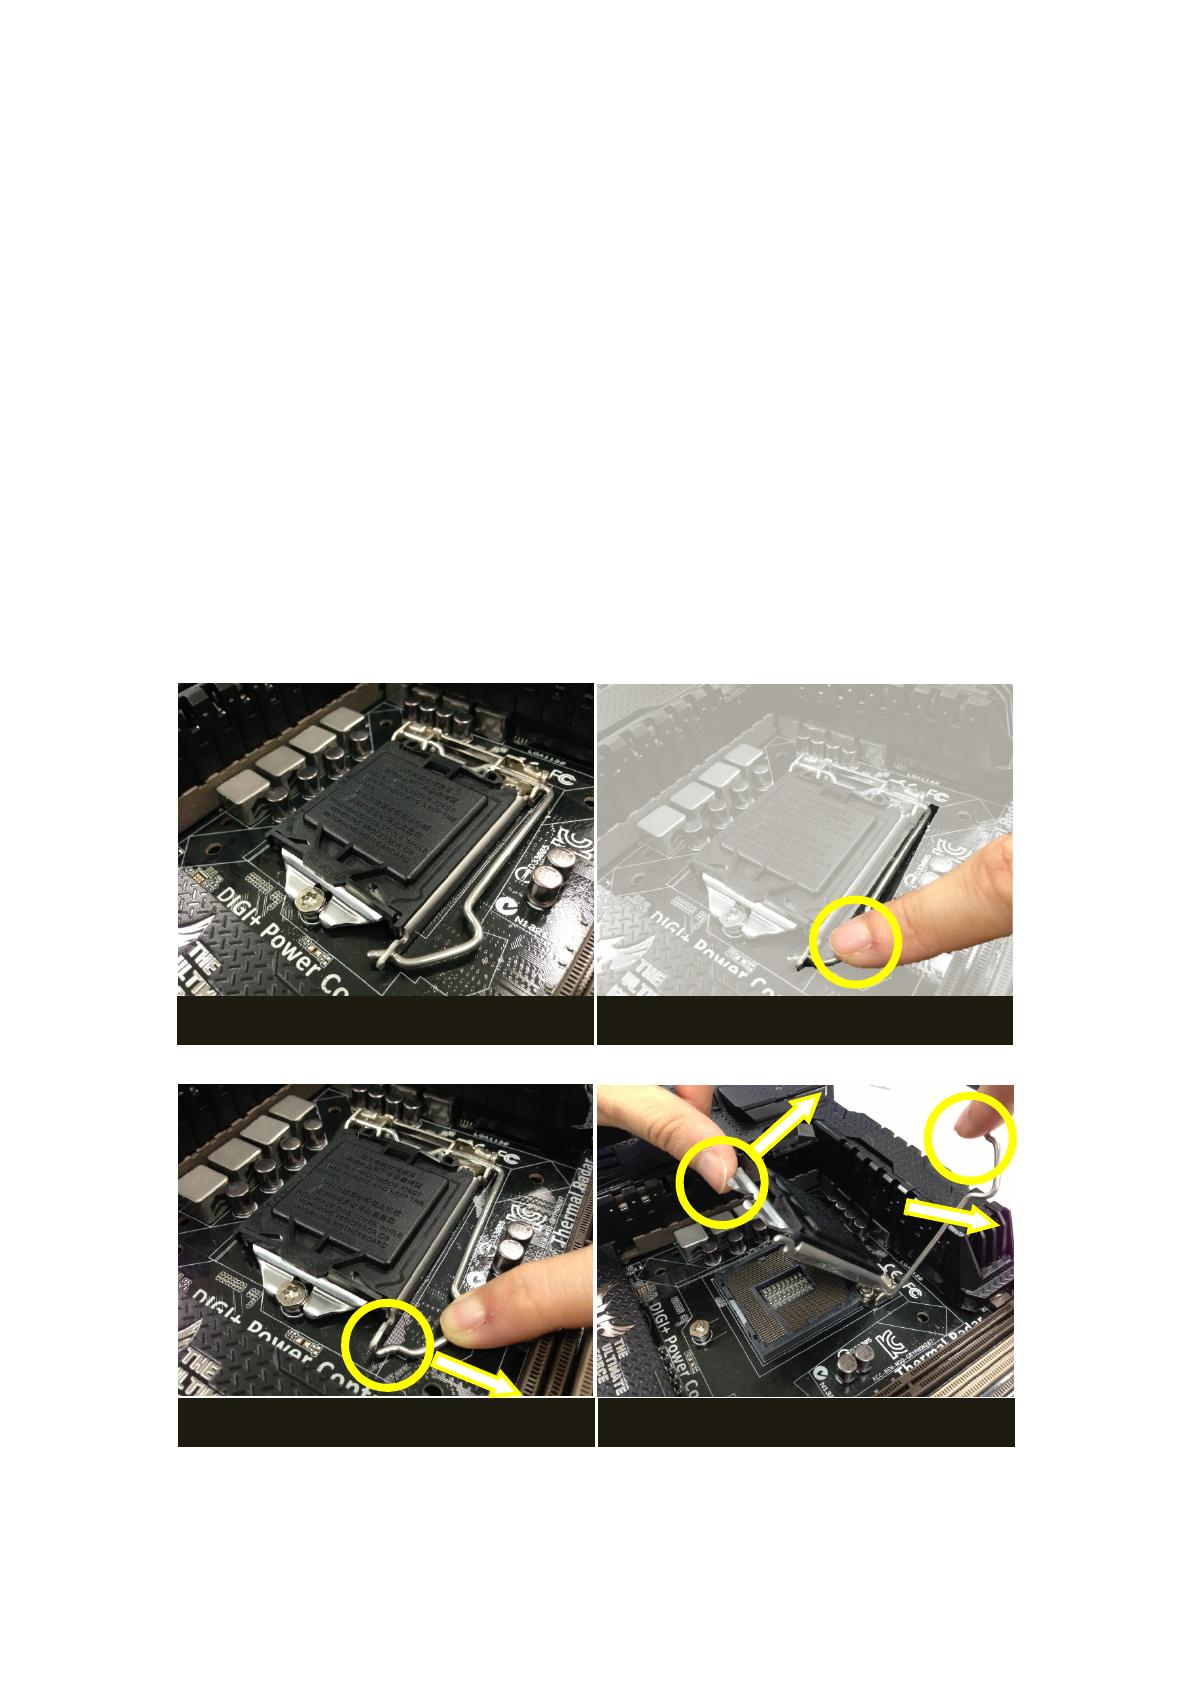
Step 1. Lift the Lever and CPU Retention
Press and hold the lever, and move it away from the lock, then lift the lever and the
CPU retention up with both hands as shown in the photo below:
1.
Check
the appearance of the whole CPU
socket.
2.
Press the lever at the place shown in red
circle
.
3.
Move the lever away from the lock.
4.
Use both hands to lift the lever and
the
CPU retention.
Step 2. Check the CPU Grid
Check the CPU grid before installing the CPU onto it. If there is any bent pins on the
CPU socket, contact your place of purchase to arrange RMA, or replacement if you
have just purchased this motherboard for first use.
The appearance of a normal CPU socket
The appearance of a damaged CPU socket
Step 3. Install the CPU
Hold the CPU with two fingers, then place it firmly and vertically onto the CPU socket
as shown in the picture below. Check and ensure both latches on the CPU socket fits
into the side latches on the CPU.
Step 4. Confirm the Stability of CPU
Check from both ends of the CPU softly with two fingers to ensure the CPU sits
properly on the CPU socket.
Note: If you feel abnormal force feedbacks from under the CPU when checking the
stability, remove the CPU and try sitting the CPU back into the CPU socket again.
Without doing so may result in the damage of CPU pins after locking the CPU
retention in place.
2.
Check
both
latches
of CPU and CPU socket
are matched.
1.
Place the CPU
vertically
onto the CPU
socket.
Check from both ends of the CPU to confirm the stability.
Step 5. Close the CPU Retention
Hold both the lever and the CPU retention with both hands, and firmly lower the
CPU retention to fit into the screw latch as shown below, and then secure the lever.
The CPU cap will pop out once the lever is secured in place. Then remove the CPU
cover, and you now have your CPU properly installed.
Note: Do not press on the CPU cap when holding the CPU retention. This will stop the
CPU cap from popping out and the CPU may be damaged.
1.
U
se
both hands
to
hold the lever and the
CPU retention.
3.
Secure the lever back in the lock.
4.
The CPU cover will
pop out
once the lever
is secured.
2.
Lower the CPU retention and fit it into
the screw latch.
Caution!!
These common mistakes may damage the CPU socket pins
These actions may easily cause the CPU to be not aligned with the CPU pins, resulting
in the damage the CPU pins after securing the lever in place.
Place the CPU in the socket with an angle instead of vertically.
The CPU latches are not aligned with the CPU socket latches.
Secure the lever and CPU retention with only one hand.
  • Page 1 1
  • Page 2 2
  • Page 3 3
  • Page 4 4
  • Page 5 5
  • Page 6 6

Asus Z87-DELUXE User manual

Type
User manual

Ask a question and I''ll find the answer in the document

Finding information in a document is now easier with AI