Fortress Technologies 640507 Installation guide

Type
Installation guide
FENCING INSTALLATION: VERSAI
1
VERSAI RESIDENTIAL FENCE
INSTALLATION INSTRUCTIONS
2
FENCING INSTALLATION: VERSAI
English


Fence Layout





Care & Maintenance/ Warranty
TABLE OF CONTENTS
FENCING INSTALLATION: VERSAI
3
INTRODUCTION
READ INSTRUCTIONS COMPLETELY BEFORE
STARTING INSTALLATION
It is the responsibility of the installer to meet all code and




its distributors shall not be held liable for improper or

Before You Begin





Call811beforeyoudigpostholestolocateandidenfy
anyburiedulies.
Note


 
 

Apply two coats of Fortress zinc based touch-up paint to


 

Torx Safety Tips
 
 

Tip:Pre-drillholeswith5/32”[4mm]drillbit.
4
FENCING INSTALLATION: VERSAI
Required Tools

Drill

Measurer


Speed
Square
Fortress


Head Bit
Bit
Extender


Socket
Set
Pencil
Rubber
Mallet
Safety

Ground
Stakes
Spade

Concrete/

Wheelbarrow
Pliers
 

Athens Fence Product Options
FT3-ATHENS
FT/FB3-ATHENS SP/FTFB3-ATHENS
2” x 2” x .060” 2” x 2” x .125” 2-1/2” x 2-1/2” x .060” 2-1/2” x 2-1/2” x .125”
Blank
Posts
All Athens Fence posts are available as Blank, Line, Corner and End posts.
Note: .125” posts are recommended to be used for gate posts.
Line
Corner End
Panel and Gate Styles
All Athens Fence Panels have matching Walk and Drive Gates
Note: 2 and 3 Rail options are available
All Athens Fence Panels are rackable to 32°
SP/FB3-ATHENS
SP3-ATHENS
EXT3-ATHENS EXT/FB3-ATHENS SP/FT3-ATHENS
VERSAI FENCE OPTIONS

Posts
 


Gate Uprights
 

Athens Fence Product Options
FT3-ATHENS
FT/FB3-ATHENS SP/FTFB3-ATHENS
2” x 2” x .060” 2” x 2” x .125” 2-1/2” x 2-1/2” x .060” 2-1/2” x 2-1/2” x .125”
Blank
Posts
All Athens Fence posts are available as Blank, Line, Corner and End posts.
Note: .125” posts are recommended to be used for gate posts.
Line
Corner End
Panel and Gate Styles
All Athens Fence Panels have matching Walk and Drive Gates
Note: 2 and 3 Rail options are available
All Athens Fence Panels are rackable to 32°
SP/FB3-ATHENS
SP3-ATHENS
EXT3-ATHENS EXT/FB3-ATHENS SP/FT3-ATHENS


or Portable Bandsaw
Post Hole


Punch
FENCING INSTALLATION: VERSAI
5
Panel & Gate Styles





Note:

 


 
BracketOpons
   

6
FENCING INSTALLATION: VERSAI
FENCE LAYOUT
Step 1: Sketch Layout of Fence Perimeter
 

 

 

(2” [50mm] Post Max On Center Spacing is
92-3/8”[2346mm]).
 
by  that will tell you how many post

 

Fig.1
Post
Post
Post
Post
Post
PostPost
Post
Post
Post
Gate
Post
Gate
Post
Gate
Post
Gate
Post
Gate
Post
Gate
Post
Walk
Gate
Walk
Gate
Double Drive
Gate
House
FENCING INSTALLATION: VERSAI
7
8
FENCING INSTALLATION: VERSAI
Step 2: Use Stakes & String to Create Perimeter
 


 
each fence run, and layout the perimeter of the fence

 Layout fence so that minimal panel cuts are required;

 

Note:
(2” [50mm] Post Max On Center Spacing is
92-3/8” [2346mm]).
Fig.1
Step 3: Dig Post Holes
 
 


 
Note:
 

Post holes should be at least  in diameter,


XXX
X
X
X
XXXX
X
XX
X
XX
Stake
Start 2
Cut
Panel
Start 4Start 3
Cut
Panel
Stake
Start 1
House
FENCING INSTALLATION: VERSAI
9


Fig.2
Step 4: Set Posts
 

 
 
As shown

 

Fig.1
Fig.2
Fig.1

Crushed Stone

Fig.3
Ground Stake &

Post
10
FENCING INSTALLATION: VERSAI
Step 2: Pour Concrete
 

 

Tip:
 

As the concrete cures


POST INSTALLATION
Step 1: Install Post
 
 

 
Fig.1
Fig.1

Concrete
Post





FENCING INSTALLATION: VERSAI
11
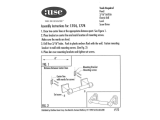
BRACKET INSTALLATION
Bracket Details:

End Bracket (EX-104) - 


Swivel Bracket (EXS-104) -


Line Bracket (EXW-204) -


each end of a panel with the bracket centered in the post













Note:
DO NOT

Corner Bracket (EXW-304) -

12
FENCING INSTALLATION: VERSAI


 









Step 1: MarkBracketHoleLocaonsForEX-104&EXS-104
 
 to mark top,

Tip:


Note:
Allpanelsshouldbeinstalledwiththeboomfaceofthe
boomrailaminimumof2”[50mm]aboveground
surface.
Fig.1
Fig.2
A
3 Rail Panel 2 Rail Panel
B
A
FENCING INSTALLATION: VERSAI
13
Fig.3
BracketHoleLocaons:34” [864mm] Panel
Pre-drill Dimensions: 

3 Rail Panel
A
B
FT3, SP3, EXT3
 
FT-FB3, SP-FB3, EXT-FB3
 
2 Rail Panel
A
B
FT2, SP2, EXT2
 N/A
FT-FB2, SP-FB2, EXT-FB2
 N/A
Fig.4
BracketHoleLocaons:40” [1016mm] Panel
Pre-drill Dimensions: 

3 Rail Panel
A
B
FT3, SP3, EXT3
 
FT-FB3, SP-FB3, EXT-FB3
 
2 Rail Panel
A
B
FT2, SP2, EXT2
 N/A
FT-FB2, SP-FB2, EXT-FB2
 N/A
14
FENCING INSTALLATION: VERSAI
Fig.5
BracketHoleLocaons:46” [1168mm] Panel
Pre-drill Dimensions: 

3 Rail Panel
A
B
FT3, SP3, EXT3
 
FT-FB3, SP-FB3, EXT-FB3
 
2 Rail Panel
A
B
FT2, SP2, EXT2
 N/A
FT-FB2, SP-FB2, EXT-FB2
 N/A
Fig.6
BracketHoleLocaons:48” [1219mm] Panel
Pre-drill Dimensions: 

3 Rail Panel: N/A
2 Rail Panel
A
B
FT2, SP2, EXT2
N/A N/A
FT-FB2
 N/A
SP-FB2, EXT-FB2
N/A N/A
Fig.7
BracketHoleLocaons:54”[1372mm]Panel
Pre-drill Dimensions: 

3 Rail Panel
A
B
FT3, SP3, EXT3
 
FT-FB3, SP-FB3, EXT-FB3
 
2 Rail Panel: N/A
FENCING INSTALLATION: VERSAI
15
Fig.8
BracketHoleLocaons:58”[1473mm]Panel
Pre-drill Dimensions: 

3 Rail Panel
A
B
FT3, SP3, EXT3


FT-FB3, SP-FB3, EXT-FB3
 
2 Rail Panel
A
B
FT2, SP2, EXT2
 N/A
FT-FB2, SP-FB2, EXT-FB2
 N/A
Fig.9
BracketHoleLocaons:70”[1778mm]Panel
Pre-drill Dimensions: 

3 Rail Panel
A
B
FT3, SP3, EXT3
 
FT-FB3, SP-FB3, EXT-FB3
 
2 Rail Panel
A
B
FT2, SP2, EXT2
 N/A
FT-FB2, SP-FB2, EXT-FB2
 N/A
16
FENCING INSTALLATION: VERSAI
Step 2: Pre-Drill and Install Brackets
Tip:
• Itsimportanttodoublecheckdimensionstoconrm
accuracyofbracketholelocaonsbeforedrilling.
 
 

 


DO NOT
Fig.1 Fig.2
PANEL CUTTING
Step 1: Measure The Panel Opening Length
 

Fig.3
FENCING INSTALLATION: VERSAI
17
Do not
measure from
post
Measure
from back
of bracket
Fig.1
Fig.2

Step 2: Mark Panel with Cut Points
 

 Use a tape measure to measure from center of panel and

 
 
Note:




Tip:
Measure from the back wall of the bracket to the back wall





Fig.1

Center of Panel

18
FENCING INSTALLATION: VERSAI
Fig.1

Saw
Step 3: Cut & Clean Panels
 
 
 

 
Tip:


Fig.2
Fig.3
Step 4: Apply Spray Paint To Cut Areas
 
st
coat of

 
 
nd

 
FENCING INSTALLATION: VERSAI
19
Fig.1
2X
PANEL INSTALLATION
Step 1: Install Level Panel
 

 

 

Step 2: Install Angled Panel
 
 
 
 


Fig.1 Fig.2

20
FENCING INSTALLATION: VERSAI
Fig.1
POST CUTTING & PRESSED DOME CAP INSTALLATION

Rake Panel Down
Slope
Step 1: Trim Excess Post Material
 

 
 

 
 
 Reference panel

Fig.1 Fig.2


Tip:
 
DO NOT


  • Page 1 1
  • Page 2 2
  • Page 3 3
  • Page 4 4
  • Page 5 5
  • Page 6 6
  • Page 7 7
  • Page 8 8
  • Page 9 9
  • Page 10 10
  • Page 11 11
  • Page 12 12
  • Page 13 13
  • Page 14 14
  • Page 15 15
  • Page 16 16
  • Page 17 17
  • Page 18 18
  • Page 19 19
  • Page 20 20
  • Page 21 21
  • Page 22 22
  • Page 23 23
  • Page 24 24

Fortress Technologies 640507 Installation guide

Type
Installation guide

Ask a question and I''ll find the answer in the document

Finding information in a document is now easier with AI