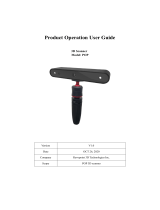
Digitizer

MakerBot Digitizer User manual

  • Hello! I am an AI chatbot trained to assist you with the MakerBot Digitizer User manual. I’ve already reviewed the document and can help you find the information you need or explain it in simple terms. Just ask your questions, and providing more details will help me assist you more effectively!
USER MANUAL
WELCOME, LET’S GET STARTED 3
1 WELCOME
Safety and Compliance
About your MakerBot Digitizer
2 SETUP
Accessory Checklist
Unpacking the MakerBot Digitizer
MakerBot Digitizer Placement
Install MakerWare for Digitizer
Calibration
Set Preferences
3 SCANNING
Scanning 101
Scanning an Object
Post-Scan Steps
4 TROUBLESHOOTING AND MAINTENANCE
Troubleshooting
Maintenance
5 REFERENCE
Specifications
Menu Functions
Glossary
Contact Us
6 TERMS
TABLE OF CONTENTS
V.2
04
06
18
22
24
25
28
30
31
34
36
38
45
52
54
58
62
64
66
68
70
72
48
1
Welcome to the
Leading Edge of
the Next Industrial
Revolution!
Let’s Get Started.
Hi there,
When we started MakerBot in 2009, one of the biggest hurdles to
3D printing was finding great 3D models. Now you hold one of the
keys to crossing this hurdle, the MakerBot Digitizer Desktop 3D Scanner.
The engineers here at MakerBot had a big task: build a machine that
scans physical objects quickly and always delivers clean 3D models
with no holes or extra pieces floating around. We also knew the entire
process had to be seamless and simple, so that creative people could
just keep creating.
Aer some calibration, the scan process requires just two clicks, and
you’ll have a complete, watertight 3D model in as little as 12 minutes.
Not everything will scan perfectly; we still have to abide by the laws of
physics. Read through this manual and check makerbot.com/digitizer
so that you understand how the technology works and how to get
good results.
People who own MakerBot Desktop 3D Printers tend to see the world
with MakerBot goggles. We’re always thinking of what we can create
next. With the MakerBot Digitizer Desktop 3D Scanner, you will start to
see all the things around you as the inspiration for something new.
We at MakerBot can’t wait to see what you create next.
Let’s remake our world together.
Bre Pettis
CEO, MAKERBOT
6
SAFETY AND COMPLIANCE
FCC DECLARATION
This equipment has been tested and found to comply with the limits for a Class B digital device, pursuant
to Part 15 of the FCC rules. These limits are designed to provide reasonable protection against harmful
interference in a residential installation. This equipment generates, uses and can radiate radio frequency
energy and, if not installed and used in accordance with the instructions, may cause harmful interference
to radio communications. However, there is no guarantee that interference will not occur in a particular
installation. If this equipment does cause harmful interference to radio or television reception, which
can be determined by turning the equipment o and on, the user is encouraged to try to correct the
interference by one or more of the following measures:
Reorient or relocate the receiving antenna.
Increase the separation between the equipment and the receiver.
Connect the equipment into an outlet on a circuit dierent from that to which the receiver is connected.
Consult the dealer or an experienced radio/TV technician for help.
You may also find helpful the following booklet, prepared by the FCC: “How to Identify and Resolve Radio-
TV Interference Problems.” This booklet is available from the U.S. Government Printing Oce, Washington
D.C. 20402.
Changes and Modifications not expressly approved by the manufacturer or registrant of this equipment
can void your authority to operate this equipment under Federal Communications Commissions rules.
MANUFACTURER
MakerBot Industries, LLC
One MetroTech Center
21st Floor
Brooklyn, NY 11201
347.334.6800
Now, before we get going, let’s review some
important safety information.
WELCOME, LET’S GET STARTED 7
SAFETY AND COMPLIANCE
WELCOME, LET’S GET STARTED
This safety alert symbol precedes each safety message in this manual. This symbol
indicates a potential safety hazard that could harm you or others or cause product or
property damage.
Warning: If the MakerBot Digitizer gets wet, immediately disconnect it from power and
allow it to dry completely before attempting to use it again.
Caution: Handle the MakerBot Digitizer with care; it includes sensitive electronic and
optical components that may be damaged if it is bumped or dropped.
Caution: Avoid excessive humidity or temperatures. When the MakerBot Digitizer is in
use, avoid temperatures above 32° C or below 0° C. Do not store the MakerBot Digitizer
in areas where temperatures exceed 32° C or fall below 0° C.
Important safety information is contained in this manual. Please read the following
messages thoroughly before using the MakerBot Digitizer™ Desktop 3D Scanner.
To use the MakerBot Digitizer safely, adhere to the following guidelines:
Do not touch the camera filter or camera lens; oil or smudges may decrease the
MakerBot Digitizer’s performance.
Do not touch the laser housing while the MakerBot Digitizer is powered on.
Do not operate the MakerBot Digitizer if any part of the machine is cracked or
otherwise damaged.
Only use the provided power supply with the MakerBot Digitizer.
Do not use power or USB cables if damaged.
Do not force USB or Power connector into place.
The socket-outlet must be installed near the equipment and must be easily accessible.
8
SAFETY AND COMPLIANCE
The MakerBot Digitizer Desktop 3D Scanner uses two (2) Class 1 lasers when it is scanning.
The Digitizer is reported certified as a Class 1 laser product under the requirements of 21 CFR
(J) 1040.10 and IEC 60825-1 as per Laser Notice 50. Class 1 lasers are safe under all conditions
of normal use. This means the maximum permissible exposure (MPE) is not exceeded when
viewing a laser with the naked eye or with the aid of typical magnifying optics.
Wavelength
Total Laser Power (per laser)
Number of Lasers
Laser Power for Classification
Mode of Operation
Beam Diameter
Divergence
650nm, nominal
<3.5mW
2
<300μ W
CW (continuous wave)
<5mm
1 Radian x <5mRadian
Warning: The laser is never to be operated if the unit is defective or the cover, seal or
output lens is damaged.
Caution: Use of controls or adjustments or performance of procedures other than those
specified herein may result in hazardous radiation exposure.
Laser Safety
Laser Parameters
WELCOME, LET’S GET STARTED 9
SAFETY AND COMPLIANCE
Caution: Do not open the MakerBot Digitizer’s laser modules or attempt to repair them.
Service on your MakerBot Digitizer’s lasers may only be performed by authorized, factory
trained technicians. To report a problem with your MakerBot Digitizer or to arrange for
service, email support@makerbot.com
All maintenance tasks for the MakerBot Digitizer must be performed with the power
turned o.
UNDERSIDE OF THE MAKERBOT DIGITIZER
Service
10
SÉCURITÉ ET RESPECT DES NORMES
DÉCLARATION DE CONFORMITÉ FCC
Cet appareil a été contrôlé et déclaré conforme aux limites relatives aux appareils numériques de
catégorie B, conformément à la section 15 des directives FCC. Ces limites sont conçues pour assurer une
protection raisonnable contre les interférences nuisibles dans une installation résidentielle. Cet appareil
produit, utilise et peut émettre de l’énergie radio-électrique et, s’il n’est pas installé et utiisé conformément
aux instructions, peut causer des interférences nuisibles aux communications radio. Cependant, il n’est
pas garanti qu’il n’y aura aucune interférence pour une installation donnée. Si cet appareil cause des
interférences nuisibles à la reception des signaux de radio ou de télévision, ce qui peut se déterminer en
éteignant et en rallumant l’appareil, il est conseillé à l’utilisateur d’essayer de corriger les interférences à
l’aide d’une ou plusieurs des mesures suivantes:
Réorienter ou repositionner l’antenne de réception.
Augmenter la distance existant entre l’appareil et le récepteur.
Connecter l’appareil à une prise d’un circuit électrique diérent de celui auquel le récepteur
est connecté.
Contacter le revendeur ou un technicien radio/TV qualifié pour toute assistance.
Vous pouvez également trouver utile le fascicule suivant, préparé par la FCC : « Comment identifier et
résoudre les problèmes d’interférence Radio-TV ». Ce fascicule est disponible auprès de l’imprimerie
nationale des Etats-Unis, Washington D.C. 20402.
Les changements et modifications apportés à cet appareil sans l’autorisation expresse du fabricant ou
du déclarant peuvent annuler votre autorisation à utiliser cet appareil aux termes du règlement des la
Commission Fédérale des Communications.
MANUFACTURER
MakerBot Industries, LLC
One MetroTech Center
21st Floor
Brooklyn, NY 11201
347.334.6800
WELCOME, LET’S GET STARTED 11
SÉCURITÉ ET RESPECT DES NORMES
Ce symbole d’avertissement de sécurité précède tout message de sécurité de ce manuel.
Ce symbole indique un risque potentiel pour la sécurité, qui pourrait vous blesser, blesser un
tiers, ou causer des avaries ou des dommages matériels.
Avertissement: Si le MakerBot Digitizer vient à se mouiller, déconnectez-le
immédiatement du courant électrique et laissez-le sécher complètement avant
d’essayer de l’utiliser de nouveau.
Attention: Manipulez le MakerBot Digitizer avec soin; il contient en eet des
composants électroniques et optiques sensibles qui pourraient être endommagés par
une manipulation brutale.
Attention: Evitez une humidité ou des températures excessives. Lorsque le MakerBot
Digitizer est en cours de fonctionnement, évitez les températures supérieures à 32º C ou
inférieures à 0º C. N’entreposez pas le scanner dans des endroits où les températures
dépassent 32º C ou tombent en-dessous de 0º C.
Ce manuel contient des renseignements importants sur la sécurité. Veuillez lire
attentivement les messages suivants avant de faire fonctionner le MakerBot Digitizer.
Pour utiliser le MakerBot Digitizer en toute sécurité, respectez les lignes directrices suivantes:
Ne touchez pas le filtre passe-bande; de la graisse ou des taches peuvent
diminuer les performances du scanner.
Ne touchez pas le boîtier du laser pendant que le scanner est sous tension.
Ne faites pas fonctionner le scanner si une pièce quelconque de l’appareil est
fendue ou endommagée de quelque façon que ce soit.
Utilisez exclusivement l’unité d’alimentation fournie avec le MakerBot Digitizer.
N’utilisez pas les câbles d’alimentation ou les cables USB s’ils sont endommagés.
Ne forcez pas sur les connecteurs d’alimentation ou USB pour les mettre en place.
La prise de courant doit être installée près de l’équipement, et il doit être
facilement accessible.
12
SÉCURITÉ ET RESPECT DES NORMES
Le scanner de bureau 3D MakerBot Digitizer utilise deux (2) lasers de Classe 1 pour l’opération
de numérisation. Les lasers de Classe 1 sont sans danger dans toutes les conditions
d’utilisation normale. Cela signifie que la limite d’exposition admissible n’est pas dépassée
si vous regardez un laser sans protection oculaire ou à l’aide d’un instrument optique
grossissant standard.
Longueur d’onde
Puissance totale du laser (par laser)
Nombre de lasers
Puissance du laser pour Classement
Mode de fonctionnement
Diamètre du faisceau
Divergence
650 nm, nominale
< 3,5 mW
2
< 300 μW
CW (onde entretenue)
< 5 mm
1 Radian x <5mRadian
Avertissement: Le laser ne doit jamais être allumé si l’unité est défectueuse ou si le
couvercle, lopercule ou la lentille de sortie sont endommagés.
Attention: L’utilisation de commandes ou de réglages ou l’exécution de procédures autres
que ceux spécifiés ici peut entraîner une exposition à des rayonnements dangereux.
Sécurité laser
Paramètres du laser
WELCOME, LET’S GET STARTED 13
SÉCURITÉ ET RESPECT DES NORMES
Attention: Ne pas ouvrir les modules laser de la MakerBot Digitizer ou d’essayer de les
réparer. Les services aprèsvente sur les lasers de votre MakerBot Digitizer doivent
être réalisés exclusivement par des techniciens agréés formés dans nos usines.
En outre, la garantie de votre scanner pourraît être annulée si vous le modifiez ou
si vous en enlevez les couvercles protecteurs ou le boîtier. Pour signaler un problème
avec votre scanner ou pour demander une réparation, envoyez un courrier électronique
à support@makerbot.com
Toutes les tâches de maintenance pour le MakerBot Digitizer doivent être eectuées avec la
puissance coupée.
BAS DE MAKERBOT DIGITIZER
Réparations
14
SICHERHEIT UND EINHALTUNG DER RICHTLINIEN
ERKLÄRUNG GEMÄSS DER US-ZULASSUNGSBEHÖRDE FÜR
KOMMUNIKATIONSGERÄTE FCC
Die Prüfung dieses Geräts hat ergeben, dass die Grenzwerte für ein digitales Gerät der Klasse B gemäß
Teil 15 der FCC-Bestimmungen eingehalten werden. Diese Grenzwerte dienen dem angemessenen Schutz
gegen Störungen und Schäden beim Gebrauch in Wohnräumen. Dieses Gerät erzeugt und verwendet
Hochfrequenzenergie und strahlt diese auch aus; wenn es nicht ordnungsgemäß und in Übereinstimmung
mit den Sicherheitshinweisen installiert und benützt wird, kann es Störungen bei Radio-, Funk- und
Fernsehgeräten erzeugen. Es gibt jedoch keine Garantie, dass eine Störung bei bestimmten Installationen
ausgeschlossen werden kann. Wenn dieses Gerät Störungen beim Empfang von Radio oder Fernsehen
erzeugt, was durch Aus- und Einschalten des Geräts festgestellt werden kann, kann der Benützer diese
Störung durch eine oder mehrere der folgenden Maßnahmen zu beheben versuchen:
Richten Sie die Empfangsantenne neu aus oder versetzen Sie sie
Vergrößern Sie den Abstand zwischen Gerät und Empfänger.
Schließen Sie das Gerät an den Ausgang eines vom Empfangsgerät separatem Schaltkreises an.
Kontaktieren Sie den Händler oder einen erfahrenen Radio/TV - Techniker.
Unter Umständen ist Ihnen auch das folgende, vom FCC erstellte Handbuch nützlich: “How to Identify
and Resolve Radio-TV Interference Problems” (Probleme bei Radio/TV-Störungen identifizieren und
beheben). Dieses Handbuch ist beim U.S. Government Printing Oce, Washington D.C. 20402, erhältlich.
Veränderungen und Modifizierungen, die nicht ausdrücklich vom Hersteller oder vom Registranten dieses
Gerätes genehmigt sind, können nach den Richtlinien der Federal Communications Commission Ihr Recht
erlöschen lassen, dieses Gerät zu benützen.
MANUFACTURER
MakerBot Industries, LLC
One MetroTech Center
21st Floor
Brooklyn, NY 11201
347.334.6800
WELCOME, LET’S GET STARTED 15
SICHERHEIT UND EINHALTUNG DER RICHTLINIEN
WELCOME, LET’S GET STARTED
Dieses Warnhinweis-Symbol steht vor jedem Sicherheitshinweis in dieser
Bedienungsanleitung. Dieses Symbol weist auf ein potentielles Sicherheitsrisiko hin, dass
Ihnen und anderen Schaden zufügen oder Produkt- und Sachschaden verursachen könnte.
Warnung: Sollte der MakerBot Digitizer mit Flüssigkeit in Berührung gelangen, trennen
Sie ihn sofort von der Stromzufuhr und lassen Sie ihn vollständig trocknen, bevor Sie
erneut versuchen, ihn in Betrieb zu nehmen.
Vorsicht: Handhaben Sie den MakerBot Digitizer sorgfältig; er beinhaltet empfindliche
elektronische und optische Komponenten, die bei nachlässiger Handhabung
beschädigt werden könnten.
Vorsicht: Vermeiden Sie extreme Temperaturen oder Feuchtigkeit. Wenn der MakerBot
Digitizer benützt wird, vermeiden Sie Temperaturen über 32° C oder unter 0° C.
Bewahren Sie den MakerBot Digitizer nicht an Orten mit Temperaturen über 32° C
oder unter 0° C auf.
Diese Bedienungsanleitung enthält wichtige Sicherheitshinweise. Bitte lesen Sie
die folgenden Hinweise aufmerksam durch, bevor Sie den MakerBotDigitizer in
Betrieb nehmen.
Um den MakerBot Digitizer sicher zu benützen, beachten Sie die folgenden Richtlinien:
Berühren Sie den Bandpassfilter nicht; Öl oder Flecken können die Leistung des
MakerBot Digitizers beinträchtigen.
Berühren Sie das Lasergehäuse nicht, während der MakerBot Digitizer
angeschlossen ist.
Verwenden Sie den MakerBot Digitizer nicht, wenn ein Bestandteil des Geräts
gebrochen oder auf andere Weise beschädigt ist.
Benützen Sie ausschließlich das mitgelieferte Netzgerät für den MakerBot Digitizer.
Verwenden Sie keine beschädigten Strom- oder USB-Kabel.
Wenden Sie beim Anstecken der USB- oder Stromverbindung keine Gewalt an.
Die Steckdose muss in der Nähe der Geräte installiert werden, und es muss leicht
zugänglich sein.
16
SICHERHEIT UND EINHALTUNG DER RICHTLINIEN
Der MakerBot Digitizer Desktop 3D Scanner verwendet zwei (2) Laser der Klasse 1 im Scan-
Prozess. Laser der Klasse 1 sind unter Bedingungen des normalen Gebrauchs sicher. Das
bedeutet, solange die maximal zulässige Bestrahlung (MZB) nicht überschritten wird, wenn
man das bloße oder mit üblichen optischen Vergrößerungsbehelfen versehene Auge dem
Strahl aussetzt.
Wellenlänge
Laser-Gesamtleistung (pro Laser)
Anzahl der Laser
Laser-Leistung zur Klassifizierung
Betriebsmodus
Strahl-Durchmesser
Divergenz
650nm, nominal
<3.5mW
2
<300μ W
CW (Dauerstrich)
<5mm
1 Radian x <5mRadian
Warnung: Der Laser darf unter keinen Umständen verwendet werden, wenn das Gerät
defekt oder die Abdeckung, der Verschluss oder die Abschlusslinse beschädigt sind.
Vorsicht: Die Verwendung von Steuerelementen, Einstellungen oder die Durchführung
anderer Schritte als die hier angegebenen können zu gefährlicher Strahlung führen.
Laser-Sicherheit
Laser-Parameter
WELCOME, LET’S GET STARTED 17
SICHERHEIT UND EINHALTUNG DER RICHTLINIEN
Vorsicht: Önen Sie den MakerBot Digitalisierer-Laser-Module nicht und versuchen Sie
nicht, ihnen zu reparieren. Service an Ihrem MakerBot Digitalisierer-Laser-Module darf
nur von autorisierten, im Werk ausgebildeten Technikern ausgeführt werden. Darüber
hinaus kann jegliche Manipulation an Ihrem MakerBot Digitizer oder das Entfernen von
Schutzabdeckungen oder des Gehäuses die Garantie erlöschen lassen Um ein Problem
mit Ihrem MakerBot Digitizer zu melden oder um einen Servicetermin zu vereinbaren,
schreiben Sie an support@makerbot.com
Alle Wartungsarbeiten für den MakerBot Digitizer muss durchgeführt mit das Gerät
ausgeschaltet werden.
BODEN MAKERBOT DIGITIZER
Service
18
ABOUT THE MAKERBOT DIGITIZER
The MakerBot Digitizer Desktop 3D Scanner can scan a real world object and
produce a ready-to-print 3D model in as little as 12 minutes, with no post-processing
or cleanup required.
All MakerBot Digitizer scans are created using MakerBot’s easy-to-use MakerWare for
Digitizer soware. MakerWare for Digitizer creates industry standard stereolithography (STL)
files which can be imported into or modified with most 3D modeling soware.
Before you start using the MakerBot Digitizer, let us tell you a little more about how it works
and what its capabilities are.
FRONT VIEW BACK VIEW
Turntable Right Laser Adjustment Screws
Camera Filter Le Laser Adjustment Screws
Camera USB Port
Le Laser Aperture Power Input Port
Right Laser Aperture Power Switch
1 6
2 7
3 8
4 9
5 10
Note: For the most complete and up-to-date tips on getting the most out of your
MakerBot Digitizer, go to the Learn More section at makerbot.com/digitizer
MakerBot Digitizer Diagrams
i
WELCOME, LET’S GET STARTED 19
ABOUT THE MAKERBOT DIGITIZER
FRONT VIEW
BACK VIEW
1
5
2
4
6
7
8
9 10
3
20
ABOUT THE MAKERBOT DIGITIZER
The MakerBot Digitizer Desktop 3D Scanner creates a digital 3D model of a physical object
by taking a rapid sequence of pictures as the object rotates on the MakerBot Digitizer
turntable. Here is how it happens:
1. Two lasers, mounted on the le and right corners of the MakerBot Digitizer, create laser
lines that outline the profile of the object, while a camera takes a series of photographs.
2. MakerWare for Digitizer soware takes the photographs of the laser lines and combines
them to create a point cloud.
3. If a completed scan still needs improvement, MakerWare for Digitizer can rescan
the object from a dierent angle and combine the two sets of scan data using
MakerBot MultiScan™ Technology.
Your final scan will be a manifold 3D mesh that can be printed on your MakerBot,
shared on Thingiverse.com, or modified in almost any 3D modeling soware.
i
Note: The MakerBot Digitizer has a dimensional accuracy of up to 2 mm.
How it Works
/