Page is loading ...

Strain Gauge Transmitter
REF NO: mSGT/om/101
Issue NO: 00
User’s Manual Page 1 of 21
User’s Manual
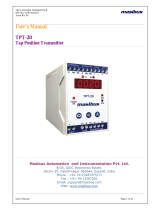
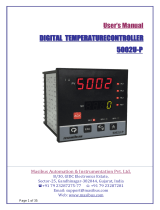
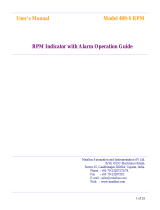
SGT-18 Strain Gauge Transmitter
Masibus Automation and Instrumentation Pvt. Ltd.
B-30, GIDC Electronics Estate,
Sector-25, Gandhinagar-382044, Gujarat, India
Phone : +91-79-23287275-77
Fax : +91-79-23287281
Email: [email protected]
Web: www.masibus.com

Strain Gauge Transmitter
REF NO: mSGT/om/101
Issue NO: 00
User’s Manual Page 2 of 21
Contents
1. Introduction........................................................................................................................... 4
1.1 Ordering Code .................................................................................................................. 4
2. Installation ............................................................................................................................ 5
2.1 Environment: ..................................................................................................................... 5
2.2 Mounting: .......................................................................................................................... 5
2.3 Installation Dimensions: .................................................................................................... 5
2.4 Removal: ........................................................................................................................... 5
3. Front Panel ........................................................................................................................... 6
4. Dimensions ........................................................................................................................... 7
5. Terminal Position Detail: ...................................................................................................... 7
6. Menu Function List ............................................................................................................... 8
7. Parameter Description .......................................................................................................... 9
8. Menu Guideline .................................................................................................................. 10
8.1 Program Menu ................................................................................................................ 10
8.2 Configuration Menu ......................................................................................................... 10
8.3 Calibration Menu ............................................................................................................. 11
8.4 Software Version ............................................................................................................. 11
9. Menu Layout ....................................................................................................................... 12
10. Modbus Detail: ................................................................................................................... 14
10.1 Configuration parameter Read – write. ........................................................................ 14
10.2 Configuration parameter Read: .................................................................................... 15
11. Specifications ..................................................................................................................... 17
12. Relay Logic: ........................................................................................................................ 19
13. Appendix: ........................................................................................................................... 20
13.1 Internal Jumper Setting For Retransmission Output .................................................... 20
14. Troubleshooting: ................................................................................................................. 21
15. Load connection ................................................................................................................. 21

Strain Gauge Transmitter
REF NO: mSGT/om/101
Issue NO: 00
User’s Manual Page 3 of 21
SAFETY PRECAUTIONS
To ensure that the device can be operated safely and all functions can be used, please read these
instructions carefully.
Caution: Never carry out work when the Power is turned on, this is dangerous.
Installation and startup must be carried out by qualified personnel only. The relevant country-specific
regulations (e.g., VDE, DIN) must also be observed.
Before startup it is particularly important to ensure:
Terminal wiring:
Check that all cables are correctly connected according to the connection diagram
The mains have been connected correctly and protection is provided against electric shock.
The device can be switched off outside the power supply according to EN 60950 regulations
(e.g., by the line protection on the primary side)
All supply lines have sufficient fuse protection and are of correct size.
All output cables are of correct size for the maximum device output current or have separate fuse
protection.
Sufficient convection is ensured.
After installation the terminal area must be covered to provide sufficient protection against
unauthorized access to live parts.
This is ensured by installing the device in the control cabinet or distributor box.

Strain Gauge Transmitter
REF NO: mSGT/om/101
Issue NO: 00
User’s Manual Page 4 of 21
1. Introduction
This is a micro-controller based Strain Gauge Transmitter which is used with strain gauges, load cells
and resistance measuring bridges. This instrument provides isolation at 4 levels:
a) Between input and Power supply
b) Between output and Power supply.
c) Between input and output.
d) Output to Output
1.1 Ordering Code
SGT-18
Model
Load Excitation
Voltage
Auxiliary Power
Supply
Retransmission
o/p type
Relay o/p
Communication
SGT-18
X
XX
X
X
X
1
5 VDC
U1
85-265 VAC/
100-300 VDC
1
4-20mA
N
None
N
None
2
10 VDC
U2
18-36 VDC
2
0-20mA
Y
Yes
Y
RS485
3
12 VDC
3
1-5VDC
4
15 VDC
4
0-5VDC
S
Special
5
0-10VDC

Strain Gauge Transmitter
REF NO: mSGT/om/101
Issue NO: 00
User’s Manual Page 5 of 21
2. Installation
2.1 Environment:
Caution: Do not install the unit where it is subjected to continuous vibration.
Do not subject the unit to physical impact.
2.2 Mounting:
The unit can be snapped onto all DIN rails according to EN 60715. The device must be mounted
horizontally (input terminal blocks facing downwards)
2.3 Installation Dimensions:
To ensure sufficient convection, a minimum spacing of 3 cm is required.
1) Place the module with the DIN rail guide way on the bottom edge of the DIN rail and then snap it
downwards.
2) The housing is mounted on the DIN rail by swiveling it into place.
3) As air vents are provided on the top and bottom part of the unit, the (horizontal) mounting
arrangement allows good vertical air circulation.
Vertical mounting arrangement of multiple units must be avoided.
2.4 Removal:
Release the snap-on catch using a screwdriver and then detach the module from the bottom edge of
the DIN Rail.

Strain Gauge Transmitter
REF NO: mSGT/om/101
Issue NO: 00
User’s Manual Page 6 of 21
3. Front Panel
ENTER / SCROLL Key – This key is used to start menu, scroll through the menu and save values.
SEL / SHIFT Key – This key is used to select the menu options, for shifting the digit of the selected
parameters and for Gross value display.
ESC / INC/ ACKNOWLEDGEMENT Key – This key is used to revert back to the parent menu from the sub
menu levels and Increment the selected digit. This key is also used as Acknowledgement key for
Alarm/trip type relay.
ENT+SHIFT Key – This simultaneous keys are used to check the mV feed in Unit.
ENT+INC Key – This simultaneous keys are used for TARE the weight.

Strain Gauge Transmitter
REF NO: mSGT/om/101
Issue NO: 00
User’s Manual Page 7 of 21
4. Dimensions
5. Terminal Position Detail:

Strain Gauge Transmitter
REF NO: mSGT/om/101
Issue NO: 00
User’s Manual Page 8 of 21
6. Menu Function List
PROG
ST-1
Set point value for relay-1
HY-1
0 TO 100
ST-2
Set point value for relay-2
HY-2
0 TO 100
* Output will not be scaled but only limit to this configured % of output.
** Retransmission Output (0% to 100%) will be scaled according to value of O/P Zero and O/P Span.
CONF
INP
IPTY
mV(-10.00 to 99.99)
Zero
Input Zero Value
Span
Input Span Value
DP
0 - 3
OFST
For Offset Value
INLO
mV(-10.00 to 99.99)
INHI – INLO >5.00 mV
INHI
OUT
rtr
Rt.op
Retransmission Output Mapping: Net/Gross
OPTY
4 –20mA, 0 –20mA, 1-5V, 0-5V, 0-10VDC
Op Z
**Output for scaling
OP S
**Output for scaling
OPLO
* % of Output
(O/P Low limit will be limited to this configured 0-25 % of O/P Span)
OPHI
* % of output
(O/P Hi limit will be limited to this configured 75-100 % of O/P Span)
OPSC
UPSC/DNSC
DIR
DIR/REV
rely
RLNO
1, 2
OPSE
UP,dw
LOGC
HI,low
C AL
ALARM,TRIP,OPEN
LTCH
YES,NO
RDLY
Relay Delay (0-100 Sec)
COM
SRNO
1-247
BAUD
4800,9600,19200
ADV
FILT
0 - 60 Sec
FSET
Give Default password for factory settings
PASS
Change Password
SQRT
YES/NO
TOUT
10-300 SEC
CAL
INP
SPAN
ZERO
OUT
OPNO
1
ZERO
SPAN
VER
1

Strain Gauge Transmitter
REF NO: mSGT/om/101
Issue NO: 00
User’s Manual Page 9 of 21
7. Parameter Description
CONF
Configuration Mode
CALI
Calibration Mode
INP
Input type Parameter Settings
OUT
Output type Parameter Settings
ADV
Advance Parameter Settings
VER
Software Version
IPTY
Input Type
Zero
Input Zero
Span
Input Span
DP
Decimal Point
OFST
Offset
INLO
I/P LO
INHI
I/P HI
Rt.op
Retransmission Output Mapping
net
Net Value
Gros
Gross Value
OPTY
Output Type
OP Z
**Output for scaling
OP S
**Output for scaling
OPLO
* % of the O/P Zero range
OPHI
* % of the O/P Span range
OPSC
Up/down Scale one sensor open
DIR
Forward/Reverse Output
FILT
Digital Filter
FSET
Factory Setting
PASS
Password
SQRT
Square root
TOUT
Time out From the Menu (10 to 300 Sec)
OVER
Input Signal above Span
UNDR
Input Signal below Zero
OPEN
Sensor Burned
WAIT
Calibration In Process
Ferr
Factory setting Error
rely
Relay
RLNO
Relay number
OPSE
Open sensor
LOGC
Relay control Logic
C AL
Configure alarm
LTCH
Latch
RDLY
Relay Delay
rtr
Retransmission
SRNO
Serial No
BAUD
Baud Rate
ST-1
Set point for relay one
HY-1
Hysteresis for Relay one
ST-2
Set point for Relay two
HY-2
Hysteresis for Relay two

Strain Gauge Transmitter
REF NO: mSGT/om/101
Issue NO: 00
User’s Manual Page 10 of 21
8. Menu Guideline
8.1 Program Menu
Set point for relay-1.
Hysteresis for relay-1.(0-100)
Set point for relay -2.
Hysteresis for relay-2.(0-100)
8.2 Configuration Menu
8.2.1 Input Selection
Input Type Selection
Input Zero Setting
Input Span Setting
Decimal Point Setting
Offset Setting
8.2.2 Output Selection
8.2.2.1 Retransmission:-
Retransmission Output Mapping
Output Type Selection
(0 –20 mA, 4-20 mA, 0-5 V, 1-5 V, 0 – 10 V that will be provided as factory setting)
Output Zero Setting for scaling.
Output Span Setting for scaling.
Output Low Setting (Minimum 0.0 – 25.0 %)
Output High Setting (Maximum 75.0 - 100.0 %)
Output Upscale / Downscale Setting for OPEN input
Output direction setting (Direct / Reverse)
8.2.2.2 Relay:-
Relay No. Selection for setting purpose (1 or 2)
Relay Upscale / Downscale Setting for OPEN input
Selection for Operating relay above (high) or below (low) set point.
Selection of relay type i.e. Alarm or Trip or Open.
Latch selection whether “Latch yes” or “No Latch” only if alarm type relay is selected.
Relay Delay is time to operate relay (In Seconds 0-100).
8.2.2.3 Communication:-
Sr. No. Selection for setting purpose (1 to 247)
Baud Rate Selection for Setting Purpose (4800, 9600, 19200)

Strain Gauge Transmitter
REF NO: mSGT/om/101
Issue NO: 00
User’s Manual Page 11 of 21
8.2.3 Advance Options
Digital filtering (Range: 0 to 60.0 second)
Factory Setting- To retrieve the factory setting.
Password Setting
Square Root (No / YES, for Linear inputs only)
For Square Root, Output will be come as per
PV = SQRT[ { (input reading – config. IP Zero) / (config. IP Span – Config. IP Zero) } *
Config. OP Span ] + Config. OP Zero
Time Setting for Come back to RUN mode on no key operation (Range: 10 to 300
second)
8.3 Calibration Menu
Input Calibration
Input Zero Calibration
Input Span Calibration
Output Calibration
Output Channel Selection for calibration
Output Zero Calibration
Output Span Calibration
8.4 Software Version
Version Number of the Software

Strain Gauge Transmitter
REF NO: mSGT/om/101
Issue NO: 00
User’s Manual Page 12 of 21
9. Menu Layout

Strain Gauge Transmitter
REF NO: mSGT/om/101
Issue NO: 00
User’s Manual Page 13 of 21

Strain Gauge Transmitter
REF NO: mSGT/om/101
Issue NO: 00
User’s Manual Page 14 of 21
10. Modbus Detail:
The table show Analog data to be transmitted and its sequence.
10.1 Configuration parameter Read – write.
Sr. no
Analog Parameters
Absolute
Address
Type of
Access
Parameter
Type
Values
Applicable
1.
Set point for relay1
40001
Read/write
Int
2.
Hysteresis for relay1
40002
Read/write
Int
0 - 100
3.
Set point for relay2
40003
Read/write
Int
4.
Hysteresis for relay2
40004
Read/write
Int
0 - 100
5.
I/P type
40005
Read/write
Int
10
6.
I/P zero
40006
Read/write
Int
-1999 to 9999
7.
I/P span
40007
Read/write
Int
-1999 to 9999
8.
Decimal point
40008
Read/write
Int
0 - 3
9.
Offset
40009
Read/write
Int
As per Input
Range
10.
I/P Lo mV
40010
Read/write
Int
-1000 to 9999
11.
I/P Hi mV
40011
Read/write
Int
-1000 to 9999
12.
O/P type1
40012
Read/write
Int
1 To 5
13.
O/P Zero* of O/P 1 for scaling
40013
Read/write
Int
As per Input
Range
14.
O/P Span* of O/P 1 for scaling
40014
Read/write
Int
As per Input
Range
15.
O/P Lo (% of O/P Zero range) for
O/P1
40015
Read/write
Int
0-250
16.
O/P High (% of O/P Span range)
for O/P1
40016
Read/write
Int
750-1000
17.
Open sensor for O/P1
40017
Read/write
Int
1 To 2
18.
Direction for O/P1
40018
Read/write
Int
3 To 4
19.
Retransmission Output Mapping
(Net Value/Gross Value)
40019
Read/write
Int
1 To 2
20.
Relay Delay for Relay-1 (Sec)
40020
Read/write
Int
0-100
21.
Relay Delay for Relay-2 (Sec)
40021
Read/write
Int
0-100
22.
DI Input (Tare)
40022
Read/write
Int
0-1
23.
Reserved
40023
Read/write
Int
0
24.
Reserved
40024
Read/write
Int
0
25.
Reserved
40025
Read/write
Int
0
26.
Open sensor for relay1
40026
Read/write
Int
1 To 2
27.
Relay control logic for relay1
40027
Read/write
Int
1 To 2
28.
Configure alarm for relay1.
40028
Read/write
Int
1 To 3
29.
Latch for relay1
40029
Read/write
Int
1 To 2
30.
Open sensor for relay2
40030
Read/write
Int
1 To 2
31.
Relay control logic for relay2
40031
Read/write
Int
1 To 2
32.
Configure alarm for relay2
40032
Read/write
Int
1 To 3
33.
Latch for relay2
40033
Read/write
Int
1 To 2
34.
Slave ID
40034
Read/write
Int
1 - 247
35.
Baud rate
40035
Read/write
Int
1 To 3
36.
Digital filter
40036
Read/write
Int
0 - 60
37.
Password
40037
Read/write
Int
0 - 9999
38.
Square root
40038
Read/write
Int
1 - 2
39.
Time out from the menu
40039
Read/write
Int
10 - 300
*Retransmission Output (0% to 100%) will be scaled according to value of O/P Zero and O/P Span.

Strain Gauge Transmitter
REF NO: mSGT/om/101
Issue NO: 00
User’s Manual Page 15 of 21
Note: The values for above configuration parameter are as follows:
a) I/P Type:
mV - 10
b) Ret. O/P:
Net - 1
Gross - 2
c) O/P type:
0-20 mA - 1
4-20 mA - 2
0-5 V - 3
1-5 V - 4
0-10 V - 5
d) Open sensor for O/P:
Up - 1
Down - 2
e) Direction for O/P:
Direct - 3
Reverse - 4
f) Open sensor for relay:
Up - 1
Down - 2
g) Relay control logic:
Hi - 1
Low - 2
h) Configure alarm for relay:
Alarm - 1
Trip - 2
Open - 3
i) Latch for relay:
Yes - 1
No - 2
j) Baud rate:
4800 - 1
9600 - 2
19200 - 3
k) Square root:
No - 1
Yes - 2
10.2 Configuration parameter Read:
Sr. no
Analog
Parameters
Absolute
Address
Type of Access
Parameter
Type
1
Net value
30001
Read
Int
2
Gross value
30002
Read
Int
3
mV value
30003
Read
Int
Gross Value = I/P Feed mV *
Net Value = Gross Value- Tare Value
I/P Span – I/P Zero
InHI – InLO

Strain Gauge Transmitter
REF NO: mSGT/om/101
Issue NO: 00
User’s Manual Page 16 of 21
Example: If Input Range is 0-80mV, then InLO will be 0 and InHI will be 80. If Scaled Display Range is 0-40Kg.,
then I/P Zero will be 0 and I/P Span will be 40.
If you feed input of 40mV then the Gross Value is as below:
Gross Value = 40*
Gross Value = 40*0.5
Gross Value = 20
Offset Parameter is used to nullify the dead weight i.e. base plate weight to have actual measurement of
material weight measurement. Once user enters the indicated bare weight into offset parameter, device will
automatically nullify the weight of bare plate for actual measurement.
The above figure shows the example of offset parameter. For example, at first instance, base plate weight (As
shown in above figure) is 4.65Kg, that will be shown on PV Display of device. One can nullify this weight by
adding value of 4.65 in offset parameter. After adding this dead weight value, PV will now show the value 0
which means that now device is ready to measure actual weight of material.
Hence by use of offset parameter, user can measure the actual weight by avoiding dead weight value of base
plate.
Note:
a) If SGT-18 process value is out of limit for particular I/P type then SGT-18 will show “Open” on display
but it will send ‘32767’ to Modbus
b) The Modbus device ID no (Sr.no.) of SGT-18 Indicators must be within 001 to 247.
c) Before starting the communication, match the Baud rate and Modbus device ID (Sr. no.) of Master and
Slave devices.
d) To clear the Tare Value manually, Enter 18 in FSET Menu.
40-0
80-0

Strain Gauge Transmitter
REF NO: mSGT/om/101
Issue NO: 00
User’s Manual Page 17 of 21
11. Specifications
Input
Input Type
-10.00 to 99.99mV field settable.
Display Range
-1999 to 9999
Accuracy
±0.1% of FS ±1 Digit
ADC Resolution
17 bits
Load Cell Excitation Voltage
5 to 15V DC factory set @ 100mA
Sampling Time
<75ms
Digital Input
Tare Adjustment
NMRR
>50 dB
CMRR
>120 dB
Tempo-Co
< 100ppm/°C
Max Voltage
20VDC
Display & Keys
Process Value
0.3" Four-digit Seven segment, RED LED
Status Indication
Power, RL1, RL2, Tx, Rx
Keys
3 Keys for configuration, calibration and operation
Display Parameter
Gross or NET value field settable
Output
Relay (Optional)
Alarm output
2 nos
Type
Single change over (C, NO, NC)
Rating
2A @ 230VAC / 30VDC
Retransmission
Output Signal
4-20mA/ 0-20mA/1-5VDC/ 0-5VDC/0-10V DC (any one - Factory Set)
Load Resistance
For Current o/p: < 750Ω max
For Voltage o/p: > 4KΩ min
Output Accuracy
±0.25% of span
Temp-co
< 150ppm/°C
Communication (Optional)
Interface
RS485 (2 Wire)
Protocol
Modbus-RTU
Baud rate
4800, 9600, 19200
Power Supply
Voltage
85 - 265V AC, 50/60 Hz / 100-300VDC
optional 18-36 V DC
Power consumption
<10VA
Isolation (Withstanding voltage)
Between primary terminals* and secondary terminals**: At least 1500 V AC for 1 minute
Between primary terminals*: At least 1500 V AC for 1 minute
Between secondary terminals**: At least 1500 V AC for 1 minute
* Primary terminals indicate power terminals and Aux Supply terminals.
** Secondary terminals indicate I/O terminals and Communication O/P.
Insulation resistance: 20MΩ or more at 500 V DC between power terminals and grounding
Terminal

Strain Gauge Transmitter
REF NO: mSGT/om/101
Issue NO: 00
User’s Manual Page 18 of 21
Physical
Dimension in mm
75(H) x 55(W) x 110(D)
Mounting
Din Rail
Weight Approx.
< 250 grams
Enclosure material
ABS
Enclosure Protection
IP20
Terminal Cable Size
2.5mm2
Environmental
Ambient temperature
0 to 55°C
Storage Temperature
0 to 80°C
Humidity
20% to 95% RH (Non-Condensing)
Connection Diagram

Strain Gauge Transmitter
REF NO: mSGT/om/101
Issue NO: 00
User’s Manual Page 19 of 21
12. Relay Logic:
Table 1
Note: If open type relay is selected then relay and LED will be ON when OPEN condition, while it will
remain off if not in OPEN condition.
Without acknowledge key pressed
CONDITION
ALARM
LATCH/TRIP
RELAY/LED
NORMAL
ABNORMAL
UP
DOWN
ACK IN
ABNORMAL
CONDITION
NORMAL
ACK IN NORMAL
CONDITION
HIGH
ALARM LED
LATCH YES
LED
OFF
FLASH
FLASH
OFF
-
STEADY
OFF
RELAY
OFF
ON
ON
OFF
-
OFF
OFF
ALARM LED
LATCH NO
LED
OFF
FLASH
FLASH
OFF
-
OFF
OFF
RELAY
OFF
ON
ON
OFF
-
OFF
OFF
TRIP
LED
OFF
FLASH
OFF
OFF
-
STEADY
OFF
RELAY
OFF
ON
OFF
OFF
-
ON
OFF
LOW
ALARM LED
LATCH YES
LED
OFF
FLASH
OFF
FLASH
-
STEADY
OFF
RELAY
OFF
ON
OFF
ON
-
OFF
OFF
ALARM LED
LATCH NO
LED
OFF
FLASH
OFF
FLASH
-
OFF
OFF
RELAY
OFF
ON
OFF
ON
-
OFF
OFF
TRIP
LED
OFF
FLASH
OFF
OFF
-
STEADY
OFF
RELAY
OFF
ON
OFF
OFF
-
ON
OFF
With acknowledge key pressed
CONDITION
ALARM
LATCH/TRIP
RELAY/LED
NORMAL
ABNORMAL
UP
DOWN
ACK IN
ABNORMAL
CONDITION
NORMAL
ACK IN NORMAL
CONDITION
HIGH
ALARM LED
LATCH YES
LED
OFF
FLASH
FLASH
OFF
STEADY
STEADY
OFF
RELAY
OFF
ON
ON
OFF
OFF
OFF
OFF
ALARM LED
LATCH NO
LED
OFF
FLASH
FLASH
OFF
STEADY
OFF
OFF
RELAY
OFF
ON
ON
OFF
OFF
OFF
OFF
TRIP
LED
OFF
FLASH
OFF
OFF
STEADY
STEADY
OFF
RELAY
OFF
ON
OFF
OFF
ON
ON
OFF
LOW
ALARM LED
LATCH YES
LED
OFF
FLASH
OFF
FLASH
STEADY
STEADY
OFF
RELAY
OFF
ON
OFF
ON
OFF
OFF
OFF
ALARM LED
LATCH NO
LED
OFF
FLASH
OFF
FLASH
STEADY
OFF
OFF
RELAY
OFF
ON
OFF
ON
OFF
OFF
OFF
TRIP
LED
OFF
FLASH
OFF
OFF
STEADY
STEADY
OFF
RELAY
OFF
ON
OFF
OFF
ON
ON
OFF

Strain Gauge Transmitter
REF NO: mSGT/om/101
Issue NO: 00
User’s Manual Page 20 of 21
13. Appendix:
13.1 Internal Jumper Setting For Retransmission Output
For retransmission output voltage or current, connect jumper as shown above on back plate PCB.
Static discharge will cause damage to equipment. Always ground yourself with wrist grounding strap
when handling electronics to prevent static dis-charge.
/