Page is loading ...

by
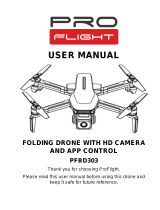
AGE: 14+

www.PyleUSA.com
1
12. HEADLESS MODE
SHORT PRESS
ONE KEY RETURN
LONG PRESS
2. POWER ON/OFF
4. 360° FLIP
6. RIGHT STICK
FORWARD/BACKWARD/
LEFT AND RIGHT SIDE FLYING
8. FORWARD/BACKWARD TRIM
10. LEFT/ RIGHT FLY TRIM
GYRO CALIBRATE
FLIGHT PATH
ALTITUDE HOLD
SHOW / HIDE SETUP MENU
CAMERA INVERSION
3D VIEW
HEADLESS MODE
SHOW/HIDE CONTROL
INTERFACE
360° FLIP
3. HIGH/MEDIUM/LOW SPEED
13.ONE KEY TAKEOFF/LANDING
1. PHOTO/VIDEO
5. LEFT STICK
ASCEND/DESCEND/
TURN LEFT/TURN RIGHT
9. TURN LEFT/RIGHT TRIM
11. EMERGENCY STOP
7.UNLOCK
SPEED CONTROL:
30%60%100%
RETURN
VOICE CONTROL
TAKE PHOTO
SHOOT VIDEO
PHOTO&VIDEO PLAYBACK
GRAVITY SENSOR MODE
LEFT AND RIGHT SIDE FLYING/
FORWARD/BACKWARD
FORWARD/BACKWARD
FINETUNE
ONE KEY LANDING
LEFT/RIGHT SIDE FLYING
FINETUNE
STOP RAPIDLY
THROTTLE CONTROL
LEFT/RIGHT TURN
LEFT/RIGHT TURN
FINETUNE
UNLOCK
Drone Remote control USB Charger
Li-Polymer
battery
Crash guard Main blade
SD card &
Card Reader
(Sold separatly)
PARTS
All photos here are for reference only. Specications are subject to physical product.
4-AXIS AEROCRAFT
CONTROL INTERFACE

www.PyleUSA.com
2
FUNCTION KEYS & NAME DESCRIPTION
WIFI APP INSTRUCTIONS
Only for WIFI featured version:
1. SOFTWARE DOWNLOAD AND INSTALLATION:
2. INSTRUCTIONS:
Open the power switch of this aircraft, and then access “SETTING” in the mobile,
open the “WIFI”and nd the “ WiFiUFO” which corresponds to GX-FPV for
connecting. When the link is successfully connected, please exit from the Setting
Option. Open the same software “GX-FPV” in the mobile and then click the icon
“PLAY” to access into the control interface to make real-time recording.
(Please keep away from other WiFi signals as far as possible when ying.)
Apple Store search GX-FPV
(Please scan this QR code to install
this software).
Google play search GX-FPV
(Please scan this QR code to install
this software).
Adjust the drones ying speed in all directions.
High/medium/low
speed
Serial
Number
Function keys /
Names
Function / Eect
360° Flip
This button will cause the drone to do a ip in the air.
Power ON/OFF
Left stick
Right stick
Remote Control POWER ON/OFF switch
Pressing up will move the drone higher, pressing down will move it lower, left will spin it in
place to the left, and right will spin it in place to the right.
Pressing forward will move the drone forward, pressing back will move it backwards, left will
move it to the left, and right will move it to the right.
This button will start the motor, after pressing it you will be able to take o and y/control
the drone.
Headless mode/
One key returen
Short press into Headless Mode ; Long press about 3 seconds into One key return function.
Once you hit the unlock button and start the motor, pressing this button will lift the drone up into
the air and hover there, if you press it again it will slowly drop down and land on the ground.
One key take-o/
Landing
Turn left/right Trim
If the drone is turning left or right while hovering without any operation, press the opposite trim
left/right turn button until it stays in place.
Forward/backward
trim
Left/ right y trim
If the vehicle move left (right) without operation,press right (left) trim button correspondingly.
If the drone is drifting forward or backward while hovering without any operation, press the opposite
trim forward/backward button until it stays in place.
Short press to take photo ; long press 3 seconds to take video , short press again stop taking video.
Photo/Video
Unlock
1
2
3
4
5
6
7
8
9
10
11
12
13
Pressing this will slow down the motor and the drone will drop quickly.
Emergency stop
If the drone is drifting left or right while hovering without any operation, press the opposite
trim left/right movement button until it stays in place.

www.PyleUSA.com
3
Fig.A Fig.B
4“AA”Batteries(Not Included)
Fig.1 Fig.2 Fig.3
LITHIUM BATTERY CHARGING INSTRUCTION
DRONE POWER SWITCH INTRODUCTIONS
REMOTE CONTROL BATTERY INSTALLATION
1. Open the battery cover of drone.,Take out lithium battery of drone from battery
case.(Fig.1)
2. Plug the USB charger into the power supply, and connect charger cord socket
with lithium battery socket. When charging, the USB LED light is o ; when the
charger LED light turns red again , charging is complete. Charging time is
approximately 150 minutes.
3. Connect the battery plug with the circuit board plug after charging. Please pay
attention to the correct polarity. (Fig.3)
4. Close battery cover of drone.
Attention:
1. Make sure the USB Charger ts properly into the USB port that is being used for
charging. If the charger is not inserting easily into the port, do NOT forcefully
insert the charger, as it could cause damage to the charger or battery.
2. The charging plug will overheat if overcharged for long periods of time. Do not
leave the battery on the charger for longer than 3 hours as it may cause damage
to the battery.
3. Do not leave the battery inside the drone when charging.
4. Do not use any chargers other than the one supplied, as it could cause damage
to the battery.
5. Wait 15-20 minutes after ying the drone before recharging the battery, to
prevent the battery from overheating.
6. Do not leave the battery near any hot surfaces or in direct sunlight for long
periods of time, as this can cause serious damage to the battery.
7. Do not puncture or damage the battery. If the battery is damaged, stop using it
and contact the manufacturer.
To turn ON the drone, press the power button located
on top of the drone. To turn OFF the drone, PRESS and
HOLD the power button for 3 seconds.
1. Remove the battery cover from the back of controller (Fig. A)
2. Install 4 “AA” batteries into the controller, make sure to install batteries to their
correct polarity. (Fig. B) Do not mix old and new batteries or battery types.
3. Replace the battery cover

www.PyleUSA.com
4
NOTICE: If the drone is moving while hovering without being controlled, adjust the movement with the trimming
buttons on the remote control until the drone is hovering properly.
Ascending
Descending
Push up the throttle stick, and the spinning speed
of the main blades will increase and the aerocraft
begins to ascend.
Pull down the throttle stick, and the spinning speed
of the main blades will decrease. The aerocraft
begins to descend.
Turn
right
Push the rudder stick to the left, and the aerocraft
will go left.
Push the rudder stick to the right, and the aerocraft
will go right.
Turn
left
If the aircraft cant rise up vertically, you need to re-set it, press the throttle
lever and direction of operation joystick to the bottom right corner of the controller
for 3 seconds , indicator will ash quickly, after it stops ashing, loosen all
remote control button and the calibration is completely.
Forward
Backward
When pushing the right lever (steering rudder) to
the right, the aerocraft will y to the right.
When pushing the right lever (steering rudder) to
the left, the aerocraft will y to the left.
When the rudder stick is pushed upward, the
aerocraft swashplate will downtilt and advances.
When the rudder stick is pushed downward, the
aerocraft will uptilt and it recedes.
Left
sideward
fly
Left
sideward
y
Right
sideward
fly
Right
sideward
y
FLIGHT PREPARATION
1. Operate in wide open spacious areas. Do not operate in bad weather, or windy
conditions. Avoid ying close to people, animals, and obstacles.
2. Make sure the battery is installed correctly and that the battery cover closes properly.
Turn on the drone by pressing the power button at the top, which will cause the lights to
ash. Now place the drone on a at surface and it is ready to be synced with the controller.
3. Turn on the remote control and move the joysticks all the way up then all the way down
to sync the controller with the drone. The lights will ash then turn solid, letting you
know the drone paired successfully with the remote control.
The drone is now ready for ight.
1. The distance the remote control will work at reduces as the power gets lower and lower
on both the drone and the remote control. Make sure to keep fresh batteries in the
remote and use caution when ying too high/far for long periods of time.
2. When the drone's power is low, it becomes more dicult to take o and y high.
3. If the drone becomes damaged, stop ying it immediately and repair it.
This is to prevent further damage or causing injury.
4. If you are not going to use the remote control for a long time, please remove the
batteries to avoid battery leaking/corrosion.
5. Do not drop or throw the remote control. Doing so can damage the components and
cause it to stop working.
PRECAUTIONS:

www.PyleUSA.com
5
THE PROBLEM REASON COUNTER MEASURES
The drone lights are
ashing, but it wont
sync with the
remote.
COMMON PROBLEM AND SOLUTION INSTRUCTION:
1. Frequency modulation
between the quadcopter
and remote control is not
operated correctly.
2. Insucient battery power.
1. Refer to the Preparation for
taking o, and re-modulate
the frequency.
2. Recharge the battery.
The drone's blades are
rotating, but the drone
will not take o.
1. Insucient battery
power.
2. The blades are
distorted.
1.Recharge the battery.
2.Replace the blades.
The drone shakes and
struggles to y
properly.
The blades are distorted Replace the blades
The trimming buttons
are working, but the
drone continues to
not y properly.
1. Distorted blades
2.The motor doesn’t
work properly.
1. Replace the blades.
2. Replace the motor.
The drone stops
working correctly after
crashing.
Three-axis acceleration
sensor lose it’s balance
after crashing.
Put the quadcopter on the
ground for 5-10 seconds.
/