Page is loading ...

SD
ard real
time
datalogger,
R5232/USB
Frequency
weighting
and Time
weighting
metfEC
67672 class
7
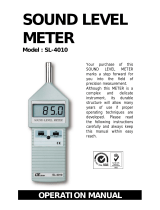
SOUND
LEVEL
METER
Model:
SL-4O33SD
Your
purchase
of
thls
SOUND LEVEL
METER
with
SD
CARD
DATALOGGER
maTK
a
step fonlrrard
for
you
into
the field
of
precision
measurement,
Although
this METER
is
a
complex
and
delicate
instrument,
ib durable
structure
wlll
allow
many
lrears
of use if
proper
operating
techniques
are
developed.
Please
read
the
following
lnstructions
carefully
and
alwap
keep
this
manual
wlthln
easy
reach.
i
L'lr,
ln
I
OPERATION
MANUAL

TABLE OF CONTENTS
1. FEATURES........
2. SPECrFICATIONS...................,.....
3. FRONT PANEL
DE5CRIPTION........
3-1
3-2
3-3
3-4
i
3-5
3-6
3-7
3-8
3-11 Callbratlon
vR
3-12
PS-232 or.ltput term|nal.........,..
3-13 DC
9V
adapEr
3-14
Trlpod Flx Nut.
3-15 Battery Cover
Screws...,............
.6
)
)............
I
2
5
6
6
6
,6
6
.6
.6
6
.5
.6
5
.6
.6
6
6
.6
3-17
Batt€ry
3-18 SD card
5.
DATALOGGER,..
5-1
functlon.
1 second
)
!!
0 se@nd
6
9
9
5-2
5-3
10
1t
t2
t2
12
t4
15
16
t7
L7
18
18
19
t9
19
20
2l
22
5-5
Check samdhg Ume
lnhnnatlon...
5{ SD cad
Data sfircture..,...
6. SavirE data
from the SD card to ttE computer.,,....,.....
7. ADVANCED SETTING.......,..............
7-1 Set dock tlm€
(
Year/Montfy'Date, Hour/Mlnute/ Second
)......
7-2 Doclmal
polnt
of SD card seturE..........,............
7-3
Auto
power
oFF
management
5-4
9. BATTERY
10. RS232 rc serlal lnterface.
llCAUBRATION
12. FREQUENC"Y
WEIG}MNG CHARACIERISTICS
OFA&CNETIA'ORI(S
13. TrME WEIGHTING
(FAST
& SLOW)
CHARACTERIsnCS
14.
P4TENT..........
7-{
Set
beep€r Sound O,VOFF.....,.........
7-5 set samdlng Unre
.....................
rc
SD
rnernory card format..,.....,....
8.
POWER
SI,PPLY
from DC ADAMR
22
23
1. FEATURES
$
fl
*
Frequency
and
Tlme
welghHng are
deslgned
to meet
IEC 61672
dass
1.
*
A
& C
welghung
networks @mply
wlth
standards.
*
0.5"
standard
mlcrophone
head.
*
f
ime
welghting
(Fast
& Slow)
dynamic
characterlstic
modes.
*
Bulld
External
callbration
VR.
I
Auto range
& Manual
range selection.
*
Available
for
e)cemal
calibraHon
adjustment.
*
Condenser
mlcrophone
for high
accuracy
& long-term
stabillty.
*
Memory
fundion
to store the
Max. &
Min. value.
*
Hold and
Peak
Hold
functions.
*
Real
Ume
SD memory
card
Datalogger,
it
Built-in
Oock
and Calendar,
rcal tlme
data re@rder,
sampllng
tlme set
from 1 second
to 3600
seconds,
*
Manual
datalogger
ls avallable
(
set the sitmpllng
tlme
to O
se@nd
),
during o(ecute
the
manual datalogger
functbn,
lt can set
the different
posltion (
locatlon
)
No.
(
pcluon
1 to
poslt{on
99
).
*
Innovation
and easy operaUofl,
@mputer
is not need b
setrip
odra sofiware,
after
o(ecute datalogger,
Just
take
away
the SD cad
from the meEr
and
plug
ln the SD card
lnto
the @mpuEr,
lt
can dovnload
the all the
measured
value wlth
the Ume
lnbrmatbn
(
year/month/date/
hour/mlnute./second
)
to Ble
E)(cel dlrectly,
then
user can
make the
further
data
or
graphh
anah,sls
by themselt
es'
*
SD card
capadty
: 1 GB to
16 GB.
*
LCD wlE!
green
lEht backllght, easy
readlng.
*
Can
default
auto
porver
ofr or manual
power
off'
*
oata
hold,
record
max. and mln.
reading.
*
Mhrocomputer
drcuit
hbh acoracy.
*
Porrer
by UM3/M
(
1.5 v
)
x 6 batterles
or DC
9V adapter.
*
RS232/USB
rc COMPUTER
lnterface.
*
HeaW
duty
& compact
housing
case.
1
Button,

I
ECI
ICATIONS
Circuit
Custom
one-chip
of microprocessor
circult.
tsI
Display
LCD
slze
: 52 mm x
38 mm
LCD
with
reen
ht
I{hsurement
Ranqe
30
-
130 dB.
Resolution
0.1 dB.
Function
dB
(
A & C
frequency
welghUng
),
Time welghtlng
(
FasL Slow
),
Peak
hold,
Data hold
Record
(
Max.,
Min.
).
(23*s3)
Characteristlcs
of "
A
"
frequency
weightlng
network meet
IEC
61672
class
1
Under
94 dB
input signal,
the
accuracy
are
:
31.5
Hz
*
2.0 dB
53 Hz
*
1.5
dB
L25
Hz
*
1,5 dB
250
Hz
*
1.4 dB
500 Hz
*
1.4 dB
lK
tlz
*
1.1 dB
2K
Hz
:l
1.6
dB
4K Hz
+
1.6 dB
8 KHz
+
2.1
dB,
-3.1
dB
72.5KHz
+
3.0 dB,
-6.0
dB
16 KHz +
3.5
dB,
-17.0
dB
Remar*:
TIE abote
spec. ae Bd
urfu
the
envlronmart
RF fuH Sbsrgth
@
ttun 3 V/t4
&
@tcttcy
l8 dbn
3l)
MHz only.
2
Frequency
Weighting
Network
Characteristics
of
A & C.
weighUng
e characterisUc
is simulated
as "Human
Ear
Llstlng"
response.
Typlcal,
lf maklng
the envlronmental
sound
level
measurement,
always
select
to
A
ng.
C
weighung
characterisuc
is near
the "FLAT'
response.
Typlcal,
it
ls suitable
for
checklng
the noise
of machinery
(Q.C'
&
knowing
the
sound
Pressure
level of
the tested
ul
ent,
llme
weighting
(Fast
&
Slow)
Fast
-
t=
200 ms
*
"Fastn
range
is simulated
the
human ear
response
tlme
welghtlng,
Slow-t=500ms
*
"Slow"
range
ls easy
to
get
the
average
rralues of
MbraUon
sound
level.
o
the measurement
value,
keep the
peak
(
max.
)
measurement
ue,
Range
selector
30 to
dB.
Manual nnge:
3 range,
30
to 80
dB, 50
to 100 dB,
80 to
130 dB,
50 dB
on each
step,
wlth o/er & under
range
lndlcaunq,
Frequency
31.5 to
16,000
Hz,
Microphone
tyDe
Electrlc
condenser
microphone.
Mlcrophone
size
6ut size,
t2,7
mm
DIA.
(
1/2 lnch)'
3
2.
lData hold
L
I
ITee;z€
a

Calibration
VR Bnild ln
external
calibra0on
VR,
easv
to
calibrate on
94 dB lwel by screw driver.
*
Callbrated vla oftemal SOUND
CALIBRATOR
(
SC-941, oDtional
).
Calibrator B & K
(Bruel
& k,aer), MULTIFUNCTION
ACOUSTIC CALIBMTOR 4226.
Datalogger
Sampling
Time
Setting
range
Auto 1 second to 3600 seconds
@
$@lng frnean ftt
lo I wil,
fut nstpty
fu
nay loss.
Manual Push Ble data logger button
once
will save
data
one Hme.
@
gtlEerrvlhv
tilrE to
0grtd,
@f,bnualn@,
analeMthe
1togg@tut
(L@M,
)no,
Data
error
no.
S0.1%
of
total
saved
data
Wplcally.
Memory
Card SD
memory card.
1
GB to
16 GB.
Advanced
setting
*
Set clocr( Urne
(
Year/t{ontft/Date,
Hou,/Mlnute/
Second
)
*
Declinal
polnt
of SD card setdng
t
Aub
povver
OFF
managern€lt
r
S€t b€ep Sourd
OIIUOFF
*
set saflDllno t me
t
SD rnemry cad
Fomat
Over Indication Show'----'
Data
Hold Freeze the
dlsolay readlns.
Memory Recall Maxlmum
& Mlnlmum value,
Sampllng
Time
of
Dlsolay
Approx.
l
seaond,
DaE
Output
RS 23UUSB
PC
computer lnterface.
*
@ttrd
tl,€
ofutal
R*r2 @bE
urcbo2 wll
fitilre
Rgrz
pftry.
*
Cot nfit the
@tal
USB
dhle
U#01
wlllNttEt$Bplw.
AC output
AC
0.5
Vrms correspondlng b each
range step.
*
Oubut
lmo&nce
:
600 ohm.
4
Power
off
Auto
shut
off savis battery
life
or
manual
off by
push
button.
OperaUng
TemDerature
0to50C.
OperaUng
Humldlw
Less
than 85%
R.H,
Power Supply
*.Alkallne
or heavy
duty
DC
1.5 V battery
(
UM3, AA
)x
6 PCs,
or equivalent.
*.DC
9V adapter inpuL
(
AQDC
power
adapter ls
opuonal
).
Power
Current Normal
operaHon
(
wlo
SD card save
data and LCD Backlight is
OFfl :
Approx,
DC 12
nA,
When
SD card save the data
but and
LCD
Backlight ls
OFF)
:
Awrcx.
rc51 mA.
*
.If L@
M&lght
on, the
power
corwump
on will increax
appmx.
6 mA.
Wei0ht
tl89
s/1.08
13.
Dimenslon 245 x 68 x.45 mm.
(9.6x2.7x
1.8 lnch
).
Accessorles
Included
*
Instructlon
manua|,.,,..,...,.,
--- --
I rc
'r'
Hard
carrylno case,
CA-06.........,..,1 PC
Optional
Accessories
*
Sound
callbrator
(
94 dB
),
SC-941.
*
Sound callbrator
(
94llt4 dB
),
SC-942.
*
Sound wlnd
shleld ball,
SF01
*
SDCard(2GB)
*
USB
cable, US,F01.
*
RS232
cable,
UPC&02.
*
Data Acqulsluon
software,
sw-u801-wIN,
*
AC
to DC 9V
adapter.
*
Soft
carrying
case, CA-05A.
5

3.
FRONT
PAN
EL
DE
SCRIPTION
3-S
3-1
t-2
3{
3-7
3-15
3.3
3.{
3{
3{
3-t4
3-t8
3-1'.|
3-to
3-t
I
t-12
3-13
Fig.
1
3-18
3-t Disolay.
i-i ffier'eutton
(
Esc,
BacHight
Button
)
3-3 Hold
Button
(
No(t
Button
)
3-4 REC
Button
(
Enter
Button
)
i-; ilno-.-ild aa
Button,
Tlme
check
Button
)
;;;il1-*;;i
iE,ton,
su'Pins
'heck
Button
)
i-z
ritUS*,
Button
(
sET
Button
)
g-a
Peai
Horo
Button
(
Logger
Button
)
3-9
MicIophone
3-10
AC
ouFut
terminal
3-11
Calibrauon
VR
3-12
RS-232
outPut
terminal
3-13
DC
9V
adapter
socket'
3-f4
Trlpod
Fix
Nut
3-15
8attery
Co/er
Ssews
3-
16
Stand
3-17
Battery
compartmenvcover
3-18
SD
card
socket
6
-l
)
-<Ft
I
MEASURING
PROCEDURE
4.
4-l fuund
tevel
meEr
l)
Power
on
by
pressing
the "
Power
On/Off
Button'(
3-2,
Fig.
1
)
,
the
mete/s
default
function
ls
"
Auto
range ",
"
n ft"qr"n.y
weighting
"
&
"
Fast time
weighting "'
The
LCD
display
will
show
the
unit
"
A. Fast
Auto
".
2) Select
'
A
'
or
"
C "
frequency
weighting
by
pressing
the
"
Ay'C
Button
"
(
3-6,
Fig.
1
)
.
Note
:
a.
The characteistk
table
ofA,
C weighting,
please
rcf.
page
22.
b. me
characteristic
of
A weighting
is simulated
as
the
"
Human
Ear Listenlng
"
resPonse.
Typically
atways
seM
the A
weighting
when
makes
environmental
sound
level
measurement.
c.
The
C weighting
dtaracteri$lc
is near
the "
FUT "
t6ponse.
Typically
it is suibble
for cltxking
the
noise
of
nachinery
(
Q.C.
dreck
)
&
knowing
the
rcal
sund
level
of the
tesftrd
quipment
3)
Determine
proper
rneasuring
range
by
pressing
the
"
Range
Button
"
(
3-5,
Fig'
f
).
After
power
on
the default
range
is
"
Auto range ".
In
the same
time
the
lower
right display
will show
the text
of
"
Auto ".
Under
the
auto
range,
press
the "
Range
Button
"
(
3-5,
Fig.
1
)
onc
steP
bY
step will
enter
to
the
manual
range
(
range
1,
range
2, range
3
)
and
auto
range
in sequence.
There
are
still 3
manual
ranges
for
your
choice
:
7
-
E

*
lvlanual range 1
,
30
-
80 dB range
:
Display
will show the unit of "
30
-
80
".
*
Manual
range 2, 50
-
100 dB
range :
Display will show
the unit of " 50
-
100 ".
*
Manual
nnge 3
,
80
-
130 dB range
:
Display will
show the unit of
"
80
-
130
".
4)
According
to various
measuring sound source,
select the
Time Weighting
(
Fast or Slow
)
by
pressing
the
"
Time
Weighting
Button
"
(
3-7,
Fig. 1
).
Note :
a. If select the
function of
"
Fast
"
time
weighting, the
dbplay
will show the unit
of
"
FAST'.
b. If select
the function of
"
Slow
"
time
weighting, the
display will show
the unit of
"
SLOW
".
4-2 Dab
Hold
During the measurement,
press
the " Hold
Button "
(
3-3,
Fig. 1
)
once will hold the
measured value & the
LCD will
display a' HOLD' symbol.
Press the
"
Hold Button
"
once again will release the
data
hold function.
4-3 Dab Reed
(
Max.,
Min. tadlng
)
l)The data
record function records the maximum
and
minimum readings.
Press the
"
REC Button
"
(
3-4, Fig.
1
)
once to start the
Data Record functlon and
there
will be
a
"
REC
"
symbol on the display.
2)With the
"
REC
"
symbol on the display
:
a) Press the "
REC
Button
"
(
3-4, Fig, 1
)
once, the
'REC
MAX
"
symbol along
with the maximum
value
will appear
on
the
display.
If intend
to
delete the maximum
value,
just
press
the " Hold Button
" (
3-3, Fig, 1
)
once, the display
will show the
"
REC
"
symbol only
& execute the
memory function
continuously.
8
b)Press
the "
REC Button
"
(
3-4,
Fig. 1
)
again,
the
"
REC
MIN
"
symbol
along with
the minimum
value
will
appear
on the display.
If intend
to
delete
the minimum
value,
Just
press
the
" Hold
Button
"
(
3-3, Fig.
1
)
once,
the
display
wil
show
the
" REC
" symbol
only
& execute
the
memory function
continuously.
c)
To
exit
the memory
record
function,
just
press
the
"
REC "
button
>
2 seconds
at least.
The
display
will
reveft
to the current
reading.
4-4
LCD
Racklight
ON,/OFF
After
power
ON,
the
"
LCD Backlight
,,will
light
automatically.
During
the measurement, press
the
"
Backlight
Button
"
(
3-2, fig.
1
)
once will
turn
OFF
the
" LCD
Backlight
".
Press
the
"
Backlight
Button
"
once
again will
turn
ON the
"
LCD Backlight
"
again.
9
5-l Prcpntfon
bebrc
exoclrE
dabloggr*
ftncilon
a, Insert
the
SD
card
frenarg
a
" SD memory
card
,,(
1
GB to
16 GB,
optional
),
insert
the
SD card into
the
n
SD card
socket
o
(
3-19,
Fig. 1),
The
front
panel
of the
SD
card should
face
against
the
-
the down
case.
b.
SD card Format
If SD
card
just
the first
time
use
into
the
meter,
it
recommend
to
make
the
"
SD
card
Format
"
at first,
,
please
refer
chapter
7-6
(
page
19
).
5. DATALOGGER

I
a
c.
Time setting
If the
meter
is used at
first Ume,
it should
to adiust
the
clock time
exactly,
please
refer chapter
7-1
( page
16
),
d,
Decimal format
setting
The numerical
data structure
of SD
card
is
default
used the "
.
"
as
the deiimal,
for
example
"20.6"
'1000.53"
. But
in certain
countries
(
Europe
...) is used
the
"
,
"
as the
decimal
point,
for example "
20,
6
'
"1000,53'.
Under such
situation,
it should
change
the Decimal
character
at
first, details
of setting
the
Decimal
point,
refer
to Chapter
7-2,
page
L7,
*
It
recommend
strongly,
do not use
memory
cards
that
have been
formatted
by
other
meter or other
installatlons
(
such
as camera,..
)
Reformat
the
memory card
with
your
meter-
t
It the
SD mernory
card exlst
the trouble
during
format by
the meter,
use the Computer
to
reformat
again,
it
can
fix the
Problem,
5-2
Auto
Dablqger
(
ffi
amplhtg
tirrE
Z
7 *ond
)
.
Slart
the data
Press the
"
REC Button
(3-4,
Fig.
1
)
once
,
the LCD
will
show the
text'
REC
",
then
press
the
"
Logger
Button
"
(
3-8,
Fig, 1
),
the
"
REC
'will
flashlng
,
at the
same
time
the
measuring
data along
the
time information
will be
saved
into the
memory circuit,
The Dlcplay
will shorr
alco show
text
"
LOGGER "
when tlre
data save
into dle
memoty
clrculL
Remark
:
How to
set the
ampling
time,
refer to Chapter
7-$
page
18.
10
During
execute the
Datalogger
function
,
if
press
the
"
Logger
Button
"
(
3-8, Fig.
1
)
once will
pause
the
Datalogger
function (
stop
to save
the measuring
data
into the
memory
circuit
temporally
).
In
the same
time
the text of
"
REC
"
will
stop
flashing.
Remark :
If
press
the
" Logger Button
"
(
3-8,
Fig. I
)
once
agan
will execute
the
Datalogger
again,
the
text of
,
REC
"
wrTl
flashing
.
5-3 Manual
Dablogger (
*t
ampllng
dme
=
O
wnd
)
c. Finish
the
Datal
r
During
pause
the Datalogger,
press
the
"
REC Button
,'
(
3-4, Fig. 1)
continuously
at
least
two seconds,
the "
REC
,,
indicator
will
be disappeared
and finish
the
Datalogger.
Rana*:
When
the
htUry
is
under the
tow
bttety
@ndttion
(shoy
the
low
bdery
tndtcabr
)
the
Dablogger
ft
nctlon ls
dlfible.
b. Pause the
datal
a. Set
sam li
time iS
to
0 second
Press
the
"
REC
Button
(
3-4, Fig. 1
)
once,
the
LCD
will
show
the text
"
REC
",
then
press
the
,'
Logger
Button
,,
(
3-8, Fig.
1
)
once,
the
"
REC
"
will
flashing
once,
at the
same
time the
measuring
data
along
the
time
information
and the Position
no, will
be saved
into
the
memory
circuit.
11

Remark
Lower
Display
will
show
the
Posih'on/Location
no,
(
Pl,
P2,.. P99
)
.
During
a<ecute
the
Manual
Datalogger,
prss-the
'SET
Butlon
'
(
3'Z
Fig. I
)
once,
d,9
lf
'the
",ll
Eutton "
(
3-5
Fig.
1) or'
V
Button
'
(
3'O
Fg.
1
)
to set
the
measuring
position
(
1 to
99,
for
example
roon
I to
room
99
)
to
identify
the
measurement
location'
Afrer
finish
the
adiustment
locattbn
no,,
press
the
" Enter
Button
" to
entry,
Press
the
"
REC Button
"
(
3-4,
Fig.
1) continuously
at
least two
seconds,
the "
REC "
indication
will
be
disappeared
and
finish
the
Datalogger.
5-4
Check
tlme
lnformatlon
During
the
measurement
if
press
"
Time
check
Button
"
(
3-5,-Fig.
1
)
>
2
seconds,
the
lower
LCD
display
will
iresent
ttre
Ume
information
of Year/Month,
Date/Hour,
Minute/Second.
5-S
Chdt
omPling
dme
inbtmadon
During
the measurement
,
If
press
"
Sampling
9!"9!r
suttoi "
(
3-6, Fig.
1
)
>
2 seconds,
the
lower
LcD
display
will
present
the
Sampiing
tlme
information
in
second
unlt'
5-6
SDArd
Daa
stactate
1) When
the
SD
card
ls used
into
the
meter,
the
SD
card
'When
the
first
time,
the
SD
card
ls used
into
the
meter,
the
SD
card
will
generate
a
folder
:
suL1
b.
Finish
the
Datal
f
L2
IJ
sLA01099.XLS
st302\
sr-A02001.x1s
sLA02002.xLS
Remark : M
: lqax.
value
is 10.
2)If
the
first time
to
execute
the
Datalogger,
under
the
route
SLAo1L
will
generate
a
new
file name
SLA01001.XLS.
After
exist
the
Datalogger,
then
execute
again,
the data
will
save
to the
SLA01001.XLS
until
Data
column
reach
to 30,000
columns,
then
will
generate
a
new file,
for
example
S1A01002'XLS
3)Under
the
folder
SLA0ll
if the total
files
more
than
99
files,
will
generate
anew
route,
such
as
sLA02\
.......,
4)The
file's
route
structure
:
SLAOl\
s1A01001.xls
sLAo1002.xLS
st-Ao2099.X1S
sLA)oq

6. Saving
data from
the
SD card
to
the com
EXCEL
software
uter
l)After execute
the Data
Logger function,
take away the
SD card outfrom
the
"
SD card
socket'(
3-18,
Fig.
1
).
.'*,
2)Plug
in the SD card into
the
Computer's
SD card
slot
(
if
your
computer
build in
this installation
)
or
insert
the SD card
into the
" SD card
adapter
". then
connect
the
"
SD card
adapter
"
into
the computer.
3)Power ON the
computer
and run
the
"
EXCEL software
".
Down
load
the saving data
flle
(
for
example
the file
name :
SLA0100I.XLS,
SU01002,XLS
)
from
the SD
card to the computer,
The
savlng data
wlll
present
into
the EXCEL
software screen (
for
example
as
following
EXCEL
data screens
)
,
then user
can use
those EXCEL
data to make
the further Data
or Graphic
analysis
usefully.
EXCEL data
screen
(
for
example
)
AI
-
C:,-.,,,,-",,..-,,,#...1
rt"o"
IeTl,L-=-a---l
B
I lphce lo"r"
T
l-.--Tre,au$
j
I
z zrxr,,lrrl6
c!
D
. ;..
E.
.1.
4
I
I
7
8_
9.-
lo
1l
L2
l3
l4
IT
16
3 2009/10/16
4
N9^Ot16
5 200910/16
6 2009/10/16
? ?fn/gtlut6
a
miluto
9 20o9.tLut6
ro 2009/10/16
Ll 2009A0A6
L2
?po9.A0/l6
13
2009/10/16
t4 2soe.ILOI!6
15 2009/10/16
Timc
Value
Uhit
16,47A5
60A dB
I6.4?fr7
66.9 dB
16:47;09
68.8
dB
t6'17:ll
7l
dB
16:47:13
423 db
16:4?:15
92.3
dB
16z17zl?
93.-t dB
16:4?:19
93.1 dB
16z1721
89.8 dB
16:47.23
9O.2 dB
16:47225
89.9
dB
16:4727
93.2 dB
L6.4129
90.? dB
16:4?:31
&2 dB
16:47:33
86.2
dB
t4
EXCEL
gra
ph reen
(
for
example
)
xl.
,irl
I
VANCED
SETTING
7.
AD
Under
do not
execute
the
Datalogger
functlon'
;;d;
isrr
eutton "
(
3-7,
Fig,
1
)
conunuously
at
L;t
,;;;^J.
,nttt
"ntil,
utu '-Advanced
setdng
"
mode'
if,"n ,t"o
tft"
'
Next
Button
"
(3-3, Flg'
1
)
once
a
whlle
mi"ql"n."
to
select
the
slx
maln
funcdon,
the
lower
dlsplay
wlll
show
:
dAtE.....,Set
clock
tlme
(
Year/Month/Date,
Hour/Minute/
Second
)
dEC.......Set
SD
card
Dedmal
character
PoFF.....
Auto
power
OFF
manaqement
bEEP.....Set
beePer
sound
ON/OFF
SP-t
.....Set
sampllng
Ume
Sd-F.'...
SD
memory
card
Format
15
',
"
'.t.
rili

Rema*:
Dudng execub tfie
"
Advanad *tdng
"
findon,
lf
ptw
"
Eff
Butbn
"
(
3-2, Fig. 7
)
ona
wlll
exlt
tfie
"AdvandSetdng "
fiincffin,
tlreLCDwill
raatm
b normal *fiaeo.
7-l
*tc{o& time
(
Yar/tlonth/DaE,
Hour/MlnuE/ &ond
)
When the
lower
display show " dAtE
"
l)Press the " Enter Button
"
(
3'{, Fig. I
)
once,
Use the
"
A
Button
"
(
3-5, Fig. 1
)
or
"
V
Button
"
(
3-6, Fig. I
)
to adjust
the
value
(
Settlng start from
Year
value
).
After
the
desircd
value
is set,
prs
the
"
Enter
Button
"
(
3-4, Fig. 1
)
once wlll
goihg
to
next
value adjustment
(
for example, first setting
value is
Year
then next to
adjust
Month,
Date, Hour,
Minute,
Second
value
).
2)After set all the
time
value
(
Year, Month, Date, Hour,
Minute, Second
),
the screen
will
Jump
to " SD card Decimal character
"
setting screen
(
Chapter 7-2
).
Remark:
After
the
time value is
settlng, the lntemal cluk
will
run
prccisely
even Power
is off
(
The
bttery
ls under
normal conditio4 no low battety
andldon
).
16
t7
7-2
Decimal
polnt
of SD @rd
settlng
The
numerical data
structure
of SD card
is default used
the
"
.
"
as the
decimal,
for example
'20'6'
'1000'53'
.
But in certain
countries
(
Europe ...)
is
used
the "
,
" as
the
decimal
point,
for example "1000,53".
under such
situation,
it should
change the
Decimal
character at
first.
When the
lower
di show
"
dEC
"
l)Use
the
"
A
Button
"
(
3-5,
Flg. 1
)
or "
V
Button
"
(
3-6,
Flg.
1
)
to select the
upper value
to
"
bASIC
"
or
"
Euro ".
bASIC
-
Use "
.
"
as
th€ Declmal
polnt
wlth default.
Euro
-
Use
",
" as
Ure
Declmal
polnt
wlth
defaulL
2)After select
the
upper text to "
bASIC
'
or
"
Euro
",
press
the
"
Enter Button
"
(
3-4, Fig.
1
)
will save
the
setting
function
with default.
7-3
Aub
pwer
OFF
management
When
the
lower di show
"
PoFF "
1)Use the "
A
Button "
(
3-5,
Fig. 1
)
or "
V
Button
"
(
3-8 FiS,
1
)
to select the
upper value to
"
yES
" or
t'
no
".
yES -
Auto
Power
Off
management
wlll enable.
no
-
Aub
Power Off
managemsnt
wlll
dlsable.
2)After select
the upper
text to
u
yES
"
or
"
no
",
press
the
"
Enter
Button
"
(
3a,
Fig. 1
)
will save
the setting
function
with default.

7-4 *t beeper flund ON/OFF
When the
lower dlsplay
show
"
bEEP
"
yES
-
Meter's beep sound
wlll
be ON
wlth
defaulL
no
-
Meter's
beep sound wlll be OFF
wlth
dcfault.
Remark :
After
execute
the datalogger functio4 the buzzer sound
will off automadcally fu
prcvent
any inteierence of
the measurement
7-5 Setempfing tlme
(
seonds
)
When the
lower
display show
"
SP-t
"
l)Usethe"
A
Button
"
(
3-5,
Flg.
1
)
or
"
Y
Button
"
(
3-6, HS. 1
)
to adjust the value
(
0, 1,2,5, lO,3Oi@,
120, 300, 600, 1800,3600
seconds
).
Remart< :
If
selxt
the sampling dme to
"
0 seand
",
it is rcady
br manual Dablogger.
2)After the Sampling value is selected,
press
the
"
Enter
Button
"
(
3-4, Fig.
1
)
will
save the setting
function with default.
1B
7-6
SD memory
atd Format
When
the lower d
show"SdF"
1)Usethe
"
Button
"
(
3-5, Fig.
1
)
or "
V
Button,,
(
3-6, Fig,
1
)
to
select the
upper value
to
"
yES
,,or
yES
-
Intend
to
Sormat
the
SD memoty
card
no
-
?{ot
execute
th€ SD
memory
card format
2)Ifselect
the
upper
to
"
yES
",
press
the
"
Enter
Button
"
(
3-4,
Fig.
1
)
once again,
the Display
wlll
show
text
"
yES
Ent
"
to
confirm
again, if
make sure
to do
the
SD memory
card forma!
then
press
" Enter
Button
"
once will format
the
SD memory
clear
all the
existing
data that
already saving
into
the SD
card,
l)When
the left
comer
of LCD
display
show ',
ffi,,
it
is necessary
to replace
the
battery.
However,
in-spec.
measurement
may
still
be made
for
several
hours
after
low
battery
indicator
appears
before
the instrument
become
inaccurate,
19
The
meter
also can
supply
the
power
supply
ftom
the
DC
9V Power
Adapter
(
optlonal
).
Insert
the
plug
of
PowerAdapter
lnto
" DC
gV powerAdapter
Input
Socket,'
(
3-13,
Fig. 1
).
The
meter
wlll
permanent
power
ON
when
use the DC
ADAPTER
power
supply (
The
power
Button
functlon
ls
dlsable
).
9. BATTERY
REPLACEMENT
1)Use the
"
A
Button
"
(
3-5, Flg. 1
)
or
"
Y
Button
"
(
3-6, Fig.
1
)
to select the upper
value
to
"
yES
"
or
uno'.
2)After select the upper text to
"
yES
'
or
"
no
",
press
the
"
Enter Button'( 3-4, Flg, 1
)
rvlll save the setdng
function wlth default.
8. POWER
SUPPLY
from
DC
ADAPTER

2) Loose the
" Battery Cover
Screws
"
(
3-15, Fig.
I
)
and
take away
the
"
Battery
Cover
"
(
3-17,
Fig, L
)
from the instrument
and remove the battery.
3)Replace
with
DC 1.5
V battery
(
UM3,
AA,
Alkaline/heavy
duty
)
x 6 PCs, and relnstate
the cover.
4)Make
sure
the battery cover
is secured after changlng
the
battery.
The ins,trument
has RS232
PC
serial lnterface vla
a 3.5
mm termlnal
(
3-12,
Flg. 1
).
The data
output ls a
16 diglt stream
whlch
can be
utillzed
for user's speclflc
application.
A RS232
lead wlth
the followlng
connection
will be
requlred
to
link the
instrument wlth
the PC serlal
port.
The 16 digits data
stream
wlll be displayed
ln the
followlng
format
:
10.
RS232 PC SERIAL
INTERFACE
Center
Pln........
(3.5
mm
Jack
plug)
Ground/shield...
I
Pin 4
Pin
Pin
2.2K
reslstor
2l
Each
d
it indicates
the
followi
status
:
RS232
FO
RMAT:
9
600
N
B
1'l Preoare the
optional
"
SOUND
CAUBRATOR
".
such
as
-'
i
st-s+r "
or'"
sC-942
"
(
set
range
to
94'0
dB
)'
Poyver
on
inl
sorna
calibrator
ti
plug calibrator
outp-ut
socket
into
ttt"
"
Microphone
"
head
(
3-9,
FIg'
1
)
of the
Sound
Level
meter.
2)Select
manual
range
to'50
-
100
dB
"
:isetect
"
Time
Weighting
" at "
Fast
"
position'
1
Start
Word
D15
4
D14
send
the
uPPer
disPlaY
data
=
1
send
the
lower
dis
data
=
2
D13
D
for
atocl
r
nun
B=17
D12,
D11
1=N
ative
Polarity
=
Posltive
D10
tion
from
right
to
the
left
becimal
Polnt(DP
),
posi
0=NoDP
1=
1DP
2=2DP
3=3DP
D9
Dlsplay
reading,
D1
=
For
examPle
:
If the
display
reading
is 1234,
then
DB
to
LsD,
D8
=
MSD
D1
ls: 00001234
DB
tO
D1
End
Word
DO
9600
Baud
rate
No
Pa
I
Data
bits
Data
bit
no.
bit
1
bit
11.
CALTBRATION
20

4)Select"A"weighung.
simtust
tne
"
callibration
VR
'
(
3-11,
Fig.
1
)
caretully
'with
a
"
-
"
screw
drlver
until
the
display
readlng
value
withln
"
94
+/- 0.2
" dB.
I
.
I
I
l,
I
I
I
I
I
i
i
I
il
!l
ti
lr
iI
I
The
meter
(
SD
card structure
)
already
get patent
or
patent pending
in following
countries
:
*
fest .nfur
stgtal
otl
1,000
Hz/94
d8.
14. PATENT
.
I2.
FREQUENCY
WEIGHTIN
CHARACTERISTICS
OFA&C
G
NETWORKS
Germany
Nr.
20 2008
016 337.4
JAPAN
3151214
TAIWAN
M 358970
M 359043
CHINA
2008 2 0189918.5
zL
2008
2 0189917.0
USA
Patent
pendinq
*
2.0 dB
-3
dB-39.4
dB
31.5
Hz
-0.8
dB-26.2d8
63
Hz
+
1.5
-0.2
dB
-16.1
dB
l25Hz
*
1,4
dB
0dB
-8.6
dB
25O
Hz
*
1.4 dB
-3.2
dB
500
Hz
+
1.1dB
0dB
0dB
1
KHz
*
1.6 dB
-0.2
dB
+1.2 dB
2Kfiz
*
1.6 dB
-0.8
dB
+1
dB
4
KHz
+2.1 dB
-3.1
d8
-3
dB
I KHz
+3.0
-6.0
-6.2d8
-4.3
dB
12.5
KHz
-6.6
d8
16 KHz
+ 1.0 dB
-
1.0 dB
F(
Fast
)
*1.
-
4.1 dB
S
(
Slotv
)
22
23
0911-SL40335D
*
1.5
dB
0dB
-1.1
dB
+3.5 dB.
-17.0
dB
-8.5
dB
13"
TIME
WEIGHTING
(F/s)
rii:r,
/