Page is loading ...

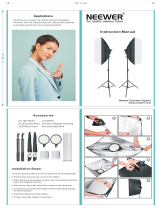
1. Morning Glory™ Softbox and Mini-Cirrus™ Installation
-Push down on spring stopper on Mini-Morning Glory™ Softbox to release spring rod tension. (as shown). Remove contents.
-Fully open Morning Glory™ Softbox.
-Attach Mini-Cirrus™ onto stud on lightstand. Tighten knob to secure.
-Attach Mini-Morning Glory™ Softbox onto Mini-Cirrus™.
-Holding onto the base, secure Mini-Morning Glory™ Softbox onto Mini-Cirrus™ by tightening knob (as shown).
-Holding bulb by its base, screw bulb into socket on Mini-Cirrus™.
x 3
Softboxes
x 3
Light Heads
x 3
Bulbs
x 3
Light Stands
Please call 562-404-0593 or email service@lincostudio.com if you have any questions.
Our Business Hours are 08:00-16:30 PST Monday-Friday.
x 1
Boom Arm
x 1
Sand Bag
LINCO INC. MORNING GLORY INSTRUCTIONS
(AM261)
2. Boom Stand Installation
-Move Boom Clamp to a center position along Boom Arm.
-Attach Boom Arm onto lightstand by securing Boom Clamp onto Lightstand Stud.
-Attach Sand Bag onto opposite end of Boom Stud and add counterweight.
-Secure attached Cirrus™ and Morning Glory™ onto Boom Arm.
-Screw in bulb into Ceramic Socket on Cirrus™
-Cover Morning Glory™ with diffuser for Softbox. (Optional)
/


